Category Archives: Tips

Small Talk Starters That Work

Walking into a room full of strangers can make even confident professionals feel uneasy.

You scan the crowd, look for familiar faces, and then realize — it’s up to you to start talking. Small talk may seem trivial, but it’s actually one of the most powerful skills in networking, friendship, and everyday connection. The right question or comment can open doors to opportunities, collaboration, and genuine relationships.

This guide is your complete, practical companion to small talk starters that work, especially for people who don’t always know what to say first. Whether you’re attending a business conference, joining a social event, or chatting in line at a café, you’ll find real, easy-to-use examples here — no forced jokes or awkward compliments required.

You’ll also learn the do’s and don’ts of casual conversation, get context-based lists of questions, discover how to listen better, and even use short follow-ups that keep a dialogue flowing naturally. By the end, small talk won’t feel like pressure — it’ll feel like a skill you can actually enjoy.

Why Small Talk Matters More Than You Think

Many people dismiss small talk as meaningless, but research and real-life experience show it’s the foundation of trust. It’s how people gauge openness, approachability, and shared values before diving deeper.

What Small Talk Actually Does

  1. Builds Comfort: Light conversation helps both people feel at ease.

  2. Opens Doors: It’s often the first step to professional opportunities.

  3. Creates Shared Ground: You find points of connection through harmless topics.

  4. Shows Empathy: Small talk demonstrates that you notice and value others.

  5. Leads to Bigger Ideas: Every meaningful conversation usually starts with a small one.

For shy or introverted professionals, mastering small talk is less about charm and more about preparation — knowing how to start, what to ask, and when to listen.

The Psychology Behind Good Small Talk

Successful small talk isn’t about being witty — it’s about being curious and present. People remember how you make them feel far more than what you say.

Three Core Principles

  1. Authenticity Over Perfection: Speak naturally. Forced conversation feels artificial.

  2. Curiosity Over Performance: Ask questions because you want to know, not because you’re filling silence.

  3. Reciprocity Over Monologue: Keep exchanges balanced; small talk is a shared rhythm, not a speech.

When your goal shifts from “impressing” to “connecting,” the pressure drops instantly.

Step 1: Preparing Mentally for Conversation

Before diving into any networking event or gathering, prepare your mindset. The aim is not to meet everyone — it’s to have a few warm, genuine exchanges.

Quick Confidence Steps

  1. Adjust Expectations: One good conversation beats ten superficial ones.

  2. Scan for Openness: Look for people who make eye contact or seem relaxed — they’re easier to approach.

  3. Breathe and Smile: Nonverbal warmth matters more than clever words.

  4. Have a Few Starters Ready: Preparation prevents blank moments.

Approach people with the mindset of curiosity rather than pressure — you’re there to explore, not perform.

Step 2: The Anatomy of a Great Small Talk Starter

Every great icebreaker does one of three things: it notices, it relates, or it invites.

1. Noticing Starters

Comment on something visible — your shared environment, food, or surroundings.

  • “This place has such great lighting; have you been here before?”

  • “That coffee smells amazing — I think I’ll try it next.”

2. Relating Starters

Find common ground or shared experience.

  • “It’s always tricky to find a parking spot here, isn’t it?”

  • “I also find these networking events a bit awkward at first.”

3. Inviting Starters

Ask open questions that spark sharing.

  • “What brought you here today?”

  • “How did you get into your field?”

When your opening line feels grounded and real, people respond with the same energy.

Step 3: 30 Small Talk Starters That Work (By Context)

Below are ready-to-use examples you can adapt to any setting.

A. At Professional Events or Conferences

  1. “What session has been your favorite so far?”

  2. “I always feel inspired after these events — how about you?”

  3. “Are you presenting or attending today?”

  4. “What kind of projects are you working on lately?”

  5. “This speaker’s perspective was interesting — did anything stand out to you?”

  6. “How did you first get interested in your field?”

  7. “What’s been the biggest surprise about this conference?”

  8. “Have you attended this event before?”

  9. “I’m trying to make the most of these breaks — how do you usually network at these things?”

  10. “What’s one takeaway you’ll apply when you get back to work?”

B. At Social Gatherings or Parties

  1. “How do you know the host?”

  2. “This playlist is great — do you know who picked it?”

  3. “That appetizer disappeared fast — did you try it?”

  4. “Are you from around here or visiting?”

  5. “I love the energy in this room — have you met many people yet?”

  6. “What’s been your favorite local spot lately?”

  7. “If you could plan the next get-together, what would you do differently?”

  8. “These things always start slow — I’m glad we got a good conversation going.”

  9. “What do you usually do on weekends when you’re not at events like this?”

  10. “I’m trying to learn people’s favorite casual hobbies — what’s yours?”

C. At Work or in a Team Setting

  1. “How’s your week going so far?”

  2. “That project you mentioned last time — how’s it progressing?”

  3. “I like how you organized that presentation — any tips?”

  4. “Have you tried that new coffee spot near the office?”

  5. “How long have you been working here?”

  6. “What’s your favorite part of your role?”

  7. “Do you listen to anything while you work, or do you prefer silence?”

  8. “It’s been a busy season — how do you usually unwind after big deadlines?”

  9. “I heard you worked on that campaign — what was that experience like?”

  10. “What kind of project would you love to take on next?”

Every one of these starters works because it shows genuine interest, leaves room for answers, and avoids controversy.

Step 4: What to Avoid in Small Talk

Not every topic is safe or helpful, especially early on. Avoid anything that might make others uncomfortable or defensive.

Common Pitfalls to Skip

  1. Politics and Religion: Save for deeper relationships.

  2. Personal Finances: Off-limits unless invited.

  3. Appearance Critiques: Even compliments can be risky if misread.

  4. Negative Comments: Complaining bonds temporarily but drains energy.

  5. Overly Private Questions: Respect comfort levels and boundaries.

Stick to topics that are positive, situational, or shared — they lead to longer, easier conversations.

Step 5: How to Keep Conversations Flowing

Starting is only half the skill. The real art of small talk lies in keeping it natural once the first answer comes.

Use the “Follow, Reflect, Ask” Technique

  1. Follow: Listen actively and follow the topic instead of switching too soon.

    • “You mentioned you recently changed roles — how’s that transition been?”

  2. Reflect: Paraphrase to show engagement.

    • “So you’re saying the remote setup really changed your team dynamic?”

  3. Ask: Continue with an open-ended question.

    • “What do you think made that project so successful?”

This flow keeps conversations dynamic and reciprocal.

Step 6: Body Language and Nonverbal Cues

Words matter, but how you say them matters more. Your tone, gestures, and eye contact carry emotional weight.

Positive Nonverbal Habits

  • Maintain gentle eye contact — not a stare, just presence.

  • Nod occasionally to signal attentiveness.

  • Smile sincerely; forced smiles are easy to spot.

  • Keep your arms relaxed, not crossed.

  • Mirror posture subtly — it builds comfort subconsciously.

When your body language says “I’m comfortable,” others feel comfortable too.

Step 7: How to Exit Gracefully

Even great conversations need natural endings. A polite exit leaves a positive impression and opens the door to reconnect later.

Smooth Exit Lines

  • “It was great chatting with you — I’m going to grab another drink before the next session.”

  • “I really enjoyed hearing about your work; let’s connect again later.”

  • “I promised to say hi to a few people, but this was a great conversation.”

  • “I’m going to circulate a bit — hope you enjoy the rest of the event.”

Always end with appreciation; people remember how you made them feel when you left.

small talk starters that work

Step 8: Practice Small Talk in Everyday Moments

You don’t need a conference badge to improve your conversation skills. Opportunities are everywhere — from elevators to grocery lines.

Mini Practice Scenarios

  1. At the Coffee Shop: “That pastry looks good — have you tried it before?”

  2. At the Gym: “I always see you here early — do you prefer morning workouts?”

  3. At the Store: “I can’t decide between these two; have you tried either?”

  4. At the Bus Stop: “Looks like the route’s running late again!”

  5. At the Doctor’s Office: “This waiting room playlist could use an upgrade, right?”

Frequent, low-stakes practice builds comfort fast — soon small talk won’t feel “small” at all.

Step 9: Using Small Talk for Networking Success

Networking isn’t about collecting business cards — it’s about starting relationships. Small talk builds the bridge to trust.

Tips for Professional Settings

  1. Ask for Insight, Not Favors: “What do you enjoy most about your work?” is far better than “Can you get me a job?”

  2. Listen Generously: People love to feel heard.

  3. Reference Shared Experiences: Mention a session or event you both attended.

  4. Follow Up Briefly: If you exchange contact info, send a simple message appreciating the conversation.

When you use small talk as a genuine connector, networking becomes natural.

Step 10: The Do’s and Don’ts of Great Small Talk

Do’s

  • Ask open-ended questions.

  • Share brief, relatable stories.

  • Use names when possible — people respond warmly to hearing their name.

  • Match energy; if someone’s calm, keep your tone easy.

  • Find humor in everyday details, not at others’ expense.

Don’ts

  • Dominate the conversation.

  • Overshare personal details.

  • Interrupt while others are speaking.

  • Correct or “one-up” people’s stories.

  • Forget to listen between sentences.

Good small talk feels effortless because it’s balanced — two people giving equal attention.

Step 11: Follow-Up Starters to Deepen the Connection

When a conversation is going well, these prompts keep it flowing naturally.

  • “That’s really interesting — what got you started in that?”

  • “You mentioned a big project earlier — what’s your favorite part about it?”

  • “That sounds challenging — how did you handle it?”

  • “If you weren’t doing this, what do you think you’d be doing instead?”

  • “What’s something exciting coming up for you?”

Follow-ups turn a short exchange into a memorable chat.

Step 12: Printable Card Version of the 30 Starters

To make this framework easy to practice, write or print your top 10 go-to starters on a small card or note in your phone. Review them before entering any social setting.

Example Quick Card:

  • “What brought you here today?”

  • “How do you know the host?”

  • “What projects are you most excited about lately?”

  • “Have you been to this event before?”

  • “What’s your favorite part about working in your field?”

Preparation eliminates the freeze moment that often stops great conversations before they start.

Step 13: Building Confidence Through Listening

Ironically, the best conversationalists talk less and listen more. People naturally open up when they feel heard.

Listening Checklist

  1. Focus fully — avoid glancing at your phone or the door.

  2. Repeat or summarize key points to show you care.

  3. Ask thoughtful follow-ups instead of switching subjects.

  4. Pause before replying — it gives weight to your response.

  5. Use brief affirmations like “That makes sense” or “I get what you mean.”

Listening transforms small talk into meaningful connection.

Step 14: What to Do When the Conversation Feels Awkward

Every interaction hits lulls — what matters is how you recover.

Rescue Strategies

  • Revisit Earlier Topics: “You mentioned you love hiking — found any good trails lately?”

  • Shift to Common Ground: “Have you done anything fun recently outside work?”

  • Laugh Lightly: “Looks like we ran out of words for a second there — that happens to me all the time!”

  • Politely Exit if Needed: “It was nice chatting — I’m going to grab a drink before the next session.”

Awkwardness isn’t failure — it’s part of natural human interaction.

Step 15: Reflection — Small Talk as a Bridge, Not a Performance

Once you view small talk as a tool for connection rather than evaluation, it becomes freeing. The goal isn’t to impress; it’s to be present.

Each interaction teaches you something — about people, about yourself, or about how connection really works.

Key Takeaways

  • Preparation beats improvisation — have a few go-to starters.

  • Listen as much as you speak.

  • Stay genuine and kind; curiosity is magnetic.

  • Keep it light but sincere — humor, not sarcasm.

  • Exit gracefully when it’s time.

Mastering small talk starters that work isn’t about memorizing scripts — it’s about developing warmth, attentiveness, and respect. Those qualities make any room easier to enter and every conversation more human.

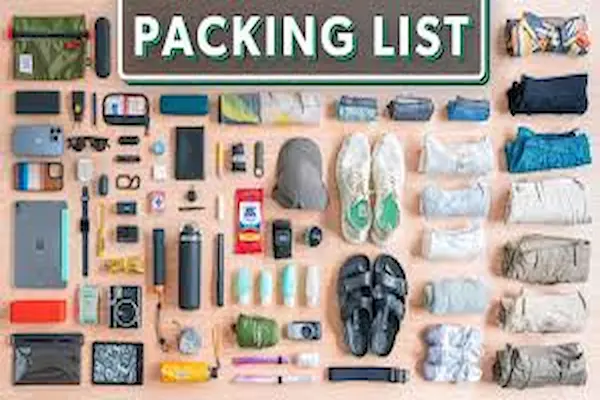
Minimalist Travel Packing List: Pack Light, Move Freely

Every traveler knows the scene, standing over a suitcase, surrounded by clothes and gadgets, trying to justify packing it all.

But halfway through the trip, most of those things stay untouched. The truth is that traveling well doesn’t come from packing more; it comes from packing right.

This guide is a complete, practical blueprint for a travel packing list minimalist approach — a simple, tested system that helps you bring everything you need and nothing you don’t. Whether you’re heading on a weekend getaway or a two-week adventure, these principles work anywhere, for any climate. You’ll get a universal checklist, category-by-category caps, outfit formulas, and realistic examples that make traveling lighter feel effortless rather than restrictive.

By the end, you’ll see that minimal packing isn’t about sacrifice — it’s about freedom. It’s about moving through airports easily, unpacking in seconds, and having more mental space to actually enjoy your trip.

Why Minimalist Packing Matters

Packing light doesn’t just save space; it saves energy. You spend less time deciding what to bring, less effort lugging bags, and less money on baggage fees.

Key Benefits of a Minimalist Packing System

  1. Faster Preparation: A universal checklist removes guesswork before every trip.

  2. Stress-Free Travel Days: Carry-ons are lighter, easier to lift, and quicker to unpack.

  3. No Lost Luggage: When everything fits in one bag, it stays with you.

  4. Flexible Mobility: You move freely through airports, trains, or buses without heavy baggage.

  5. Simpler Outfits: Fewer items mean quicker decisions and coordinated looks.

Minimalism in travel is not about deprivation; it’s about traveling intentionally and efficiently.

Step 1: The Mindset — Less Choice, More Freedom

Overpacking happens because of fear — fear of being unprepared or of repeating outfits. But when every piece you bring is versatile, you stop worrying about “what ifs.” Minimalist travel starts with confidence that less is enough.

Think of your suitcase like a toolbox: every item serves a function, and if two things serve the same purpose, one can stay home.

Quick Mindset Shifts

  • Replace “What if I need it?” with “What will I definitely use?”

  • Choose multipurpose over single-purpose items.

  • Remember: doing laundry once is lighter than carrying excess clothes for two weeks.

Step 2: The Universal Packing Framework

This system uses a five-category method that applies to every trip — from city breaks to business travel to outdoor adventures.

The Five Essentials

  1. Clothing: The core of your wardrobe — versatile, layerable pieces.

  2. Toiletries: Only the essentials that fit your daily routine.

  3. Tech: Devices that serve multiple roles.

  4. Documents and Money: Travel ID, cards, and emergency cash.

  5. Extras: A few personal comfort items or accessories.

By organizing within these five categories, you’ll simplify both packing and unpacking.

Step 3: The Clothing Rule — 5, 4, 3, 2, 1

This rule is the foundation of minimalist travel wardrobes. It gives you enough options to mix and match without overpacking.

Here’s how it works for one week:

  • 5 Tops – Neutral, breathable, and easy to layer.

  • 4 Bottoms – Mix of shorts, pants, or skirts depending on the climate.

  • 3 Pairs of Shoes – One for walking, one for casual wear, one for dressier moments.

  • 2 Jackets or Layers – A light sweater and a weatherproof outer layer.

  • 1 Specialty Item – Swimsuit, workout gear, or event outfit.

If your trip is longer than a week, repeat outfits and plan to do laundry once — it’s lighter and easier than carrying twice as much.

Smart Clothing Tips

  • Stick to a color palette of 2–3 tones that mix easily.

  • Choose wrinkle-resistant fabrics for travel days.

  • Roll clothes instead of folding to save space and prevent creases.

  • Use packing cubes or fabric bags to separate categories.

Step 4: Sample Capsule Wardrobe for a 10-Day Trip

To show this system in action, here’s an example that works for most destinations and climates (adjust for weather):

Tops:

  1. Neutral T-shirt

  2. Lightweight button-up

  3. Long-sleeve top

  4. Casual blouse or polo

  5. Layering piece (light sweater or cardigan)

Bottoms:

  1. Jeans or casual pants

  2. Lightweight trousers or skirt

  3. Shorts or leggings

  4. One pair of versatile black pants (can dress up or down)

Shoes:

  1. Comfortable walking sneakers

  2. Casual flats or sandals

  3. One slightly dressy pair (optional)

Outerwear:

  1. Light jacket or blazer

  2. Foldable raincoat or windbreaker

Accessories:

  • Compact scarf

  • Sunglasses

  • Simple jewelry (one set of each type)

  • Foldable hat

With this capsule setup, you can create 10–15 outfit combinations without repeating the exact same look twice.

Step 5: Toiletries — The “Half and Mini” Rule

Most travelers pack too many toiletries out of habit. Instead, apply the “Half and Mini” rule:

  1. Bring half as much as you think you’ll need. You rarely finish full containers during travel.

  2. Use mini sizes for everything non-essential.

Essential Toiletries List

  • Toothbrush, toothpaste, floss

  • Small shampoo and conditioner

  • Bar soap or travel body wash

  • Razor or travel trimmer

  • Deodorant

  • Compact brush or comb

  • Lightweight moisturizer or sunscreen

  • Minimal makeup or skincare (only daily items)

Pack toiletries in a clear, leak-proof bag for easy access during airport security.

Step 6: Tech and Tools — Choose Multipurpose Devices

Technology simplifies travel, but it also adds weight quickly. Focus on essentials that multitask.

Smart Tech List

  • Phone: Combines camera, GPS, notes, and entertainment.

  • Universal charger or adapter: Works for all devices.

  • Power bank: Keep it lightweight.

  • Headphones: Noise-canceling if possible, doubles as relaxation aid.

  • E-reader or tablet: Saves space compared to books.

If you’re on a business trip, add a laptop only if essential. Otherwise, most personal tasks can be handled from your phone or tablet.

Step 7: The Paper and Money Essentials

Documents are small but crucial. Keep them secure and easy to reach.

Travel Document Checklist

  • Passport or ID

  • Boarding passes or e-tickets

  • Travel insurance details

  • Debit/credit cards

  • Local currency for arrival expenses

  • Emergency contact list

  • Copy of key documents stored digitally

Keep everything in one travel wallet or slim pouch. This keeps check-ins fast and stress-free.

Step 8: Accessories and Extras — Keep It Minimal

Minimalist travel doesn’t mean joyless travel. A few comfort items can make your experience more relaxing without adding bulk.

Light, Useful Extras

  • Sleep mask and earplugs

  • Foldable tote bag (for groceries or laundry)

  • Small reusable water bottle

  • Compact umbrella

  • Pen for forms and journaling

  • Lightweight book or e-reader

Each extra should serve a real purpose or enhance comfort — if not, skip it.

travel packing list minimalist

Step 9: The Carry-On Core

A minimalist traveler can fit everything into a single carry-on bag and a small personal item.

Packing Order for Efficiency

  1. Bottom Layer: Shoes and heavier items in packing cubes.

  2. Middle Layer: Clothes rolled or cube-packed.

  3. Top Layer: Toiletries and accessories for easy access.

  4. Side Pocket: Chargers, passport, and travel documents.

Bag Tips

  • Soft-shell backpacks adapt better to overhead compartments.

  • Keep your personal item (small backpack or tote) organized — it holds essentials like snacks, tech, and ID.

  • Aim for under 7–8 kg (15–17 lbs) total weight for maximum comfort.

Step 10: The 15-Minute Packing Routine

Once your minimalist system is set up, packing for any trip should take no more than 15 minutes.

Quick Routine

  1. Review your universal checklist.

  2. Choose outfits using the 5-4-3-2-1 formula.

  3. Pack clothes first, then toiletries and tech.

  4. Double-check travel documents.

  5. Weigh your bag if flying.

With practice, this becomes automatic — no last-minute chaos, no forgotten essentials.

Step 11: How to Handle Laundry on the Road

Doing laundry is the key to traveling light. It sounds like extra work, but it’s quick and easy when planned right.

Simple Laundry Options

  • Use hotel or hostel facilities once mid-trip.

  • Pack a small detergent packet for hand-washing in the sink.

  • Choose quick-dry fabrics to air dry overnight.

You’ll always have fresh clothes without doubling your luggage.

Step 12: Sample Outfit Combinations

To make minimalist travel easier, visualize how your wardrobe pieces mix and match.

Example Combinations for 10 Days

  1. T-shirt + jeans + sneakers

  2. Button-up + black pants + flats

  3. Sweater + leggings + scarf

  4. Blouse + skirt + sandals

  5. Long-sleeve top + jeans + jacket

  6. T-shirt + shorts + walking shoes

  7. Button-up + trousers + cardigan

  8. Dress or nice outfit for dinner

  9. Casual repeat combo from day 1 with accessories switched

  10. Layered travel-day outfit (comfortable but tidy)

With interchangeable basics, every outfit looks intentional, not repetitive.

Step 13: Minimalist Travel Habits

Packing light is a skill that improves with repetition. The more you travel this way, the less you’ll feel tempted to bring extras.

Habits to Maintain

  1. Keep your travel toiletry bag always ready.

  2. Repack essentials right after returning home.

  3. Review what you didn’t use after each trip — remove it next time.

  4. Stick to one-bag travel for short trips to build confidence.

  5. Challenge yourself to remove one item from your list before every trip.

Minimalist travel is learned by doing — each journey refines your system.

Step 14: Common Overpacking Traps

Even experienced travelers fall for these mistakes. Avoiding them helps keep your bag lean and your trip light.

  1. “Just in Case” Items: If you can buy it locally, leave it.

  2. Too Many Shoes: Stick to versatile, comfortable pairs.

  3. Duplicate Toiletries: Share or use multipurpose products.

  4. Full-Size Containers: Travel-size only.

  5. Unplanned Souvenirs: Pack an empty tote for extras instead.

Awareness is half the battle — once you spot these patterns, they’re easy to fix.

Step 15: Minimalist Packing Recap Checklist

Before You Leave:

  • Choose neutral, layerable clothes.

  • Use the 5-4-3-2-1 clothing rule.

  • Limit toiletries to essentials.

  • Keep documents in one pouch.

  • Fit everything in a carry-on.

  • Pack light, breathe easier.

Minimalist travel isn’t about restriction — it’s about feeling free enough to enjoy your trip without being weighed down by unnecessary stuff.

Final Thoughts: Travel Light, Live Fully

Your travel packing list minimalist mindset doesn’t just change how you pack — it changes how you travel. When you carry less, you move faster, think clearer, and experience more. You spend less time organizing and more time exploring.

The goal isn’t to fit into a single backpack forever; it’s to build a habit of intentional travel — bringing what you truly need and letting go of what you don’t.

Start with your next trip. Pack for comfort, not for “just in case.” You’ll be amazed at how liberating traveling light can feel — because freedom doesn’t come from what you bring, but from what you leave behind.

Frugal Grocery Tips Without Coupons: Smart Ways to Save Money

For many families, the grocery bill is one of the most unpredictable expenses in the monthly budget.

Prices rise, appetites grow, and time to plan feels limited. It’s easy to assume that saving money on food means clipping endless coupons, hunting for special deals, or sacrificing quality — but that’s not true. Real grocery savings come from small, consistent habits that add up over time.

This guide offers frugal grocery tips without coupons, teaching you how to stretch every dollar while still eating balanced, satisfying meals. Whether you’re feeding a busy household or cooking for one, the strategies here are practical, sustainable, and grounded in real-life routines. You’ll learn how to master unit pricing, plan meals based on what you already have, reduce waste, and make smart choices at the store — no complicated coupon systems required.

By the end, you’ll have a clear, repeatable process for managing grocery shopping that saves money naturally and makes your pantry work for you, not against you.

Why Skip Coupons — and Still Save Big

Coupons can help, but they often push you toward buying processed or brand-name products you don’t really need. True frugal grocery planning is about smarter decisions before and during shopping — not chasing discounts that don’t align with your family’s diet or values.

Realistic Reasons to Focus on Smart Habits Instead

  1. Time Efficiency: You won’t spend hours searching for deals.

  2. Less Impulse Buying: Coupons can tempt you into buying extras “just because it’s on sale.”

  3. Healthier Choices: You’re more likely to buy whole foods and essentials instead of packaged snacks.

  4. Sustainable Savings: Smart shopping habits last for years; coupons expire.

Instead of chasing short-term discounts, focus on consistent behaviors that keep your grocery costs steady week after week.

Step 1: Know Your True Grocery Budget

Before you can save, you need to understand what you actually spend. Most people underestimate their grocery expenses by 15–25%. Tracking helps you make realistic adjustments.

How to Find Your Baseline

  1. Review bank or receipt totals for the past month.

  2. Calculate the weekly average.

  3. Decide on a target number — reduce your total by 10–15% for the next month.

  4. Treat that number as a game: how can you meet your needs without exceeding it?

This small awareness shift changes the way you shop, making you more intentional with every purchase.

Step 2: Master the Power of Unit Pricing

Unit pricing is one of the most overlooked tools for grocery savings. It tells you the cost per ounce, pound, or liter — the true measure of value.

How to Compare Products the Smart Way

  1. Look at the unit price label (often on the shelf below the item).

  2. Compare across brands and sizes — the biggest container isn’t always cheaper per ounce.

  3. Use your phone calculator if needed.

  4. Keep track of regular unit prices for items you buy often — over time, you’ll learn what’s actually a good deal.

Example:

  • Brand A pasta: $2.00 for 12 oz → $0.17 per ounce

  • Brand B pasta: $2.50 for 16 oz → $0.16 per ounce
    Even though Brand B costs more upfront, it’s the better long-term value.

Once you start thinking in unit prices, you’ll notice savings on nearly every shopping trip.

Step 3: Plan Meals from Your Pantry

The fastest way to overspend is planning meals first and then shopping for them. The frugal approach flips that process — you plan around what you already have.

The Pantry-First Meal Plan

  1. Take Inventory: Check your pantry, fridge, and freezer before shopping.

  2. Identify Anchors: Find base ingredients — rice, beans, pasta, eggs, frozen veggies — that can stretch into multiple meals.

  3. Fill the Gaps: Only buy what’s needed to complete meals, not restock everything at once.

  4. Rotate Stock: Use older items first to prevent waste.

A pantry-based plan keeps meals creative, reduces clutter, and cuts spending significantly.

Step 4: Shop with a Purpose (and a List)

Going to the store without a list is like shopping blind. A clear plan keeps you focused and helps you resist tempting extras.

The Three-Part Shopping List

  1. Essentials: Core ingredients like bread, milk, eggs, rice, and oil.

  2. Meal Fillers: Produce, proteins, and sides based on your weekly menu.

  3. Extras: Items like snacks, condiments, or baking ingredients — optional, not mandatory.

Keep your list visible while shopping and stick to it. If something not on the list catches your eye, pause and ask:

  • “Do I already have something similar?”

  • “Will I use this more than once?”

  • “Is this replacing something, or adding clutter?”

Frugal grocery shopping is 90% discipline and 10% math.

Step 5: Build Your Weekly Cleaning Routine (15-Minute Food Resets)

Food waste is silent money loss. Every wilted vegetable or expired item represents dollars gone. But a few short maintenance habits can prevent that entirely.

Simple Food Maintenance Habits

  1. Midweek Fridge Check: Take five minutes to see what’s about to expire.

  2. Leftover Night: Once a week, make dinner entirely from leftovers or near-expiry items.

  3. Freeze Smart: Label leftovers with dates and freeze single portions for quick meals later.

  4. Reorganize Weekly: Keep older items visible and newer ones behind them.

Even a 15-minute “food audit” once a week saves $20–$30 in waste for most families.

Step 6: Buy in Bulk — But Strategically

Bulk buying only saves money if you can use what you buy. The key is balancing storage space, shelf life, and realistic consumption.

When Bulk Makes Sense

  • Dry goods like rice, oats, and pasta.

  • Freezer-safe proteins like chicken or fish.

  • Pantry staples with long shelf lives (beans, lentils, flour).

When It Doesn’t

  • Perishables that spoil fast (fresh fruit, bread, dairy).

  • New or rarely used products you haven’t tested yet.

Buying in bulk is most effective when you know your family’s real eating habits.

Step 7: Simplify Meals Without Sacrificing Flavor

Cooking frugally doesn’t mean eating bland food. You can create tasty, filling meals from simple ingredients with a few clever combinations.

Core Budget-Friendly Ingredients

  • Rice and beans (mix for protein)

  • Eggs and potatoes

  • Cabbage, carrots, and onions (long shelf life)

  • Frozen vegetables (nutrient-rich and affordable)

  • Canned tuna, beans, and tomatoes

Easy Low-Cost Meal Ideas

  1. Vegetable Fried Rice: Use leftover rice, eggs, and frozen veggies.

  2. Lentil Soup: Combine lentils, carrots, onions, and broth.

  3. Egg and Potato Skillet: Add herbs and a sprinkle of cheese.

  4. Homemade Burrito Bowls: Use rice, beans, and any leftover protein.

  5. One-Pot Pasta: Simmer noodles, tomato sauce, and chopped vegetables together.

A short list of versatile ingredients keeps meal planning easier and cheaper.

frugal grocery tips without coupons

Step 8: Make a Weekly Example Menu

Having a predictable rotation helps lower decision fatigue and keeps you from ordering takeout.

Sample 7-Day Frugal Menu

Monday: Vegetable stir-fry with rice
Tuesday: Lentil soup with toast
Wednesday: Chicken and veggie pasta
Thursday: Omelet with potatoes and salad
Friday: Homemade pizza with leftovers
Saturday: Bean burritos or tacos
Sunday: Roast vegetables with rice and herbs

Repeat your best-performing meals every two weeks to simplify planning.

Step 9: Track Grocery Prices Over Time

Knowing average prices helps you spot true discounts without relying on coupons.

How to Create a Price Log

  1. Choose 10–15 items you buy every week.

  2. Write down the price per unit for each.

  3. Update every month.

This mini “price book” teaches you to recognize when something is genuinely cheaper — and when it’s just marketing.

Step 10: Reduce Hidden Waste

Food isn’t the only waste — packaging, electricity, and time count too.

Waste-Reducing Habits

  • Store leftovers in reusable containers.

  • Use cloth bags instead of single-use plastic.

  • Cook multiple meals at once to save energy.

  • Repurpose vegetable scraps for broth.

Frugality is about efficiency, not deprivation — using everything you buy to its fullest potential.

Step 11: Keep a “Use It Up” List

When items linger too long, they’re easy to forget. Keep a visible note on your fridge of things that need to be eaten soon.

Example:

  • Open yogurt

  • Leftover chicken

  • Half an onion

  • Soft apples

Plan one meal around these items each week — it saves both money and waste.

Step 12: Rethink “Luxury” Foods

Not all treats need to disappear — they just need boundaries. Instead of cutting snacks completely, buy smaller amounts less often.

  • Buy one premium cheese or dessert per week, not three.

  • Choose multipurpose condiments like plain yogurt (can replace sour cream or dressing).

  • Replicate café favorites at home — coffee, muffins, or smoothies — for a fraction of the price.

Enjoyment is part of sustainability; extreme restriction leads to burnout.

Step 13: Use Simple Batch Cooking

Cooking larger portions saves money and energy. You don’t need to meal prep for a week — just double your dinner and store half.

Batch Cooking Ideas

  • Cook double rice or pasta for later meals.

  • Prepare soup or chili in bulk and freeze half.

  • Roast a tray of vegetables to use in wraps or bowls.

  • Make a big batch of pancakes or muffins for quick breakfasts.

Batch cooking makes it easier to eat well even when you’re tired — the ultimate frugal hack.

Step 14: Rotate and Refresh Pantry Staples

A well-stocked pantry supports every other strategy. Keep a simple, rotating base list and restock gradually.

Core Pantry Essentials

  • Rice, beans, and lentils

  • Pasta, flour, and oats

  • Oil, vinegar, and salt

  • Canned tomatoes, broth, and tuna

  • Herbs, spices, and garlic

Every two weeks, check what’s low and restock just the basics. This keeps your pantry balanced, not bloated.

Step 15: Reevaluate and Adjust Monthly

Frugal living works best when it’s flexible. Review your progress each month.

Ask Yourself:

  1. Which meals worked best for both taste and cost?

  2. Which items went unused or spoiled?

  3. What savings did I notice in total spending?

  4. What small change can I try next month?

This ongoing reflection turns grocery savings into a long-term habit — not just a quick fix.

Final Thoughts: Simplicity Over Perfection

The smartest frugal grocery tips without coupons focus on behavior, not bargains. By shopping intentionally, cooking simply, and using what you already have, you reduce waste and stress while eating better for less.

A sustainable grocery plan doesn’t depend on extreme measures — it’s built on steady, repeatable habits that make sense for real life. Start small: track your spending, cook from your pantry, and commit to one or two changes this week.

You’ll soon discover that saving money on groceries isn’t about doing more — it’s about doing what matters, consistently.

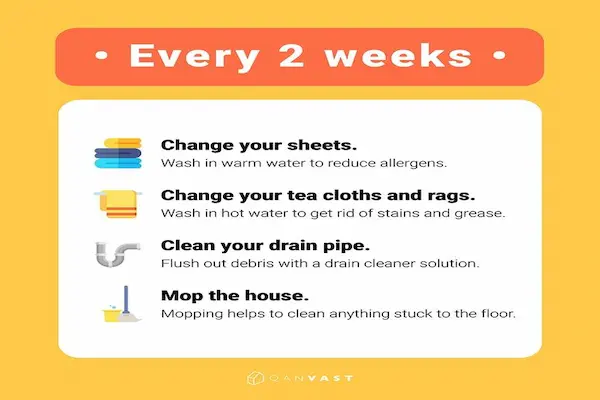
Cleaning Schedule for Busy People

When life feels packed with work, family, errands, and everything in between, cleaning the house can easily slide to the bottom of the list.

Yet, having a clean space plays a quiet but powerful role in mental clarity and comfort. A tidy home doesn’t just look better, it helps you think clearer, feel calmer, and stay organized. Still, for many, the hardest part isn’t cleaning itself,  it’s finding the time and structure to start.

That’s where a cleaning schedule for busy people makes all the difference. Instead of spending hours scrubbing on weekends, you’ll break chores into small, doable steps that fit inside short bursts of time. Whether you live alone, with roommates, or manage a full household, this method works because it’s designed around real life,  not perfection.

In this guide, you’ll find a sustainable weekly cleaning routine, a quick list of essential tools, a 15-minute-per-day system that anyone can maintain, and practical tips for making your home feel fresh without constant effort. By the end, you’ll see that a clean home isn’t about having endless free time, it’s about having the right plan.

Why a Cleaning Schedule Matters for Busy Lives

A structured cleaning plan turns chaos into calm. When cleaning becomes predictable, it stops feeling overwhelming. You always know what to do next and how long it will take.

Key Benefits of a Weekly Cleaning Routine

  1. Reduces Stress: Clutter can make your mind feel as messy as your space.

  2. Saves Time: Doing small tasks regularly prevents buildup that leads to long cleaning sessions.

  3. Improves Focus: A clean home helps reduce distractions, making it easier to work or relax.

  4. Creates Consistency: Structure keeps your space manageable even during hectic weeks.

  5. Encourages Teamwork: Shared schedules help families or roommates divide chores fairly.

When cleaning is broken down into a rhythm instead of random tasks, it becomes a normal part of the day — not a dreaded weekend project.

Setting Up Your Cleaning System

Before you start your new routine, you’ll want a simple setup — a clear plan, the right tools, and realistic expectations.

Step 1: Define Your Spaces

List every area you want to keep tidy. Typical zones include:

  • Kitchen

  • Living room

  • Bedrooms

  • Bathroom(s)

  • Entryway or hallway

  • Laundry area

This gives you a complete view of your home and helps you plan time by space rather than by size.

Step 2: Gather the Right Cleaning Gear

You don’t need expensive products or bulky gadgets — just a few essentials that make cleaning quicker and safer.

Basic Gear List

  • Multi-surface cleaner or mild soap

  • Disinfecting wipes or spray

  • Microfiber cloths (at least three)

  • Mop or floor wipes

  • Small handheld vacuum or broom

  • Sponges and scrub brush

  • Laundry detergent and stain remover

  • Trash bags

  • Rubber gloves

Step 3: Create Cleaning Zones

Divide your home into two types of zones:

  1. High-traffic areas (clean daily or every other day): kitchen counters, floors, bathroom sink.

  2. Low-traffic areas (clean weekly or biweekly): bedrooms, closets, or guest rooms.

This balance keeps your home feeling fresh even when you’re pressed for time.

The Core System: 15 Minutes a Day

The easiest way to maintain a clean home is through short, focused sessions. Fifteen minutes may sound too short to make a difference, but small, consistent cleaning bursts prevent buildup and clutter.

How to Use the 15-Minute Method

  1. Set a Timer: Commit to cleaning until it goes off — no distractions.

  2. Pick One Zone: Focus on one area or task per session.

  3. Work Fast: Don’t aim for deep cleaning; aim for visible progress.

  4. Repeat Daily: The key is consistency, not perfection.

In one week, those minutes add up to over an hour of cleaning — without feeling like you’ve lost any time.

Your Simple Weekly Cleaning Schedule

Here’s a practical routine designed for busy people. It divides major chores by day, keeping your weekends free for rest.

Monday – Kitchen Refresh

  • Wipe countertops and appliances.

  • Sweep or vacuum the floor.

  • Empty the trash.

  • Load or unload the dishwasher.

Tuesday – Bathroom Basics

  • Wipe mirrors and sink.

  • Disinfect toilet and shower surfaces.

  • Replace towels and restock toiletries.

  • Spray air freshener or light a candle.

Wednesday – Living Room Reset

  • Dust surfaces and electronics.

  • Vacuum or sweep floors.

  • Straighten pillows, blankets, and décor.

  • Collect cups, dishes, or misplaced items.

Thursday – Bedroom Reset

  • Make the bed and change sheets.

  • Dust side tables and lamps.

  • Fold or hang clothes.

  • Vacuum or sweep under the bed.

Friday – Floors and Finishing Touches

  • Mop hard floors or vacuum carpets.

  • Wipe baseboards or corners if needed.

  • Empty smaller trash bins.

  • Add fresh flowers or scent diffusers.

Saturday – Laundry and Declutter Day

  • Wash and fold clothes.

  • Tackle one clutter zone (drawer, shelf, or closet).

  • Put away anything left out during the week.

Sunday – Rest and Reset

  • Take 10 minutes to tidy shared spaces.

  • Refill cleaning supplies for the next week.

  • Light a candle or open windows to freshen the air.

This plan keeps cleaning manageable, with no single day feeling overwhelming.

Quick Cleaning Tasks You Can Do Anytime

Even with a schedule, spontaneous mini-tasks make upkeep easier.

10-Minute Power Tasks

  1. Wipe kitchen counters after meals.

  2. Do a quick sink scrub after brushing teeth.

  3. Fold a laundry load while watching TV.

  4. Sweep the entryway before leaving the house.

  5. Empty the dishwasher or dryer during your coffee break.

Tiny cleaning bursts add up — they turn maintenance into habit instead of effort.

The “One-Minute Rule”

This rule, made famous by productivity experts, says: if a task takes less than one minute, do it immediately.

Everyday One-Minute Actions

  • Hang up a coat.

  • Wipe a spill.

  • Toss expired food.

  • Replace the toilet paper roll.

  • Straighten a cushion or fold a blanket.

By doing these right away, you prevent clutter and chaos from growing unnoticed.

Weekend Deep Cleaning (Optional)

If you want your home to sparkle, add one “deep clean” zone each weekend. You can rotate between areas so everything gets a refresh at least once a month.

Monthly Deep-Clean Rotation

  1. Week 1: Kitchen appliances and cabinets.

  2. Week 2: Bathroom grout and shower.

  3. Week 3: Bedroom closets and drawers.

  4. Week 4: Living room furniture and windows.

Keeping deep cleaning small and rotational avoids burnout and ensures your home stays fresh year-round.

cleaning schedule for busy people

How to Involve the Whole Family

If you live with others, share responsibility. Small roles make cleaning feel fair and cooperative.

Family Cleaning Strategy

  1. Create a Chore Chart: List daily and weekly tasks by name or color code.

  2. Assign Age-Appropriate Tasks:

    • Kids: Pick up toys, make beds, wipe surfaces.

    • Teens: Vacuum, take out trash, handle laundry.

    • Adults: Rotate deeper chores or kitchen tasks.

  3. Use Timers or Music: Turn cleaning into a quick, shared activity.

  4. Reward Effort, Not Perfection: Celebrate consistency more than spotless results.

Shared responsibility builds teamwork — and teaches everyone to care for the space they live in.

Cleaning Shortcuts for Time-Crunched Days

Life gets busy, and some days you’ll have less time. These shortcuts keep your home feeling tidy even when you’re overwhelmed.

  • When You Only Have 5 Minutes
    1. Make the bed.
    2. Clear countertops.
    3. Empty the trash.
  • When You Have 10 Minutes
    1. Do a quick vacuum or sweep.
    2. Wipe bathroom surfaces.
    3. Fold and put away clean laundry.
  • When You Have 15 Minutes
    1. Start the dishwasher or washing machine.
    2. Dust key areas and reset the living room.
    3. Spot-clean floors or entryways.

Short bursts may not look like much, but together, they maintain order.

Cleaning Tracker Template

Keeping track of your cleaning progress doesn’t have to be complicated. A simple checklist or written plan can make all the difference in keeping your home organized and your motivation steady. Instead of using a chart or spreadsheet, try thinking of your week as a series of small, focused cleaning goals.

Here’s how your weekly cleaning tracker might look in text format:

  • Monday: Focus on the kitchen. Wipe down countertops and appliances, sweep the floor, and take out the trash. Check this off once done to start the week fresh.

  • Tuesday: Tackle the bathroom. Clean the mirror and sink, disinfect high-touch areas like handles and faucets, and replace towels if needed. A short, focused session here prevents buildup later.

  • Wednesday: Reset your living room. Dust furniture and electronics, fluff pillows, vacuum or sweep the floor, and put away anything out of place.

  • Thursday: Refresh the bedroom. Change sheets, dust nightstands, fold laundry, and clear surfaces. Even 10 minutes of tidying makes a huge difference in how your space feels.

  • Friday: Focus on floors and finishing touches. Vacuum carpets or mop hard floors, wipe corners and baseboards, and empty smaller trash bins.

  • Saturday: Handle laundry and decluttering. Wash clothes, fold and put them away, and pick one small area — a drawer, shelf, or closet — to organize.

  • Sunday: Use this day as a calm reset. Spend a few minutes tidying shared spaces, refilling cleaning supplies, and opening windows to air out your home.

Each day has a purpose, and each task can be completed in under 20 minutes. Writing this plan on a notepad or whiteboard keeps it visible, and checking off completed days builds a sense of progress and satisfaction.

By the end of the week, you’ll realize that these short bursts of cleaning — consistently applied — maintain a fresh, comfortable home without ever requiring a long, exhausting deep clean.

Smart Cleaning Habits That Save Time

Building small habits keeps your home in check automatically.

Mini Habits That Stick

  1. Clean as You Cook: Rinse dishes or wipe counters between steps.

  2. Tidy Before Bed: Spend five minutes resetting your main room.

  3. Use Baskets for Quick Storage: Keep one in each room for loose items.

  4. Wipe Surfaces Nightly: Keeps grime from building up.

  5. Laundry Routine: One load a day prevents pileups.

Consistency beats effort — daily mini actions save hours later.

How to Make Cleaning Feel Easier Mentally

Cleaning isn’t just physical work; it’s also emotional. The trick is reframing it as self-care instead of obligation.

Mindset Shifts That Help

  1. Start Small: Begin with one surface, not a whole room.

  2. Visualize Completion: Imagine the calm feeling when it’s done.

  3. Pair Cleaning with Pleasure: Play music or listen to a podcast.

  4. Reward Yourself: After cleaning, enjoy a quiet coffee or favorite snack.

A positive mindset turns cleaning from pressure into peace.

Keeping Momentum Week After Week

The challenge isn’t starting — it’s staying consistent. The secret is designing a system that fits your reality, not an ideal version of it.

Tips to Maintain Motivation

  1. Track Progress Visibly: Seeing checkmarks builds satisfaction.

  2. Simplify Products: Fewer tools mean less clutter and more action.

  3. Adjust When Needed: Some weeks require flexibility — and that’s okay.

  4. Focus on Maintenance, Not Perfection: A tidy home beats a spotless one you can’t sustain.

  5. Celebrate Milestones: Treat yourself after a full month of keeping up your routine.

Every small success builds momentum toward a cleaner, calmer home.

Quick Reset Routine for Overwhelming Days

When life gets messy and motivation is low, try this short reset plan. It takes 20 minutes total and instantly refreshes your space.

  1. Gather Clutter (5 minutes): Toss trash, return misplaced items.

  2. Wipe Key Surfaces (5 minutes): Focus on counters, tables, and bathroom sink.

  3. Vacuum or Sweep (5 minutes): Prioritize visible areas.

  4. Freshen Air (2 minutes): Open windows or spray light scent.

  5. Final Touch (3 minutes): Fluff pillows or light a candle.

Even a small reset can completely change how your home — and your mind — feels.

Final Thoughts: Clean Enough, Not Perfect

The truth about keeping a tidy home is that “perfect” isn’t realistic, especially when you’re busy. What truly matters is creating a space that supports you — not one that drains your energy.

This cleaning schedule for busy people focuses on simplicity, not struggle. When you clean in short bursts, spread tasks across the week, and build habits that stick, your home stays in order without eating up your time.

Start today with one 15-minute session — just one zone, one corner, or one task. Tomorrow, do it again. Over time, you’ll find that consistency beats intensity every time, and cleanliness becomes less of a chore and more of a lifestyle.

Micro Habits to Build Daily: Small Steps for Big Change

When people think about improving their lives, they often picture dramatic transformations, the kind that involve quitting bad habits overnight, committing to intense workouts, or overhauling entire routines in one go.

But human behavior doesn’t change that way. Real progress happens in small, consistent steps that fit naturally into daily life. These are called micro habits, and they have the power to reshape your mindset, health, and productivity from the ground up.

In this complete guide, we’ll explore micro habits to build daily, the science behind why they work, and how you can turn tiny, one-minute actions into powerful systems of change. You’ll discover 30 practical micro habit ideas for all areas of life, learn how to design your own “habit recipe,” and use simple tracking tools to stay consistent without pressure or perfectionism.

By the end, you’ll understand that growth doesn’t come from doing more — it comes from doing small things consistently until they become part of who you are.

What Are Micro Habits?

Micro habits are the smallest possible actions that move you toward a bigger goal. They take less than two minutes, require little motivation, and remove the friction that makes starting difficult.

Key Features of Micro Habits

  1. Tiny Effort: They demand minimal time or willpower.

  2. Easy to Repeat: You can do them anywhere, anytime.

  3. Connected to a Cue: They attach to something you already do daily.

  4. Rewarding by Design: Completing them gives an immediate sense of success.

For example:

  • Doing one push-up after brushing your teeth.

  • Writing one sentence in your journal before bed.

  • Drinking a glass of water right after waking up.

Each is so small it’s hard to fail — and that’s exactly the point.

Why Micro Habits Work

Behavioral research shows that success in habit formation comes less from willpower and more from environment, identity, and repetition.

The Science of Small Steps

  1. Reduces Resistance: When something feels easy, your brain stops viewing it as a threat or chore.

  2. Builds Momentum: Small wins create a positive feedback loop, reinforcing the behavior.

  3. Supports Identity Change: Each repetition confirms a new self-image — you start becoming the kind of person who acts in alignment with your goals.

  4. Improves Consistency: Smaller actions are harder to skip because they fit into any schedule.

  5. Encourages Compounding: Over time, small habits stack into significant change — one tiny step repeated daily becomes hundreds by the end of a year.

Micro habits are essentially a practical application of what psychologist B.J. Fogg calls “behavior design” — scaling goals down until they’re so easy you can’t say no.

How to Start Building Micro Habits

Creating a new micro habit involves four simple stages: cue, action, reward, and repetition.

Step 1: Identify the Cue

A cue is a trigger that reminds you to perform the habit. The best cues are tied to existing routines.

Examples of Strong Cues:

  • After pouring my morning coffee…

  • When I close my laptop at the end of the day…

  • Before I brush my teeth at night…

Step 2: Define the Smallest Action

Scale down your habit until it’s nearly effortless. If your goal is to read more, start with one paragraph. If it’s to exercise, begin with one minute of stretching.

Step 3: Reward Yourself Instantly

Even small rewards help your brain associate pleasure with the behavior. Smile, say “done,” or check off your habit tracker. The sense of completion matters more than the size of the action.

Step 4: Repeat and Build Naturally

Once your micro habit feels automatic, expand it slightly — from one minute to five, from one push-up to ten. Growth happens naturally, without force.

The Habit Recipe Formula

To make your habits stick, you can use this simple structure known as the habit recipe:

“After I [current routine], I will [new tiny habit].”

This format connects your new action to something already automatic.

Examples:

  • After I brush my teeth, I will floss one tooth.

  • After I pour my coffee, I will take three deep breaths.

  • After I open my laptop, I will review my top three priorities for the day.

Over time, the trigger becomes inseparable from the habit — you do it automatically, without deciding.

30 Micro Habits to Build Daily

Here are small, proven actions you can start using today across different areas of your life. Each takes under two minutes but creates momentum that compounds over time.

1. Health and Energy

  1. Drink one full glass of water upon waking.
  2. Stand and stretch for one minute every hour.
  3. Add one extra vegetable to your lunch.
  4. Take ten slow breaths before eating.
  5. Go outside for sunlight exposure before 10 a.m.
  6. Prep one healthy snack each evening.
  7. Do one set of squats or push-ups before showering.
  8. Replace one sugary drink with water or tea.
  9. Walk around the block after dinner.
  10. Go to bed five minutes earlier each night.

2. Productivity and Focus

  1. Write down one main goal for the day.
  2. Review your top three priorities after checking email.
  3. Declutter one small space — a drawer, desktop, or folder.
  4. Set a two-minute timer to start any difficult task.
  5. End each workday by listing tomorrow’s first action.
  6. Keep one tab open at a time when working online.
  7. Silence notifications for 30 minutes of deep work.
  8. Review your planner before bed.
  9. Delete one unnecessary file or email per day.
  10. Celebrate one task completed by noting it in a success log.

3. Relationships and Gratitude

  1. Send one kind message or thank-you each day.
  2. Make eye contact and smile at one person intentionally.
  3. Write one sentence in a gratitude journal.
  4. Compliment someone sincerely.
  5. Ask one meaningful question in conversation instead of small talk.

4. Learning and Growth

  1. Read one paragraph or page from a book daily.
  2. Watch one short educational video or listen to a two-minute podcast snippet.
  3. Write one new idea or lesson learned each evening.
  4. Review one flashcard or note from something you’re studying.
  5. Reflect for one minute on what went well today.

Even if you only choose three or four of these to begin, you’ll start noticing real changes in mindset and behavior within a few weeks.

How to Track Your Micro Habits

Tracking makes habits visible — it turns progress into motivation. Seeing a streak of consistent days triggers the brain’s reward system, making you less likely to break the chain.

Simple Tracking Methods

  1. Paper Tracker: Draw boxes for each day and cross them off when complete.

  2. Calendar Method: Place a checkmark or symbol on each day you succeed.

  3. Habit Journal: Write short reflections like “Did my morning water” or “Read one paragraph.”

  4. Visual Cues: Use sticky notes or small symbols on your mirror, desk, or phone case.

You don’t need an app — the act of checking something off creates a sense of satisfaction that reinforces the routine.

Weekly Reflection Questions

  • Which micro habits felt easiest or most enjoyable?

  • Which ones did I skip, and why?

  • What can I adjust to make them even smaller or smoother?

Reflection transforms tracking into learning, ensuring you adapt instead of giving up.

How to Make Micro Habits Stick

The strength of a micro habit lies in its consistency, not its size. To help yours last, focus on identity, environment, and self-compassion.

1. Connect Habits to Identity

Rather than thinking “I need to exercise,” shift to “I’m the kind of person who moves daily.” Identity-driven habits last because they reinforce who you want to become, not what you must do.

2. Optimize Your Environment

Make good habits easy and bad ones harder.

  • Keep healthy snacks visible, and hide junk food.

  • Place a book on your pillow as a reading reminder.

  • Lay out workout clothes where you’ll see them first thing.

Your surroundings shape your behavior far more than willpower does.

3. Pair Habits Together (Habit Stacking)

Combine a new habit with one you already do. For example:

  • After brushing your teeth → floss one tooth.

  • After starting your coffee → review your daily plan.

  • After sitting at your desk → take three deep breaths.

This chaining method builds routines naturally, without forcing extra effort.

4. Forgive Missed Days

Perfection isn’t the goal — consistency is. Missing once doesn’t break your progress; quitting does. Get back on track the very next opportunity.

5. Celebrate Micro Wins

Acknowledge progress daily, no matter how small. Smile, say “I’m improving,” or write it down. These moments build emotional momentum — the fuel for long-term change.

micro habits to build daily

Sample “Habit Recipe” Plan

Here’s an example of how you can design your own small daily routine using the formula:

  1. After I pour my coffee → I will write one sentence in my journal.

  2. After I brush my teeth → I will floss one tooth.

  3. After I close my laptop at work → I will write tomorrow’s first task.

  4. Before bed → I will write down one thing I’m grateful for.

Each habit connects seamlessly to a cue and takes less than two minutes — easy enough to maintain even on the busiest days.

Common Mistakes When Starting Micro Habits

  1. Making Habits Too Big Too Soon: If you expand too quickly, friction returns. Stay small longer than you think you need to.

  2. Lacking Clear Cues: Without a specific trigger, habits fade. Always tie them to time or context.

  3. Chasing Too Many at Once: Focus on three to five micro habits maximum until they become automatic.

  4. Expecting Immediate Transformation: Change builds quietly, then suddenly. Trust the compound effect.

  5. Skipping Reflection: Tracking progress helps refine strategy — skipping it means missing learning opportunities.

Each mistake is part of learning. Adjust gently and keep going.

Advanced Habit Layering: Growing from Micro to Macro

Once your small habits feel easy, you can start combining them into clusters that create entire systems.

Example Habit Layers

  • Morning Focus System:

    • Drink water → review goals → stretch for one minute.

  • Evening Reset Routine:

    • Write gratitude note → tidy desk → prep clothes for tomorrow.

  • Wellness Mini-Ritual:

    • Take deep breaths → do one stretch → step outside for sunlight.

This layering approach builds structure while keeping friction low. Each mini sequence strengthens identity and predictability.

The Psychology Behind Why Micro Habits Stick

Small, easy habits align with how the brain builds new neural pathways. Each repetition strengthens the connection, eventually making the habit automatic.

Key Psychological Drivers

  1. Dopamine Reward Loop: Small successes trigger pleasure chemicals that reinforce behavior.

  2. Reduced Decision Fatigue: Automatic habits free mental energy for bigger choices.

  3. Confidence Growth: Completing tiny tasks daily improves self-trust — the belief that you’ll follow through.

  4. Self-Perception Shift: You begin to see yourself as someone disciplined, calm, or organized.

These psychological benefits make micro habits sustainable long after initial motivation fades.

A Simple Tracking Template

You can use a straightforward three-column layout for weekly habit tracking:

Column 1: Habit (e.g., Drink morning water)
Column 2: Days Completed (Mon–Sun checkboxes)
Column 3: Notes or Reflections

At the end of each week, review patterns — which habits stick naturally and which need smaller adjustments.

Example Reflection Prompts

  • Did I miss any days in a row? What caused it?

  • Which habit felt most rewarding?

  • How can I make one of these even smaller or simpler?

Tracking isn’t about perfection — it’s about awareness.

5-Minute Daily Habit Reset

Whenever motivation dips, try this five-minute reset routine to reconnect with your goals.

  1. Breathe Deeply (30 seconds): Clear your focus.

  2. Review Your Wins (1 minute): Remind yourself of what you’ve done right.

  3. Revisit Your Why (1 minute): Recall why these habits matter.

  4. Simplify (1 minute): Shrink any habit that feels heavy.

  5. Take One Action (1.5 minutes): Do the smallest next step — momentum is what matters.

This brief reset reactivates your confidence and keeps progress steady even during tough days.

Reflection Prompts for Long-Term Growth

Once your micro habits become consistent, reflection helps you refine and evolve.

Ask Yourself:

  • Which tiny habits have changed how I see myself?

  • What new habits naturally appeared as a result?

  • Where can I simplify further to keep growth sustainable?

Reflection ensures your habits grow with you rather than turning into rigid routines.

Final Thoughts: Tiny Steps, Real Transformation

The beauty of micro habits to build daily lies in their simplicity. You don’t need massive motivation or perfect discipline — just a willingness to start small, stay steady, and trust the process.

Each glass of water, each deep breath, each small note of gratitude seems insignificant in isolation. But together, they form a foundation for a calmer, healthier, and more intentional life.

Change doesn’t begin with grand plans — it begins with a single, tiny step repeated until it becomes part of you.

So start today. Choose one micro habit so small it feels almost silly, and do it. Tomorrow, do it again. Over time, you’ll realize the power of small actions not just to change your routine, but to reshape your entire identity.

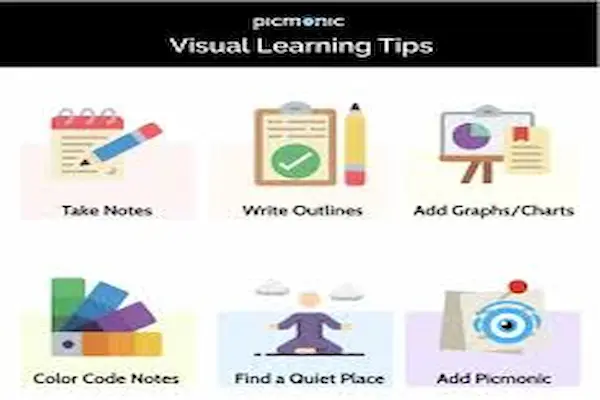
Study Tips for Visual Learners: See It, Learn It, Remember It

Everyone learns differently, and while some people grasp new ideas best through listening or hands-on experience, others find that seeing information laid out visually makes.

If you’re someone who remembers charts better than paragraphs, who enjoys color-coded notes or diagrams that connect ideas, you’re most likely a visual learner. Understanding how your brain processes information gives you a powerful advantage — it lets you study smarter, not longer.

This guide explores study tips for visual learners, offering clear techniques, examples, and practical systems that help you transform complex information into visuals your mind easily recalls. You’ll also learn how to use diagrams, color, and mind maps strategically, how to organize notes for maximum clarity, and how to combine visual memory with spaced repetition to make studying both efficient and rewarding.

By the end, you’ll have a structured approach to learning visually — one that saves time, reduces stress, and helps you walk into any exam with confidence.

Understanding Visual Learning

Visual learners process and retain information through images, patterns, and spatial relationships. They prefer to “see” concepts in action rather than only read or hear them.

Key Traits of Visual Learners

  1. Strong Visual Memory: You remember faces, layouts, and written notes easily.

  2. Preference for Diagrams and Charts: Graphs and mind maps make sense faster than text-heavy explanations.

  3. Sensitivity to Color and Structure: Organization and color coding help you focus.

  4. Difficulty with Purely Verbal Lessons: Long lectures without visuals often feel overwhelming.

  5. Spatial Awareness: You recall where information was placed on a page or slide.

Recognizing these traits helps you select the right strategies — ones that match how your mind naturally organizes information.

Why Visual Learning Works

The human brain processes visuals faster than text — about 60,000 times faster, according to cognitive research. Visual cues also engage both hemispheres of the brain, strengthening memory connections.

The Benefits of Visual Study Techniques

  • Enhanced Recall: Visuals stick longer in memory because they create strong mental images.

  • Better Focus: Color and structure reduce distractions and maintain attention.

  • Clearer Understanding: Seeing relationships between ideas makes it easier to grasp complex topics.

  • Improved Long-Term Retention: Visual notes can be reviewed faster and more effectively during exam prep.

Essentially, the more senses you engage while learning, the deeper your understanding becomes — but for visual learners, the sense of sight leads the way.

study tips for visual learners

Step 1: Transform Information into Visuals

One of the easiest and most effective ways to study as a visual learner is to turn abstract information into clear visuals.

Techniques to Try

  1. Diagrams and Flowcharts:
    Break down processes — such as the water cycle, a math formula, or a historical timeline — into arrows, boxes, and flow connections.

    • Example: Instead of memorizing the steps of cellular respiration through text, draw each stage as a flow diagram showing oxygen and energy exchange.

  2. Mind Maps:
    Centralize a main topic in the middle of the page and connect related ideas outward with lines. Add symbols or quick doodles to each branch.

    • Example: For literature, place the book title at the center and branch out with themes, characters, and key quotes.

  3. Infographics:
    Combine data, icons, and short text blocks. If you’re reviewing history or science, summarize dates and facts visually rather than in long paragraphs.

  4. Timelines:
    Use horizontal or vertical layouts for chronological topics. Include visuals like arrows, icons, or symbols for major events.

  5. Color Coding:
    Use different colors for categories — blue for definitions, red for dates, green for formulas. Consistency helps the brain link colors with meanings automatically.

Step 2: Visual Note-Taking Systems

Visual learners benefit from notes that look organized and feel visual. Traditional linear notes often don’t work well because they lack structure or visual cues.

The Cornell Visual Adaptation

You can modify the Cornell Note System — a proven structure — to fit a visual learning style:

  • Left Column: Write main ideas or questions.

  • Right Column: Add diagrams, short answers, and colored highlights.

  • Bottom Section: Summarize using symbols, arrows, or quick sketches.

This approach gives structure without overwhelming your visual memory.

Other Note-Taking Styles

  1. Sketch Notes: Combine small drawings with text to represent ideas.

    • Example: For anatomy, sketch organs next to each description.

  2. Chart Notes: Divide your page into boxes to separate themes or steps.

  3. Storyboard Notes: Lay out information as frames, like scenes in a comic strip, especially useful for sequences or case studies.

The goal is not to make perfect art — it’s to make your notes more memorable.

Step 3: Use Color Intentionally

Color is a silent teacher. When used effectively, it helps the brain categorize and recall information quickly.

How to Use Color for Studying

  1. Highlight Strategically:

    • Yellow for main ideas.

    • Pink for definitions.

    • Green for examples or case studies.
      Avoid over-highlighting — too many colors cancel out the effect.

  2. Color-Coded Folders or Tabs:
    Assign a color to each subject or unit for easy navigation.

  3. Sticky Notes and Flashcards:
    Use colors to indicate difficulty levels or topic types — blue for easy, orange for medium, red for challenging.

  4. Visual Themes:
    Keep your palette consistent so your brain learns to associate color with subject matter.

A clean, color-coded system not only boosts memory but also makes studying more enjoyable.

Step 4: Combine Visuals with Active Recall

Visuals help store information, but recalling it strengthens memory. Active recall means testing yourself instead of just rereading notes.

How to Apply Active Recall Visually

  1. Cover-and-Recall Method:

    • Cover one side of your notes or diagram.

    • Try to reconstruct missing information from memory.

    • Check your accuracy and repeat.

  2. Flashcards with Images:

    • On one side: a diagram, chart, or keyword.

    • On the other: explanations or definitions.

  3. Blank Diagram Practice:

    • Recreate diagrams from scratch without looking.

    • This reinforces memory and structure understanding simultaneously.

  4. Visual Quiz Sheets:

    • Create “fill-the-blank” versions of your visuals for regular review.

This process trains your brain to retrieve visual information under pressure — the same way it must perform during exams.

Step 5: Apply Spaced Repetition with Visual Study Tools

Spaced repetition strengthens long-term memory by reviewing material at increasing intervals. For visual learners, the method works best when paired with imagery.

Example Routine

  1. Review new material right after class.

  2. Review again the next day using visuals or mind maps.

  3. Review one week later — focus on diagrams or color patterns that stand out.

  4. Review again after two weeks and one month.

To make repetition visual, use cue cards, sticky note grids, or digital mind maps. Each review should highlight visuals rather than blocks of text.

Step 6: Create Visual Study Environments

The space where you study matters. A clean, organized desk mirrors the clarity you’re trying to build in your notes.

Environment Checklist

  • Lighting: Natural or soft white light keeps visuals clear and eyes relaxed.

  • Declutter: Keep only essential materials visible.

  • Wall Aids: Hang key diagrams, charts, or vocabulary posters where you’ll see them often.

  • Rotation System: Change visuals weekly to avoid “visual fatigue” — when your brain starts ignoring what it sees daily.

Creating a visually stimulating yet calm study space keeps your focus sharp and motivation steady.

Step 7: Use Technology the Smart Way

While paper notes work great, digital tools give visual learners endless flexibility.

Helpful Tools and Methods

  1. Mind Map Apps: Build interactive diagrams that grow with each study session.

  2. Digital Flashcards: Use color, icons, and images for fast recall drills.

  3. Slide Creation: Turn lessons into slide decks with bullet visuals or infographics.

  4. Tablet Notes: Stylus-based apps allow sketching diagrams directly into your notes.

The goal is not to use more tools, but to use tools that align with how you visualize information naturally.

Step 8: Use Real-World Visual Memory Anchors

Anchoring means connecting abstract concepts to real-world images your brain already knows.

Examples of Anchors

  • Shapes and Symbols: Remember “circular economy” by picturing a recycling loop.

  • Landmarks or Objects: Imagine historical events happening in familiar locations.

  • Color Stories: Associate each topic with a color and a scene — for example, “green” for biology, paired with images of forests or leaves.

These visual anchors make recall smoother and faster.

Step 9: Practice Visualization as a Skill

Visualization isn’t just passive — you can strengthen it deliberately.

Daily Visualization Exercise

  1. Close your eyes and picture a page of notes.

  2. Try to “see” where each key term or image was located.

  3. Recreate it mentally, adding color and movement.

  4. Open your eyes and compare your mental image to the real one.

Practicing this a few minutes daily improves both spatial and memory accuracy.

Step 10: Combine Visual Learning with Other Styles

Even if you’re a visual learner, mixing styles helps balance retention.

How to Blend Methods

  • Auditory: Explain visuals aloud to reinforce memory.

  • Kinesthetic: Redraw or rearrange diagrams manually.

  • Reading/Writing: Summarize visuals into short written outlines.

Combining methods makes knowledge more flexible — adaptable under different exam conditions.

Common Mistakes Visual Learners Should Avoid

  1. Overdecorating Notes: Too many colors or symbols can overwhelm instead of clarify.

  2. Ignoring Text Altogether: Some subjects still require detailed reading for context.

  3. Relying Only on Neatness: Beautiful notes aren’t enough; understanding comes first.

  4. Not Reviewing Visuals Regularly: Visual memory fades without repetition.

  5. Skipping Active Recall: Looking at visuals alone doesn’t guarantee retention — testing yourself does.

The key is balance — clarity without clutter.

Sample Study Flow for Visual Learners

Here’s an example of how to structure a study session using everything covered above.

  1. Preview (10 minutes): Skim material and highlight key headings.

  2. Visual Creation (30 minutes): Draw diagrams, color-code notes, and build mind maps.

  3. Active Recall (20 minutes): Cover visuals and test yourself.

  4. Review (10 minutes): Summarize with quick sketches or rewrite key diagrams from memory.

  5. Reflection (5 minutes): Write down what visuals helped most and what to adjust next time.

Repeating this flow across subjects ensures both comprehension and recall improve week by week.

The Power of Visual Study Templates

Having structured templates saves time and brings consistency. Create or print blank versions of:

  • Mind map outlines

  • Timeline charts

  • Diagram grids

  • Cornell visual note sheets

Keep them ready so you can jump straight into visualizing instead of spending time formatting.

Putting It All Together

Being a visual learner isn’t about decorating notes — it’s about seeing meaning. When you convert abstract information into shapes, colors, and patterns, you give your brain something concrete to work with. The process builds not just memory but understanding.

By combining color-coded notes, diagrams, mind maps, and spaced repetition, you’ll create a system that helps you learn efficiently and remember confidently.

So next time you sit down to study, don’t just read — see what you’re learning. Turn words into images, connections into maps, and knowledge into something you can visualize with ease.

Your mind already thinks in pictures — now it’s time to study in them too.

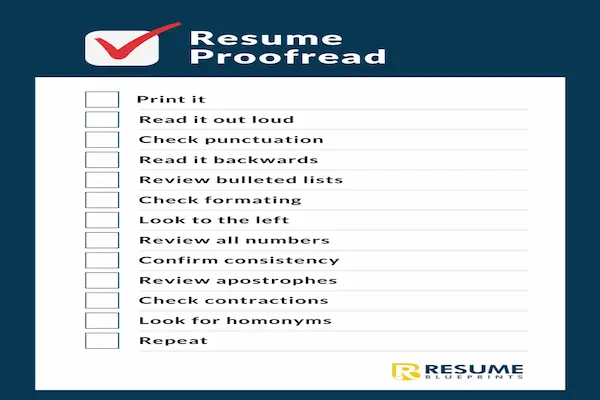
Quick Resume Proofreading Checklist for a Flawless Finish

Before you hit “submit” on that job application, take one last look at your resume.

Tiny errors can quietly undo hours of hard work, no matter how impressive your experience might be. Hiring managers scan dozens — sometimes hundreds — of applications, and even one misplaced comma, inconsistent font, or typo can give the impression that you rush through details. That’s why using a resume proofreading checklist quick and efficient is a game changer.

This complete, 3,500-word guide gives you a structured, time-saving approach to proofreading. You’ll learn how to spot the most common resume mistakes, format for clarity, and apply a 20-point checklist that ensures your resume looks sharp, credible, and ready for any recruiter’s review. We’ll also walk through a sample “before and after” section to show how small improvements transform your entire presentation.

By the end, you’ll have a simple system to check any resume in 10 to 15 minutes — saving time, boosting confidence, and improving your chances of landing that interview.

Why Proofreading Matters More Than You Think

When you’re deep into writing, it’s easy to miss small details. Your brain fills in the gaps automatically, reading what it expects instead of what’s actually on the page. That’s why even the most capable job seekers make tiny errors that slip by unnoticed.

What Proofreading Does for You

  1. Prevents Embarrassing Mistakes: A single typo in your contact info or job title can derail an application.

  2. Shows Professionalism: A polished resume signals attention to detail and credibility.

  3. Improves Readability: Clean formatting and consistent tone help recruiters process information faster.

  4. Supports Your Confidence: When you know your resume is error-free, you can apply with less anxiety.

  5. Sets You Apart: Many candidates don’t review carefully — yours will stand out as more polished and intentional.

Proofreading isn’t just about fixing grammar. It’s about ensuring your resume communicates reliability and precision — two traits every employer values.

Quick Prep: Get Ready to Proofread

Before jumping into the checklist, create the right setup. Proofreading requires focus and a bit of distance from your writing.

Preparation Steps

  1. Take a Break: Step away from your resume for at least an hour before proofreading. This resets your focus.

  2. Print It Out: Reading on paper reveals spacing, alignment, and visual issues you might miss on screen.

  3. Read Aloud: Hearing each word slows your pace and highlights awkward phrasing.

  4. Change the Format: View your resume in a different font or size temporarily to spot inconsistencies.

  5. Use a Quiet Setting: Minimize distractions — proofreading is about small details that need your full attention.

The 20-Point Resume Proofreading Checklist Quick

Use this list as your go-to system every time you update your resume. Each point ensures your content, tone, and layout meet professional standards.

Section 1: Basic Information

  1. Check Your Name and Contact Details: Verify your phone number, email, and location are correct and current. Even one digit off can cost opportunities.

  2. Use a Professional Email Address: Avoid casual usernames; stick to versions like firstname.lastname@email.com.

  3. Include Updated Links (if relevant): Review your LinkedIn, portfolio, or online profiles for accuracy and alignment with your resume.

Section 2: Grammar and Spelling

  1. Run a Spell Check — But Don’t Rely Solely on It: Automated tools miss context errors like “manger” instead of “manager.”

  2. Watch for Common Confusions: Double-check words like “there/their/they’re,” “your/you’re,” and “lead/led.”

  3. Check Verb Consistency: Past roles should use past tense; current roles should use present tense.

  4. Avoid Repetition: Replace repetitive verbs (“managed,” “handled”) with varied, action-oriented alternatives.

  5. Eliminate Filler Words: Cut vague terms like “responsible for,” “helped with,” or “worked on.” Replace with strong verbs like “coordinated,” “developed,” or “executed.”

Section 3: Formatting and Layout

  1. Maintain Consistent Fonts and Sizes: Stick to one or two fonts. Use clear, readable styles like Arial, Calibri, or Helvetica.

  2. Align Dates and Job Titles: Keep formatting uniform across all sections. Dates should align right or left consistently.

  3. Use Consistent Bullet Points: Choose one style (dots, dashes, or circles) and apply it throughout.

  4. Check Margins and Spacing: Ensure equal padding around all edges and consistent line spacing.

  5. Review Section Headers: Make sure your “Experience,” “Education,” and “Skills” headers use identical formatting.

Section 4: Clarity and Tone

  1. Simplify Sentences: Each bullet should express one clear achievement or responsibility. Avoid overly complex phrasing.

  2. Quantify When Possible: Replace generic statements with measurable results — for example, “increased sales by 15%” instead of “improved sales.”

  3. Ensure Objectivity: Keep the tone factual, not self-promotional. Avoid phrases like “the best” or “outstanding.”

  4. Eliminate Personal Pronouns: Never use “I,” “me,” or “my.” Resume language stays impersonal and professional.

Section 5: Content Accuracy

  1. Verify Company Names and Job Titles: Small spelling errors here can make recruiters doubt your attention to detail.

  2. Check Dates for Overlap: Ensure start and end dates follow logical order. Gaps or overlaps should be intentional and explainable.

  3. Confirm Education and Certifications: Make sure listed credentials match official names and dates exactly.

Once you’ve gone through all 20 points, take a short break, then do a final pass to catch anything your brain might still gloss over.

Common Resume Mistakes and How to Fix Them

Even polished professionals make small but recurring errors. Recognizing them early keeps your resume clean.

1. Overcrowded Layouts

Packing too much information on one page makes it unreadable. Use white space strategically — a balanced layout looks cleaner and more professional.

2. Inconsistent Formatting

Switching fonts, bullet styles, or capitalization patterns can distract recruiters. Keep consistency throughout.

3. Typos in Job Titles

Words like “Manger” instead of “Manager” slip through spell check. Always read job titles slowly.

4. Misaligned Dates or Text

Check alignment in every section. Uneven spacing or indents make a resume look rushed.

5. Overuse of Buzzwords

Words like “synergy,” “dynamic,” and “results-driven” have lost impact. Replace them with specific achievements.

6. Weak Verbs

Strong action verbs make each bullet more persuasive. Start with words like “led,” “created,” “implemented,” or “optimized.”

7. Using Full Paragraphs

Recruiters scan quickly. Use concise bullet points — no walls of text.

8. Outdated Information

Remove old jobs, irrelevant coursework, or outdated skills like “MS-DOS.” Keep it focused on what adds current value.

How to Proofread Formatting Efficiently

Formatting consistency makes your resume look intentional. Even if your content is perfect, sloppy design can weaken the impression.

Quick Formatting Audit

  • Print your resume and look at it from a distance — does it appear balanced?

  • Check if bullet points align perfectly under each job entry.

  • Ensure there’s equal spacing before and after section headers.

  • Verify page breaks — never split job entries between pages.

  • Keep page length appropriate: one page for early careers, two for experienced professionals.

Formatting should feel invisible — it supports the content without drawing attention to itself.

resume proofreading checklist quick

Quick Visual Proofreading Trick

Reading backward is one of the fastest ways to catch small errors. Start from the bottom line of your resume and move upward, one line at a time. This technique breaks your brain’s rhythm, forcing it to notice spelling issues that it would normally skim over.

Alternatively, try covering lines with a sheet of paper and reveal them one by one. Slowing down your visual intake drastically increases accuracy.

Polishing Language for Professional Tone

Great resumes balance clarity and professionalism without sounding stiff or robotic.

Tips for Polished Writing

  1. Focus on Results: Instead of listing tasks, highlight accomplishments.

    • Weak: “Responsible for managing customer accounts.”

    • Strong: “Managed 50+ customer accounts, achieving 95% retention rate.”

  2. Use Parallel Structure: Keep the same grammatical form for bullet points.

    • Example: “Designed marketing campaigns, tracked metrics, and improved engagement.”

  3. Eliminate Redundant Phrases: Drop phrases like “in order to” or “due to the fact that.” Simpler is stronger.

  4. Keep It Active: Avoid passive verbs. Instead of “was involved in,” use “collaborated on.”

The Before-and-After Example

Here’s how a few subtle edits can transform one section of your resume from average to professional.

Before

Customer Service Representative

  • Responsible for handling customer calls.

  • Helped with complaints and billing questions.

  • Worked on tracking orders in system.

  • Sometimes trained new employees.

After

Customer Service Representative

  • Handled 40+ customer calls daily, resolving issues with empathy and efficiency.

  • Addressed billing discrepancies, ensuring accurate account adjustments.

  • Managed order tracking system updates, improving accuracy by 20%.

  • Trained five new employees on company protocols and communication best practices.

The difference lies in precision, quantification, and tone. The revised version is confident, concise, and achievement-focused — the hallmarks of a polished resume.

Extra Tips for a Final Review

Before saving and sending your resume, finish with these last few checks.

  1. Save as PDF: Prevent formatting from changing when opened on another device.

  2. Name Your File Clearly: Use “Firstname_Lastname_Resume.pdf.”

  3. Print a Test Copy: Ensure everything aligns properly on paper.

  4. Check Contact Info Again: Always confirm your phone number and email.

  5. Read It Once More the Next Day: A fresh look often reveals tiny details you missed.

Building a Proofreading Routine

Proofreading isn’t just for your first draft — it’s a habit that keeps your resume updated and reliable.

Maintenance Plan

  • After Each Job Change: Update your achievements immediately while they’re fresh.

  • Every Three Months: Review for formatting, contact info, and skill relevance.

  • Before Major Applications: Use the 20-point checklist to finalize your version.

By maintaining a rhythm, you’ll never feel rushed before a big opportunity.

Key Takeaways

A polished resume doesn’t come from luck — it comes from methodical care. Using this resume proofreading checklist quick, you can confidently ensure that every detail reflects accuracy, professionalism, and attention to detail.

Remember:

  • Small mistakes create big impressions — positive or negative.

  • Consistency in style builds credibility.

  • Precision shows pride in your work.

When your resume looks and reads flawlessly, recruiters focus on your strengths, not your spelling. The time you spend proofreading isn’t just about correcting typos — it’s about presenting yourself as someone who values excellence in every task.

So, print your checklist, take a deep breath, and give your resume one more careful read. That extra five minutes could make the difference between being overlooked and being called in for the interview you deserve.

Simple Meal Prep for Beginners: Easy, Safe, and Time-Saving Tips

Modern life moves fast, and between work, errands, and everything else demanding attention, finding time to cook balanced meals every day can feel nearly impossible.

You might start the week with good intentions, but by Wednesday, takeout menus or frozen dinners start to look like the only realistic options. The solution isn’t to cook more often — it’s to cook smarter. That’s where simple meal prep for beginners comes in.

Meal prep isn’t just for athletes or culinary enthusiasts; it’s a practical system that helps anyone eat better, save money, and reduce stress during busy weeks. By setting aside a small window of time once or twice a week to plan, batch cook, and safely store your food, you can create nourishing meals that are ready when you are.

This complete 3,500-word guide will walk you through meal prep step by step, showing you how to build three beginner-friendly plans, organize shopping efficiently, handle ingredients safely, and store meals properly. By the end, you’ll have a simple system to keep your fridge organized, your budget in check, and your meals healthy and satisfying — even on your busiest days.

Understanding the Basics of Meal Prep

Before diving into recipes and storage containers, it’s essential to understand what meal prep really means. At its core, meal prep is about preparation and planning — taking time once or twice a week to prepare ingredients or fully cooked meals in advance.

The Three Common Types of Meal Prep

  1. Batch Cooking: Making large quantities of one dish and dividing it into multiple servings for the week.

  2. Ingredient Prep: Washing, chopping, and portioning out ingredients (like vegetables, grains, and proteins) so they’re ready for quick cooking later.

  3. Full Meal Assembly: Pre-cooking entire meals that only need reheating before eating.

Each style has benefits depending on your schedule and cooking comfort level. Beginners often start with ingredient prep, then gradually move to full meals once they feel confident with timing and food safety.

Why Meal Prep Is Worth Trying

Meal prep isn’t just a time-saver — it’s a mindset shift toward simplicity and better health.

Key Benefits

  1. Saves Time: Instead of cooking every night, you reheat or quickly assemble prepped ingredients.

  2. Reduces Waste: You buy only what you need, store it correctly, and use it efficiently.

  3. Saves Money: Home-cooked meals cost far less than takeout or daily lunches.

  4. Encourages Balanced Eating: Having pre-made healthy options reduces impulse snacking.

  5. Minimizes Decision Fatigue: You always know what’s for dinner, removing the daily “what should I cook?” question.

Even one or two weeks of consistent meal prep can make you feel more organized, relaxed, and in control of your nutrition.

Setting Up for Success: Tools and Equipment

You don’t need fancy gadgets or professional equipment to meal prep effectively — just a few sturdy basics.

Essential Tools

  • Sharp Knife and Cutting Board: For chopping fruits, vegetables, and proteins efficiently.

  • Measuring Cups and Spoons: For consistent portion sizes and recipe accuracy.

  • Large Pots and Pans: Especially one deep skillet and a medium saucepan for batch cooking.

  • Mixing Bowls: For marinating, mixing salads, or tossing roasted vegetables.

  • Storage Containers: Choose airtight, microwave-safe containers in multiple sizes. Glass works best for durability, but BPA-free plastic also works.

  • Labels or Tape: Mark dates and contents to track freshness.

Once you’ve gathered your tools, clear a bit of counter space — meal prep goes more smoothly when you can move freely and keep ingredients organized.

Step-by-Step: How to Start Meal Prepping

Step 1: Choose Your Prep Day

Pick one or two days each week when you have at least one to two hours free — usually Sunday and Wednesday work well. Consistency builds the habit.

Step 2: Plan Your Meals

Select recipes that share ingredients and store well for several days. Think of meals you already enjoy — pasta, rice bowls, soups, or roasted vegetables — and build from there.

Step 3: Create a Shopping List

Write down everything you need for the week. Group items by category:

  • Produce: Vegetables, fruits, herbs.

  • Proteins: Chicken, beans, tofu, eggs.

  • Grains: Rice, pasta, oats, quinoa.

  • Dairy or Alternatives: Yogurt, cheese, milk.

  • Pantry Staples: Olive oil, spices, sauces, canned goods.

This structure speeds up shopping and prevents impulse buys.

Step 4: Prep Ingredients Safely

Before you begin cooking, wash your hands thoroughly, sanitize surfaces, and separate raw proteins from other foods to prevent cross-contamination.

Step 5: Cook in Batches

Use the oven, stovetop, or slow cooker to prepare multiple items simultaneously. Roast vegetables while boiling rice or baking chicken. Efficiency is key.

Step 6: Cool and Store Properly

Let cooked food cool for about 30 minutes before sealing it in containers. Store meals in the fridge if you’ll eat them within four days, or freeze portions for longer storage.

Step 7: Label and Organize

Label each container with the dish name and prep date. Store meals by category: lunches on one shelf, dinners on another, snacks in a drawer.

Food Safety and Storage Times

Safe storage is the foundation of successful meal prep. Even the most delicious recipe loses its value if it isn’t stored properly. Knowing how long different foods last in the fridge or freezer helps you plan smarter and prevents waste.

Fridge Storage Guidelines

Most cooked foods stay fresh for about three to five days when kept in airtight containers and stored at a consistent, cold temperature. Here’s what you should keep in mind:

  • Cooked meats and poultry stay good for about three to four days.

  • Cooked rice, pasta, and grains can last four to five days if sealed well and kept cool.

  • Cooked vegetables usually remain safe for three to five days.

  • Soups and stews should be eaten within three to four days.

  • Salads with dressing are best within one to two days since moisture softens greens quickly.

  • Hard-boiled eggs keep well for up to a week when left in their shells.

  • Cut fruits such as melons, berries, or pineapple should be eaten within three to four days.

As a general rule, when in doubt, throw it out. Trust your senses — any change in smell or texture means it’s time to discard the item.

Freezer Storage Guidelines

Freezing extends the shelf life of your prepped meals significantly. Just make sure you cool cooked food completely before freezing, and always label each container with the date.

Here’s how long you can safely store common items in the freezer:

  • Cooked meats and poultry keep for two to six months.

  • Cooked grains or beans remain good for about three months.

  • Soups, stews, and chili can be stored for two to three months.

  • Casseroles, lasagna, or baked pasta dishes stay fresh for roughly two to three months.

When you’re ready to use frozen food, thaw it in the refrigerator overnight instead of leaving it at room temperature. This prevents bacterial growth and keeps the texture of your food more consistent. Always reheat meals until they are hot throughout — steaming or bubbling ensures safety.

simple meal prep for beginners

Three Beginner Meal Prep Plans

Each plan below includes easy recipes, practical shopping ideas, and step-by-step guidance for one week. Adjust portion sizes based on your household or appetite.

Plan 1: The Quick and Easy Starter

Perfect for: beginners with limited time and minimal cooking experience.

Focus: no-fuss, 20–30-minute recipes using common ingredients.

Sample Menu

  • Breakfasts: Overnight oats with fruit and yogurt.

  • Lunches: Chicken and vegetable wraps.

  • Dinners: One-pan roasted chicken, potatoes, and broccoli.

  • Snacks: Cut veggies with hummus or trail mix.

How to Prep

  1. Cook a batch of chicken breasts and roasted vegetables on Sunday.

  2. Mix overnight oats for three mornings ahead.

  3. Portion everything into containers.

  4. Keep snacks portioned in small bags for grab-and-go convenience.

Shopping List

  • Rolled oats, milk, fruit, yogurt

  • Chicken breasts, potatoes, broccoli

  • Whole-grain wraps, lettuce, carrots, hummus

  • Nuts, seeds, or trail mix ingredients

Plan 2: The Balanced Weekly Plan

Perfect for: busy workers who want variety but still value simplicity.

Focus: balanced meals with proteins, grains, and colorful vegetables.

Sample Menu

  • Breakfasts: Hard-boiled eggs and fruit.

  • Lunches: Rice bowls with grilled chicken, beans, and roasted vegetables.

  • Dinners: Turkey chili or lentil stew.

  • Snacks: Greek yogurt with honey or mixed nuts.

How to Prep

  1. Boil rice and cook turkey or lentils at the same time.

  2. Roast a tray of vegetables — zucchini, carrots, bell peppers.

  3. Prepare chili or stew in a slow cooker.

  4. Store portions in individual containers with labels.

Shopping List

  • Rice, lentils, or quinoa

  • Ground turkey or canned beans

  • Mixed vegetables, onions, garlic

  • Greek yogurt, honey, fruit

  • Olive oil, salt, pepper, and spices

Plan 3: The Freezer-Friendly Plan

Perfect for: anyone who prefers prepping once every two weeks.

Focus: large batches of meals that freeze well and reheat perfectly.

Sample Menu

  • Breakfasts: Freezer smoothie packs (blend with milk when ready).

  • Lunches: Veggie and chicken stir-fry with brown rice.

  • Dinners: Baked casseroles or lasagna.

  • Snacks: Homemade muffins or energy balls.

How to Prep

  1. Make double batches of each dish.

  2. Portion meals into freezer-safe containers.

  3. Label clearly with names and dates.

  4. Freeze meals flat when possible to save space.

Shopping List

  • Frozen mixed vegetables, chicken thighs, brown rice

  • Pasta, tomato sauce, cheese

  • Bananas, spinach, berries (for smoothies)

  • Oats, peanut butter, honey (for energy balls)

Reheating Tips

  • Defrost meals overnight in the fridge.

  • Reheat in the microwave or oven until piping hot.

  • Avoid refreezing previously thawed food.

Smart Batch Cooking Tips

Batch cooking turns an afternoon of effort into an entire week of convenience.

Techniques to Save Time

  1. Cook Multiple Items at Once: Use all burners and the oven simultaneously.

  2. Double Up on Ingredients: Prepare two proteins with similar seasoning to create variety.

  3. Use Sheet Pans: Roast multiple vegetables together — just separate by cooking time.

  4. Plan Reusable Components: Cook grains, proteins, or sauces that work across different meals.

Example:

A large batch of grilled chicken can be used for wraps, salads, rice bowls, and soups throughout the week.

Safe Storage and Reheating Tips

Food safety is key in meal prep. Follow these practices to keep your meals fresh and risk-free.

Cooling and Storing

  • Cool food before sealing containers to prevent condensation.

  • Store meals in shallow containers for faster cooling.

  • Arrange items in the fridge so air can circulate around them.

Reheating

  • Always heat leftovers to at least 165°F (74°C).

  • Stir halfway through reheating to distribute heat evenly.

  • Avoid reheating food more than once.

Labeling System

Use a simple labeling method: Date + Dish Name.
For example: “Chicken Rice Bowl – April 10.”

Labels help track freshness and prevent confusion when you prep multiple dishes at once.

Common Meal Prep Mistakes to Avoid

Even small missteps can affect results. Avoid these beginner pitfalls:

  1. Overcooking Everything: Meals that are perfectly fresh may turn mushy when reheated. Slightly undercook vegetables to keep them crisp.

  2. Ignoring Portion Sizes: Overfilling containers can lead to waste. Use balanced portions instead.

  3. Skipping Cooling Time: Hot food sealed too soon spoils faster.

  4. Lack of Variety: Eating the same meal daily leads to boredom. Rotate sauces, spices, or side dishes.

  5. Unclear Labels: Forgetting dates means guessing freshness — risky and wasteful.

Meal prep works best when approached with patience and mindfulness. Small improvements make a big difference over time.

How to Make Meal Prep a Habit

The key to success is turning prep into a routine rather than an occasional project.

Weekly Routine Example

  1. Friday: Plan meals and write a shopping list.

  2. Saturday: Shop for groceries and clean produce.

  3. Sunday: Cook, portion, and store meals.

  4. Midweek: Review what’s left, refresh ingredients, and repeat smaller batches if needed.

Over time, this rhythm becomes second nature, saving hours each week and simplifying decision-making.

Final Thoughts: Making Meal Prep Work for You

Starting simple meal prep for beginners doesn’t require a complete lifestyle overhaul. It’s about consistency, safety, and practicality — taking small steps that fit your reality. By following the five steps of planning, shopping, prepping, cooking, and storing mindfully, you’ll gradually transform how you eat and manage your time.

Each week becomes smoother, meals feel easier, and your confidence grows. Whether you’re packing lunches, cooking for a family, or just trying to eat better on a tight schedule, meal prep turns chaos into calm, one container at a time.

So, clear your counter, set your timer, and start small. With the right habits, your kitchen becomes not just a place to cook — but a foundation for health, energy, and balance.

How to Remember Names: Simple Steps for Better Recall

We’ve all been there, you meet someone new, exchange a pleasant introduction, and within seconds, the name slips away like sand between your fingers.

You smile politely, nod along, and hope that someone else will mention it before the conversation ends. Forgetting names happens to everyone, but when it occurs often, it can create frustration and even embarrassment, especially in professional or social situations where remembering names builds trust and rapport.

The good news is that anyone can improve their ability to recall names. With practice, patience, and a few gentle strategies, you can train your brain to connect faces and names more naturally. This guide on how to remember names offers a simple five-step method, practical drills, and polite recovery tactics for when memory fails. You’ll also learn what habits quietly block recall and how to strengthen your social confidence with genuine attention.

Why We Forget Names So Easily

Before learning how to fix the problem, it helps to understand why it happens in the first place. Forgetting names isn’t necessarily a sign of poor memory — it’s usually about attention.

The Real Reasons Behind Name Forgetting

  1. Divided Attention: During introductions, people often focus on what to say next instead of listening carefully.

  2. Lack of Association: Names are arbitrary sounds unless linked to something meaningful.

  3. Stress or Self-Consciousness: When you feel nervous, your brain prioritizes comfort over retention.

  4. Overload of Information: Meeting several people at once floods your short-term memory.

  5. No Repetition: Without repeating or mentally reinforcing a name, it fades quickly.

By addressing these simple issues with awareness and structure, you can transform an awkward moment into an opportunity for authentic connection.

The Five-Step Method to Remember Names

The following five-step approach blends mindfulness, memory science, and social etiquette. It’s designed for anyone — from hospitality workers to managers to event attendees — who wants to feel more confident remembering names.

Step 1: Listen Like You Mean It

When someone introduces themselves, stop thinking about your response and focus entirely on the name. Listening attentively is the first act of respect and memory.

  • Make eye contact when they say their name.

  • Repeat it silently to yourself once or twice.

  • Avoid interrupting with immediate comments; just receive the information fully.

When you slow down enough to really hear the name, your mind has time to register it.

Step 2: Repeat the Name Out Loud Naturally

Using the name in conversation reinforces it immediately. This simple step helps transfer the name from short-term to active memory.

Example:

  • “It’s nice to meet you, Angela.

  • “So, Mark, how long have you been with the company?”

You can repeat it again when leaving:

  • “Great talking with you, Mark. Hope to see you again soon.”

This repetition doesn’t sound forced when spoken warmly. It also signals attentiveness — people appreciate being addressed by name.

Step 3: Create a Mental Link or Image

Associating the name with something familiar makes it easier to retrieve later. Your brain stores images and connections better than abstract words.

Here are some ways to build associations:

  1. Visualize: Connect the name to a mental picture. For example, imagine Rose holding a flower or Mr. Brown wearing a brown jacket.

  2. Rhyme or Sound Clue: Use a light rhyme or sound-alike cue — “Dan drives a van” or “Lilly loves lilies.”

  3. Personal Connection: Link the person to someone you already know with the same name — “He reminds me of my cousin Alex.”

  4. Meaning or Character Trait: Notice a personality feature or expression that matches the sound or tone of their name.

The goal isn’t to overthink — just one mental hook makes recall faster later.

Step 4: Reinforce the Name Through Context

Your brain remembers details best when they’re tied to real situations or conversations. Keep using the name as naturally as possible throughout interactions.

Practical Ways to Reinforce:

  • Write the name in your notes or on a contact list immediately after meeting.

  • Mentally review who you met at the end of each day.

  • If you’re at an event, recall the name each time you spot the person again.

Even subtle repetition during the first few hours cements the connection far better than waiting until days later.

Step 5: Review and Recall Later

The last step is active recall — revisiting what you’ve learned before it fades. That short review anchors the name in long-term memory.

Try this mini routine:

  1. At the end of the day, list everyone you met.

  2. Visualize each face and repeat the name aloud.

  3. If you struggle, look back at any notes or business cards briefly.

  4. Test yourself again the next day without prompts.

The combination of immediate repetition and later recall solidifies the name naturally, making it available when you need it most.

Practice Drills to Strengthen Name Recall

Building memory for names is like exercising a muscle — short, consistent practice yields better results than cramming.

Drill 1: Name and Face Flashbacks

Whenever you meet someone, challenge yourself to recall their name later that day. If you can remember the name 6–8 hours later without reminders, you’re strengthening recall duration.

Drill 2: Event Recap Exercise

After any meeting or social event, write down:

  • Who you met

  • One visual detail about them

  • The topic you discussed

Reviewing this list weekly improves retention for both names and contextual details.

Drill 3: Digital Review

If your work involves many new people, store names with brief cues in your contacts — for instance, “Maria – client from Friday meeting, loves hiking.” Reviewing once a week helps fix them in memory without feeling forced.

Drill 4: Association Memory Game

Pick a list of 10 random names and assign imaginary faces or features to them. Practicing this visualization sharpens your ability to form connections quickly when meeting real people.

Drill 5: Conversation Reinforcement

During small talk, say the person’s name naturally every few minutes. Use it in both greetings and farewells. This small repetition rhythm feels friendly and boosts memory.

How to Recover Gracefully If You Forget

Even with preparation, names occasionally slip away. What matters most is how politely and confidently you handle it.

Gentle Recovery Lines

  1. “I’m so sorry — your name just escaped me for a moment. Could you remind me?”

  2. “Please forgive me, I’m still learning names today.”

  3. “I remember your face so well, but your name isn’t coming to me — could you help me out?”

Said with warmth and a smile, these lines show humility, not carelessness. Most people respond kindly because they’ve been in the same situation themselves.

Backup Techniques

  • If you’re in a group, introduce yourself again — it often prompts others to reintroduce themselves.

  • Listen carefully to how others address the person; you might catch the name naturally.

  • If it’s a formal setting, discreetly check an attendee list, badge, or seating chart.

The goal isn’t perfection but connection — and sincere effort leaves a lasting impression.

Etiquette for Using Names in Conversation

Names can strengthen rapport when used thoughtfully, but overusing them can sound artificial. The key is moderation and tone.

Polite Name Usage Tips

  1. Use Names Sparingly: Once at the start, occasionally during conversation, and again at farewell is ideal.

  2. Mind Pronunciation: If unsure, ask politely, “Am I saying your name correctly?” This shows respect.

  3. Acknowledge Cultural Differences: Some cultures prefer titles or honorifics first; observe cues before switching to first names.

  4. Respect Privacy: Avoid using someone’s name loudly in public or professional spaces if the context feels private.

Handled with courtesy, remembering and using names communicates genuine attention — a rare trait that elevates your presence in any setting.

Common Pitfalls That Weaken Memory

Avoiding these simple mistakes will keep your memory sharper and your interactions smoother.

  1. Pretending to Remember: Guessing a name or covering up confusion risks embarrassment later. Honesty is always better.

  2. Rushing Introductions: If you’re distracted during a first meeting, the name won’t register. Take that brief moment to pause and listen fully.

  3. Information Overload: Trying to memorize multiple names at once without context often fails. Focus on two or three at a time.

  4. Negative Self-Talk: Telling yourself you’re “bad with names” becomes a self-fulfilling habit. Replace it with, “I’m learning new names each day.”

  5. Skipping Review: Without revisiting names after initial meetings, even strong recall fades. Daily or weekly reviews are essential.

Awareness of these habits helps prevent small memory lapses from snowballing into awkward situations.

how to remember names

Expanding the Skill: Social and Professional Benefits

Learning how to remember names goes far beyond avoiding embarrassment — it’s a cornerstone of social intelligence and professionalism.

Benefits of Strong Name Recall

  1. Improved Relationships: Remembering someone’s name makes them feel seen and valued.

  2. Increased Trust: It signals attentiveness and reliability in business or community settings.

  3. Better Networking: People respond more warmly when they feel personally acknowledged.

  4. Higher Confidence: Knowing you can remember names reduces social anxiety and hesitation.

  5. Positive Reputation: Consistent courtesy makes you stand out as thoughtful and genuine.

In short, remembering names is not about memorization — it’s about presence.

A Short Daily Routine to Build Long-Term Recall

To make these skills stick, consistency matters more than complexity. Try dedicating five minutes a day to memory reinforcement.

Daily Routine Example

  1. Morning: Recall three people you met recently and visualize their faces.

  2. Afternoon: Practice one association drill — linking names with images.

  3. Evening: Write down any new names learned during the day and review before bed.

These micro-practices keep your memory flexible and responsive, gradually turning name recall into a habit rather than a task.

How to Apply This Skill in Group Settings

Large events or busy workplaces can make remembering names feel impossible, but structure helps.

Strategies for Crowded Environments

  1. Start Small: Focus on remembering one or two names at a time instead of trying to memorize everyone immediately.

  2. Use Visual Cues: Pay attention to badges, uniforms, or seating positions — these help anchor associations.

  3. Group Recap: After meetings, note where people sat or what they contributed; the context strengthens memory.

  4. Follow-Up Quickly: Send a thank-you or follow-up note using names soon after introductions — this reinforces recall.

These habits keep your attention intentional even in fast-paced, high-contact roles.

How to Make Forgetting Less Stressful

Even memory experts forget sometimes. The trick is to treat forgetfulness with calm curiosity instead of frustration.

Gentle Mindset Shifts

  • Stay Present: Focus on the conversation rather than panicking about the forgotten name.

  • Practice Self-Forgiveness: Everyone forgets; how you recover defines your professionalism.

  • Learn from Each Slip: Ask yourself afterward what distracted you and how to adjust next time.

By replacing self-criticism with awareness, you turn every forgotten name into another step toward improvement.

Reflection Prompts for Better Memory Awareness

To deepen your learning, spend a few minutes reflecting after social interactions.

Useful Questions

  1. Did I genuinely listen during introductions, or was I distracted?

  2. What mental image or phrase could help me recall each person’s name next time?

  3. How did using someone’s name affect the tone of our conversation?

  4. What can I do tomorrow to practice this skill naturally?

Reflection transforms techniques into habits by bringing mindfulness into every encounter.

The Polite Power of Names

A name is often the first personal gift someone offers you in conversation — and remembering it is one of the simplest ways to show respect. Practicing how to remember names isn’t about memory tricks alone; it’s about slowing down, listening deeply, and caring enough to make someone feel known.

By using the five-step method — listening, repeating, associating, reinforcing, and reviewing — you’ll start noticing results within days. Add polite recovery lines for those rare forgetful moments, and your confidence will grow naturally.

When people feel remembered, they feel valued. And when you value others through something as small as remembering their name, you transform everyday interactions into lasting connections.

How to make the stove sparkling with vinegar?

stove sparkling with vinegar

Want to learn how to leave the stove shining? There are a few concoctions you can make with vinegar that are great for keeping your stovetop clean.

After all, he sautés from here, fries a chicken there, cooks the meat from there and so the stove gets dirty. So when you are surprised, the situation is out of control, isn’t it?

So, knowing how common this happens, here are some simple tips on how to leave the stove shining with vinegar. Follow below! How to make the stove sparkling with vinegar? Tips!

Vinegar and neutral detergent

This is a powerful mix, great for removing those stains that just won’t go away. So, to make it, you will need:

  • 1 tablespoon alcohol vinegar;
  • 1 spoon of neutral detergent.

So, mix the two ingredients well and moisten a cloth with this mixture. Then rub all over the stove, letting it act for about 2 minutes.

After that time, you just need to pass a new cloth, now dry and clean, to remove the product and prevent it from getting stains. Once this is done, your stove will be clean and shining.

stove sparkling with vinegar

Baking Soda and Vinegar

If you want a magic recipe to make your stove shine, then you’ll only need two basic ingredients that you probably have at home:

  • Alcohol vinegar;
  • Sodium bicarbonate.

Therefore, to do this cleaning is very simple: spread the alcohol vinegar across the surface of the stove. If the dirt is very impregnated, don’t skimp on the vinegar, agreed?

Then sprinkle baking soda on all parts and let the mixture act for 5 minutes. Now just get a sponge to remove the excess, always passing the soft part of it so as not to scratch the stove.

By doing this, in addition to cleaning your stove, leaving it well sanitized, you will also leave it shiny, as if it were brand new.

White vinegar and lemon

Do not think that the mixtures to leave the stove shining with vinegar are over. Now, vinegar is a very versatile ingredient and when combined with others, it promotes unparalleled cleaning.

So, for this recipe you will need:

  • White vinegar;
  • Hot water;
  • Sodium bicarbonate;
  • Lemon Juice.

So, just make the mixture by adding 500 ml of hot water, baking soda, lemon juice and white vinegar. Now pass this mixture onto a sponge and rub the soft side all over the stove, just be careful not to burn yourself.

Finally, pass a dry cloth to remove excess and see the impressive result of a clean and shiny stove.

Tip: If the burners are very dirty, soak them in this mixture for 5 minutes. After that time, just rub them with steel wool and a dry cloth.

Vinegar and degreaser

When the stove is too dirty, there is no other way out: you will need a degreaser to do this cleaning job more efficiently.

So here you will need:

  • Vinegar;
  • Degreaser or remover.

The idea is not to mix the two, but to apply a degreaser or remover first to remove the excess. Remember to follow the guidelines given by the manufacturer.

Also, to finish, clean with vinegar and sponge. Just apply some vinegar to the soft part of the sponge, then just rub it.

Then finish the cleaning process with a damp or dry cloth. As a result, your stove will shine again.

White vinegar and warm water.

The ideal is not to let the stove arrive in a situation of maximum dirt, as this makes cleaning more time consuming and laborious.

Therefore, the solution of white vinegar with warm water is great for everyday use, as it ensures effective cleaning and prevents the stove from arriving in a very dirty state.

Thus, you will need;

  • 1 spoon of vinegar;
  • Warm water.

In a spray bottle, mix vinegar and warm water. Then spray the mixture on a cloth and pass it on the stove. Finally, wipe with a dry cloth to remove excess.

Tip: Always do this process after cooking, so you keep the stove shining. However, do not forget to wait for the stove to cool down, of course!

stove sparkling with vinegar

How to keep the stove shining?

In addition to using the vinegar solutions shown above to keep your stove always clean and shining, some day-to-day measures help to ensure that this appliance is in good condition. Look!

Clean as soon as you’re done

Accumulated dirt is always harder to get out and ends up causing stains. Therefore, adopt the habit of, when you finish cooking, wait for the stove to cool down and clean it.

Remove grease stains immediately

Prevention is always the best medicine. When noticing that a grease stain has spilled onto the stove, wipe it off immediately with a cloth dipped in vinegar. This will prevent stains from appearing.

Use stove protectors

Finally, another tip that works great to keep the stove shining is to use the protectors, ideal for those who cook daily and want to keep it always clean.

The great advantage of these protectors is that they avoid the contact of fat and other foods directly on the stove, that is, it makes cleaning less laborious.

Of course, they end up hiding the stove, but sometimes using the protectors can help a lot.

Conclusion

Now you know what steps to take to make your stove shine with vinegar. After all, this versatile ingredient combines with several others and promotes a deep cleaning of your appliance.

stove sparkling with vinegar

Also, don’t forget to follow the tips that ensure you keep the stove clean longer and even help with its durability.