Category Archives: Technology

Smart Home Basics for Beginners: Easy, Safe Ways to Get Started

Technology has quietly transformed the way we live, cook, clean, and relax.

What once seemed futuristic — lights that adjust on voice command, thermostats that learn your habits, and doorbells that show who’s outside — is now accessible to anyone with a smartphone and Wi-Fi. But if you’ve ever felt overwhelmed by the idea of setting up a smart home, you’re not alone. Many first-time users worry about complexity, compatibility, or security, yet the truth is that you can start small, stay safe, and enjoy real convenience without needing advanced technical knowledge.

This guide explains smart home basics for beginners — breaking down the essentials into clear, manageable steps. You’ll learn what devices to start with, how automation actually works, what privacy and safety settings to check, and how to build a system that grows over time. Whether you live in a rented apartment or your own house, this is about making your home smarter in simple, practical ways that fit your lifestyle.

Why a Smart Home Doesn’t Have to Be Complicated

A “smart home” simply means your everyday devices — like lights, locks, speakers, and appliances — can connect to the internet or communicate with each other through a central hub or app. Instead of using switches or remotes, you can control them by voice, schedule, or automation.

Benefits of Starting a Smart Home

  1. Convenience: Control multiple devices from your phone or through voice commands.

  2. Energy Efficiency: Smart thermostats and lights adjust automatically to reduce waste.

  3. Security: Cameras, locks, and motion sensors keep you informed about activity at home.

  4. Accessibility: Automations can simplify routines for older adults or those with mobility challenges.

  5. Customization: You set how your environment responds — dimming lights, adjusting music, or controlling temperature hands-free.

Starting with a few devices allows you to build confidence before expanding into full automation.

Step 1: Understand How Smart Home Systems Work

Every smart home setup relies on three main elements — devices, connections, and control platforms. Understanding these basics helps you make smarter buying choices.

1. Devices

These are the physical gadgets that perform functions — smart bulbs, thermostats, plugs, cameras, or speakers.

2. Connections

Devices communicate through Wi-Fi, Bluetooth, Zigbee, or Thread. Most entry-level setups work easily over home Wi-Fi.

3. Control Platforms

A platform or “hub” connects everything under one app or voice assistant, like:

  • Google Home

  • Amazon Alexa

  • Apple Home

  • Samsung SmartThings

Each lets you create “routines” — actions that happen automatically, such as turning off lights when you leave home or adjusting the temperature at night.

Step 2: Start Small — One Device at a Time

Instead of buying everything at once, begin with one or two smart devices that simplify daily routines. Starting small helps you understand setup steps and security options without feeling overwhelmed.

Recommended Starter Devices

  1. Smart Bulbs: Easy to install — just replace your regular bulbs. Control brightness and color through an app or voice.

  2. Smart Plug: Turns any regular appliance (like a lamp or coffee maker) into a controllable device.

  3. Smart Speaker: Acts as both a music system and voice assistant hub.

  4. Smart Thermostat: Learns your schedule and adjusts heating or cooling automatically.

  5. Smart Doorbell or Camera: Adds visibility and security to your entryway.

These entry-level devices work independently or as part of a connected system, giving you flexibility to expand later.

Step 3: Choose Your Smart Home Platform

Your platform is like your home’s digital brain — the system that links all devices and lets you control them together.

Comparison of Common Platforms

  • Amazon Alexa: Great for affordability and wide compatibility.

  • Google Home: Ideal if you already use Android or Google services.

  • Apple Home (HomeKit): Prioritizes privacy and integrates well with iPhones.

  • Samsung SmartThings: Works with a wide range of devices from different brands.

When choosing, think about your existing devices and ecosystem — it’s easiest to start with what you already own.

Step 4: Set Up a Strong Home Network

Smart devices rely on a stable, secure internet connection. Before adding multiple gadgets, make sure your Wi-Fi can handle them.

Network Preparation Checklist

  1. Check Router Range: Ensure all rooms where you’ll install devices have strong signal strength.

  2. Rename Devices Clearly: Use labels like “Kitchen Light” or “Bedroom Plug” for easy control.

  3. Update Firmware: Keep your router and devices updated to close security gaps.

  4. Use a Separate Guest Network: Connect smart devices to a dedicated network separate from personal devices for extra security.

A strong, secure network forms the backbone of every smart home.

Step 5: Learn How to Automate Tasks

Automation is where a smart home truly starts to feel “smart.” Instead of controlling devices one by one, you create simple rules that trigger actions automatically.

Example Automations for Beginners

  1. Morning Routine: Lights brighten gradually, your smart speaker reads the weather, and the coffee maker turns on.

  2. Leaving Home: Motion sensors detect no movement, turning off lights and adjusting the thermostat.

  3. Evening Mode: Lights dim, the door locks, and soft music starts.

  4. Security Alert: If motion is detected outside, the camera records and sends a phone alert.

Automations save time and energy while giving your environment a personalized rhythm.

Step 6: Explore Voice Assistants

Voice assistants like Alexa, Google Assistant, or Siri make smart homes feel effortless. They let you perform tasks without lifting a finger.

Everyday Commands to Try

  • “Turn off all lights.”

  • “Play relaxing music in the living room.”

  • “Set the thermostat to 72 degrees.”

  • “Lock the front door.”

  • “Good morning” (triggers your pre-set routine).

Voice assistants also help visually impaired users and make multitasking easier — a major advantage of smart home tech.

Step 7: Prioritize Safety and Privacy

Smart homes depend on data to function, but privacy should always come first. Taking simple precautions ensures your devices remain secure.

Smart Home Safety Tips

  1. Change Default Passwords: Every device should have a unique password.

  2. Enable Two-Factor Authentication: Adds an extra layer of protection.

  3. Turn Off Microphones When Not in Use: Especially for smart speakers in bedrooms.

  4. Review App Permissions: Only allow access necessary for operation.

  5. Update Regularly: Security patches keep systems protected.

Privacy doesn’t need to be sacrificed for convenience — it’s about awareness and proactive setup.

smart home basics for beginners

Step 8: Organize by Room for Simplicity

Grouping devices by room makes control easier, especially in larger homes or shared spaces.

How to Structure Rooms

  • Living Room: Smart TV, speakers, lights, plugs.

  • Bedroom: Smart bulb, fan plug, alarm routine.

  • Kitchen: Plug for coffee maker, smart display for recipes, motion sensor for lights.

  • Entryway: Smart lock, doorbell camera, motion light.

When you open your smart home app, each room appears separately, so you can adjust quickly without scrolling through dozens of devices.

Step 9: Use Energy Monitoring and Reports

Many smart plugs and thermostats include built-in tracking tools that show how much energy your devices use.

How to Use Energy Data

  1. Review weekly reports in your app.

  2. Identify which devices consume the most power.

  3. Set schedules to reduce unnecessary usage.

  4. Turn off devices completely when idle.

These insights can lead to noticeable savings on energy bills over time.

Step 10: Troubleshooting Common Smart Home Issues

Even simple setups can occasionally face connection or compatibility issues. The key is to troubleshoot systematically.

Common Problems and Fixes

  • Device Won’t Connect: Reboot your router and confirm you’re on the same Wi-Fi network.

  • Voice Commands Not Working: Check naming consistency — “Living Room Light” must match app settings.

  • Slow Response: Reduce the number of simultaneous commands or upgrade your router.

  • Automation Doesn’t Trigger: Review routine settings and ensure sensors are active.

Most problems resolve quickly once you verify your network and app permissions.

Step 11: Expand Gradually

Once you’re comfortable with one or two devices, you can scale up confidently.

Smart Devices to Add Next

  • Smart Sensors: Detect motion, humidity, or open doors.

  • Smart Locks: Secure entryways with codes or fingerprint access.

  • Smart Blinds: Automatically adjust for sunlight or privacy.

  • Smart Appliances: Washers, ovens, or vacuums that run on schedules.

Expanding step-by-step helps maintain organization and prevents device overload.

Step 12: Create “Scenes” for Everyday Moments

Scenes combine multiple devices into one command — perfect for daily routines.

Sample Scenes

  • Movie Time: Lights dim, curtains close, TV turns on.

  • Dinner Mode: Kitchen lights brighten, background music starts.

  • Goodnight: All lights off, doors locked, thermostat adjusts.

Scenes bring convenience and atmosphere, turning ordinary moments into effortless comfort.

Step 13: Maintain Your Smart Home System

Like any technology, smart devices need occasional maintenance to stay efficient and secure.

Monthly Maintenance Routine

  1. Check for Software Updates: Apply updates promptly.

  2. Clean Devices Gently: Dust sensors and cameras.

  3. Test Automations: Make sure schedules still match your routine.

  4. Review Access Permissions: Remove outdated user accounts.

A few minutes of maintenance each month prevents bigger issues later.

Step 14: Troubleshooting Wi-Fi Overload

If your network starts lagging after adding several smart devices, your Wi-Fi may be reaching its limit.

How to Optimize Performance

  1. Use a dual-band router (2.4 GHz for devices, 5 GHz for personal use).

  2. Add a Wi-Fi extender for larger homes.

  3. Consider a mesh system for seamless coverage.

  4. Disconnect inactive devices occasionally.

Reliable connectivity ensures your automations stay smooth.

Step 15: Enjoy the Long-Term Benefits

Once your system is running smoothly, the rewards become clear: more time, less hassle, and a sense of control over your home environment.

Long-Term Advantages

  • Reduced energy costs.

  • Increased safety and security.

  • Simplified daily routines.

  • Improved comfort and accessibility.

What started as a few smart bulbs and plugs can grow into a fully personalized home ecosystem — all tuned to your preferences.

Final Thoughts: Smart Homes Made Simple

Starting your smart home basics for beginners journey doesn’t require technical expertise — just curiosity and a few simple steps. By focusing on safety, practicality, and gradual setup, you’ll create an environment that saves time, enhances comfort, and supports your lifestyle.

A smart home isn’t about flashy gadgets — it’s about using technology to make life easier and more intentional. Begin with one device, set it up confidently, and soon you’ll discover how seamlessly your home can adapt to your needs.


Screen Time Limits on Phone: Simple Steps to Cut Distractions

In today’s world, phones are an inseparable part of daily life, they wake us up, guide our commutes, help us work, and keep us entertained.

Yet, what starts as convenience often turns into constant distraction. Many people realize too late that the first and last thing they see every day is their screen. Notifications pile up, apps demand attention, and hours disappear almost unnoticed.

This guide breaks down how to set screen time limits on your phone in a realistic, step-by-step way. You’ll learn how to manage your device, not the other way around — with practical instructions for both iOS and Android, recommended time ranges, and gentle strategies to build healthier habits around technology.

Whether you’re a parent helping your child focus or an adult trying to reclaim attention for meaningful work, this article offers clear steps to help you set limits without guilt or overwhelm.

Why Screen Time Control Matters

Digital devices are designed to capture and keep attention. Every ping, scroll, and refresh creates a loop of short-term reward that can subtly reduce focus, productivity, and even sleep quality over time. Managing screen time isn’t about strict control — it’s about making intentional choices so your phone supports your goals instead of competing with them.

The Real Costs of Excessive Screen Time

  1. Reduced Concentration: Frequent checking fragments attention, making deep work harder.

  2. Poor Sleep: Blue light and late-night scrolling disrupt natural rest cycles.

  3. Emotional Drain: Constant exposure to social feeds can trigger comparison and stress.

  4. Time Loss: Hours slip away in micro-checks that feel harmless individually.

  5. Family Disconnection: Overuse can interfere with relationships and shared moments.

Taking charge of screen habits restores calm and focus. It’s not about restriction — it’s about balance.

Step 1: Understanding Your Current Usage

Before setting any limit, you need clarity on how you actually spend time on your device. Both Android and iOS provide detailed breakdowns of daily and weekly activity.

How to Check Your Screen Time

On iPhone (iOS):

  1. Open Settings.

  2. Tap Screen Time.

  3. Review your Daily Average and Most Used Apps.

  4. Tap See All Activity to view specific usage by category (e.g., social, productivity).

On Android (Digital Wellbeing):

  1. Go to Settings.

  2. Tap Digital Wellbeing & Parental Controls.

  3. View your Screen Time Dashboard.

  4. Check which apps you open most often and how many notifications you receive daily.

Once you know where your time goes, you can set realistic limits that address your biggest distractions.

Step 2: Define Your Screen Time Goals

Before jumping into restrictions, clarify your intention. Ask yourself: What am I hoping to gain by reducing screen time?

Examples of Common Goals

  • More focused work sessions without distractions.

  • Better sleep by cutting late-night scrolling.

  • More time for reading, exercise, or family.

  • Reducing mindless social media use.

Setting a clear purpose helps you stay consistent. You’re not just cutting time — you’re reclaiming it for something better.

Step 3: Set App Limits Strategically

App limits are one of the simplest ways to reduce digital clutter. You decide how long you want to use each app or category, and your phone automatically pauses access once you hit that limit.

How to Set App Limits

On iPhone:

  1. Open Settings → Screen Time.

  2. Tap App Limits → Add Limit.

  3. Choose app categories like Social Networking or Games.

  4. Set daily time limits — start small, such as 30–60 minutes total per day.

  5. Tap Add to confirm.

On Android:

  1. Go to Settings → Digital Wellbeing & Parental Controls.

  2. Tap Dashboard.

  3. Choose the app you want to limit.

  4. Tap App Timer → Set Timer.

  5. Select your daily time allowance and confirm.

Once time is up, the app greys out until the next day — a gentle reminder to take a break.

Step 4: Use Focus or Downtime Modes

App limits help with daily use, but Focus (iOS) or Bedtime Mode (Android) takes it further by silencing notifications during certain hours.

How to Use Focus or Downtime

On iPhone:

  1. Go to Settings → Focus.

  2. Choose from presets like Work, Personal, or Sleep.

  3. Select which apps and contacts can reach you during each mode.

  4. Schedule Focus hours automatically (e.g., 10 p.m. to 7 a.m.).

On Android:

  1. Open Settings → Digital Wellbeing → Focus Mode.

  2. Select distracting apps to pause temporarily.

  3. Set automatic activation times (e.g., work hours or bedtime).

These tools create intentional quiet zones, protecting your focus and rest without requiring willpower every time.

Step 5: Establish Family or Shared Controls (If Needed)

Parents can use built-in tools to help children balance device time safely, while adults can use them to hold themselves accountable through shared reports.

Setting Up Family Screen Time

For iOS Users:

  1. Go to Settings → Screen Time → Family Sharing.

  2. Choose the family member’s device.

  3. Set app limits, content filters, and downtime schedules remotely.

For Android Users:

  1. Install or open Google Family Link.

  2. Connect your child’s device.

  3. Adjust daily time limits and bedtime hours.

  4. View usage summaries weekly.

These features promote healthy tech habits across all ages, fostering open conversations rather than strict enforcement.

Step 6: Define Your Ideal Time Ranges

Not everyone needs the same level of restriction. Balance comes from setting limits that align with your lifestyle.

Suggested Screen Time Guidelines

  • Social Media: 30–60 minutes per day total.

  • Entertainment Apps (YouTube, Netflix): 1–1.5 hours per day.

  • Messaging & Calls: No limit unless disruptive.

  • News Apps: 15–30 minutes per day.

  • Email or Work Apps: Use Focus Mode instead of strict timers during non-work hours.

Start modestly — cutting two hours a day is easier when done gradually. The goal is long-term sustainability.

Step 7: Build a Daily Review Routine

Checking your phone’s Screen Time summary helps maintain awareness. Instead of guessing, you’ll know when usage creeps up and can adjust quickly.

How to Make Review a Habit

  1. Review your usage every Sunday evening.

  2. Compare this week’s average with last week’s.

  3. Identify one app or category that can lose 15 minutes.

  4. Celebrate progress instead of perfection.

This small check-in turns self-control into an automatic routine rather than a reactive effort.

screen time limits on phone

Step 8: Use Focus Modes for Work Sessions

When deep focus is required, use Focus or Do Not Disturb to block distractions during specific hours.

Quick Focus Setup for Work

  1. Enable Focus Mode on your phone.

  2. Allow only essential apps (calendar, messages from key contacts).

  3. Keep music or white noise apps available if they help concentration.

  4. Work in 60–90-minute blocks before taking short breaks.

This method prevents notification interruptions while keeping your phone functional for important needs.

Step 9: Identify Digital Triggers

Limiting screen time isn’t just about the phone — it’s about understanding what drives you to pick it up.

Common Triggers

  • Boredom: Reaching for your phone during small pauses.

  • Stress: Using screens to self-soothe or escape discomfort.

  • Habit Loops: Checking apps automatically without intention.

Once you notice triggers, replace them with simple alternatives:

  • Stretch or take a walk during breaks.

  • Keep a notebook nearby for quick thoughts.

  • Turn off nonessential notifications to reduce impulses.

Step 10: Declutter Your Digital Space

Your phone should feel calm, not chaotic. Fewer apps mean fewer temptations.

How to Declutter

  1. Delete apps you haven’t used in a month.

  2. Move addictive apps off the first screen.

  3. Group tools (like banking or navigation) in one folder.

  4. Turn off notification badges that create urgency.

Each small adjustment removes friction and helps your screen feel more intentional.

Step 11: Track Progress Over Time

Reducing screen time is gradual. By watching trends, you’ll see where you improve and where you can refine.

Tracking Methods

  • Review your weekly usage chart.

  • Note your longest streak of meeting limits.

  • Write reflections: “How did I use my extra time today?”

  • Reward yourself for consistency, not perfection.

Long-term change happens when awareness becomes a habit.

Step 12: Protect Privacy and Data

Screen time tools are safe, but some third-party apps collect data. Always use official settings or privacy-conscious apps.

Safe Practices

  • Use built-in Screen Time or Digital Wellbeing tools.

  • Avoid free monitoring apps that request excessive permissions.

  • Keep your device updated to maintain security.

  • Regularly clear app permissions and old data.

Protecting your digital privacy keeps you in control of both your attention and your information.

Step 13: Reset at Night — Creating a Digital Curfew

Evening screen time is one of the biggest contributors to poor sleep. Creating a nightly cutoff restores rest and focus.

Simple Night Routine

  1. Set Downtime or Focus Mode 60 minutes before bed.

  2. Move your phone out of reach or to another room.

  3. Use a physical alarm clock if needed.

  4. Replace scrolling with light reading, stretching, or journaling.

Your mind resets when your night ends peacefully instead of with blue light stimulation.

Step 14: Gradual Habit Reinforcement

Don’t expect perfection overnight. Building healthier phone habits takes time. The key is consistency, not strict control.

Reinforcement Tips

  • Celebrate small wins — five fewer unlocks per day is progress.

  • Share goals with a friend for accountability.

  • Replace high-use apps with positive ones like meditation or reading.

  • Review results monthly to stay motivated.

Every minute you reclaim builds a stronger sense of control and calm.

Step 15: When You Slip — Reset, Don’t Quit

Everyone exceeds their limits sometimes. The goal isn’t to eliminate all screen use but to realign when you drift off course.

Reset Strategies

  1. Turn off app timers for a day, then restart fresh.

  2. Reflect on why usage spiked — stress, boredom, fatigue?

  3. Reintroduce one positive routine (reading, walking, quiet time).

  4. Remember: the goal is progress, not punishment.

Over time, your phone becomes a tool again — not a master.

Key Takeaways

  • Awareness precedes change — track your habits first.

  • Start small with manageable app limits.

  • Use Focus and Downtime for distraction-free periods.

  • Review progress weekly to build consistency.

  • Protect privacy and set a calm nightly routine.

Healthy screen time limits are not about restriction — they’re about reclaiming your attention for what matters most.

When you set screen time limits on your phone intentionally, you create mental space for rest, focus, and real connection — the kind that no notification can replace.

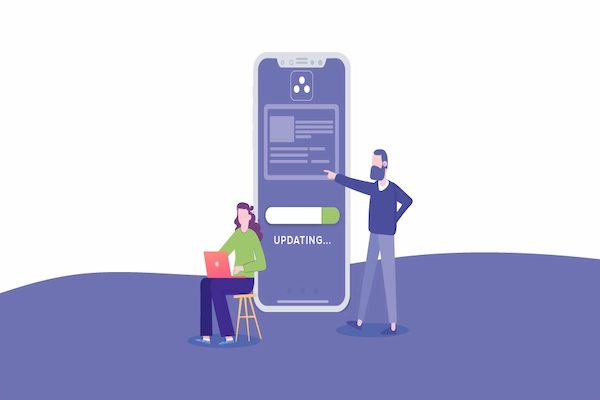
Update Apps Without Hassle: Stay Secure and Up to Date

Everyone has seen it — that small notification reminding you there’s a new update available.

You tell yourself you’ll do it later, and then days turn into weeks.

Eventually, your phone or computer starts lagging, apps crash unexpectedly, and certain features stop working altogether. What seems like a small delay often leads to bigger frustrations down the line.

Learning to update apps without hassle is one of the simplest yet most effective ways to keep your devices running smoothly and securely.

Updates aren’t just about adding fancy new icons or features — they fix bugs, close security holes, and make everything run faster and more reliably.

This step-by-step guide will teach you how to manage updates with ease across different devices, understand what those updates really do, and set up automatic systems so you never have to worry about missing one again.

Why App Updates Matter More Than You Think

When developers release updates, they’re not just redesigning the interface. Most updates are built around performance improvements, compatibility fixes, and security patches. Ignoring them is like skipping oil changes in a car — everything might seem fine until suddenly, it’s not.

Key Benefits of Regular App Updates

  1. Security Protection: Updates patch vulnerabilities that hackers might exploit.

  2. Better Performance: Developers optimize speed and memory usage.

  3. Bug Fixes: Glitches, crashes, and annoying freezes get resolved.

  4. New Features: You gain access to improved tools and functions.

  5. Compatibility: Apps stay in sync with your system’s latest version.

Skipping updates can cause your apps to misbehave or even stop working entirely — especially after major operating system changes.

Why People Avoid Updating Apps

Even though everyone knows updates are important, procrastination is common. Understanding why you avoid them helps you fix the habit.

Common Reasons

  1. Fear of Change: Some worry updates will change layouts or remove familiar features.

  2. Time Constraints: Updates can feel inconvenient when you’re in the middle of something.

  3. Limited Internet: Large updates consume data, especially on mobile plans.

  4. Storage Space Issues: Low storage discourages downloads.

  5. Past Bad Experiences: An update might have caused bugs before, leading to hesitation.

The truth is, updating doesn’t need to be disruptive. Once you automate the process, updates happen quietly in the background.

update apps without hassle

How App Updates Work

Before we get into the practical steps, it helps to understand what’s happening behind the scenes.

When developers publish an update:

  • It’s uploaded to the app store or distribution platform (Google Play, App Store, Microsoft Store, etc.).

  • Your device periodically checks for available updates.

  • When found, the update either installs automatically or waits for your permission.

Most updates fall into two categories:

  1. Minor Updates (Patches): Small improvements or bug fixes, often numbered like 3.1.2 → 3.1.3.

  2. Major Updates: Larger releases that might change design or features, like 3.1 → 4.0.

Understanding this distinction helps you know what to expect.

Updating Apps on Android Devices

Android makes app updates straightforward, whether you want them automatic or manual.

Option 1: Enable Automatic Updates

  1. Open the Google Play Store app.

  2. Tap your profile icon in the top-right corner.

  3. Select Settings → Network preferences → Auto-update apps.

  4. Choose one of the following:

    • Over any network (uses Wi-Fi or mobile data).

    • Over Wi-Fi only (recommended for saving data).

From now on, your apps will update silently whenever a new version is available.

Option 2: Update Apps Manually

  1. Open the Google Play Store.

  2. Tap your profile → Manage apps & device.

  3. Tap See details under “Updates available.”

  4. Choose Update all or tap each app individually.

Bonus Tip

If you’re low on storage, uninstall apps you rarely use before updating. This prevents update failures caused by insufficient space.

Updating Apps on iPhone and iPad

Apple’s App Store makes updates automatic, but you can also take control manually if you prefer.

Option 1: Turn On Automatic Updates

  1. Open Settings.

  2. Scroll down and tap App Store.

  3. Under Automatic Downloads, toggle App Updates to ON.

Your iPhone will handle updates automatically when connected to Wi-Fi and power.

Option 2: Update Apps Manually

  1. Open the App Store.

  2. Tap your profile icon in the upper-right corner.

  3. Scroll down to see pending updates.

  4. Tap Update All or update individual apps.

Extra Advice

If an app update causes problems, you can temporarily remove it and reinstall — this forces the latest stable version download.

Updating Apps on Windows PCs

PC users often overlook app updates outside of Windows itself. Luckily, the Microsoft Store simplifies this for apps downloaded through it.

How to Update Apps from Microsoft Store

  1. Open the Microsoft Store.

  2. Click your profile icon → App settings.

  3. Turn on App updates → Update apps automatically.

If you prefer manual control:

  1. In the Store, click Library.

  2. Select Get updates to refresh the list.

  3. Click Update all or choose apps individually.

For Non-Store Apps

Programs like browsers, antivirus software, or creative tools often update themselves. Look for:

  • Help → Check for updates in the menu.

  • Notification prompts when launching the app.

Important Note

Always download updates directly from the app’s official source. Avoid unofficial sites — they may include malware or modified installers.

Updating Apps on macOS

Mac updates are typically stable and easy to manage through the App Store or built-in updater tools.

For App Store Applications

  1. Open the App Store.

  2. Click Updates in the sidebar.

  3. Choose Update All or click Update next to individual apps.

To enable automatic updates:

  1. Open System Settings → App Store.

  2. Enable Automatically check for updates and Install app updates.

For Apps Installed Outside the App Store

  • Many Mac apps, like browsers or productivity tools, include built-in update options.

  • You can usually find them under App name → Check for Updates.

Tip

Restart your Mac occasionally after large updates. It ensures new files are properly integrated.

Updating Apps on Chrome OS

If you use a Chromebook, app updates come through the Google Play Store or Chrome browser automatically.

Chrome OS System Updates

  1. Click the clock at the bottom-right corner.

  2. Open Settings → About Chrome OS.

  3. Click Check for updates.

Android Apps on Chrome OS

  1. Open the Google Play Store.

  2. Tap your profile → Manage apps & device → Updates available.

  3. Choose Update all.

Because Chrome OS combines Android and browser elements, updates happen quickly and securely in the background.


Updating Apps on Smart TVs and Consoles

Smart TVs and consoles like PlayStation or Xbox also rely on app updates for security and performance.

Smart TVs

  • Samsung TV: Go to Settings → Support → Software Update → Auto Update.

  • LG TV: Use Settings → General → About This TV → Allow Automatic Updates.

  • Android TV: Open the Play Store → Settings → Auto-update apps.

Consoles

  • PlayStation: Highlight the app → Press Options → Check for Update.

  • Xbox: Go to My Games & Apps → Manage → Updates.

These devices often update automatically, but checking occasionally ensures nothing gets left behind.

Managing App Updates Efficiently

Once you know how updates work, the next step is building habits and settings that make the process effortless.

1. Schedule Updates for Low-Activity Hours

Set your devices to update overnight or during breaks. This prevents slowdowns while you work or study.

2. Prioritize Security-Related Updates

If an app lists “security fixes,” install it immediately. Delaying puts your information at risk.

3. Use Wi-Fi for Large Downloads

Avoid wasting mobile data by ensuring automatic updates only occur over Wi-Fi.

4. Keep Storage in Check

Before updates, delete temporary files or move large items to external drives.

5. Restart Devices Periodically

Updates may install fully only after a reboot. Restarting once a week helps complete pending installations.

How to Handle Update Issues

Occasionally, updates can misbehave — crashing, hanging, or introducing new bugs. Knowing how to handle these calmly prevents panic.

Common Problems and Fixes

  1. App Won’t Update

    • Check your internet connection.

    • Ensure you have enough storage space.

    • Clear the cache for your app store (on Android or Windows).

  2. Update Causes Bugs

    • Restart your device first.

    • If the issue persists, uninstall and reinstall the app.

    • On Android, you can use App Info → Uninstall updates to roll back.

  3. Slow Update Speeds

    • Pause and resume downloads.

    • Switch to a stronger Wi-Fi network.

  4. Update Fails Midway

    • Try rebooting and updating again.

    • Disable any VPNs temporarily — they can block connections.

Patience and methodical steps solve most update hiccups without risk.

Rollback Basics: When Updates Cause Trouble

Sometimes a new update breaks functionality you rely on. Rolling back gives you breathing room until a fix arrives.

Safe Rollback Practices

  1. Check for Built-In Options:
    Some systems allow you to revert easily — Android’s “Uninstall updates” or Windows’ “Previous version” features.

  2. Reinstall an Older Version (Carefully):
    If necessary, use official sources or version archives from the developer — never third-party sites.

  3. Contact Support:
    Report issues to the app’s support team so they can patch quickly.

Rollbacks should be temporary solutions, not permanent habits.

Automating Everything: Set It and Forget It

The easiest way to stay updated is by letting your devices handle it.

Benefits of Automatic Updates

  • No manual effort required.

  • Updates install when you’re not using your device.

  • Fewer security risks from delayed patches.

When to Keep Manual Control

If you use older or specialized software that might break after updates, disable auto-install and review each update first.

Hybrid Strategy

Many users enable automatic updates for essential apps (browsers, antivirus, operating systems) and keep manual control over niche or creative tools. This approach balances convenience with caution.

Creating an “Update Routine”

Building a light, consistent routine keeps everything current without stress.

Weekly Checklist

  • Open your app store once a week and tap Update All.

  • Restart your phone or PC afterward.

Monthly Checklist

  • Check system updates.

  • Review storage space.

  • Remove apps you no longer use.

Every Six Months

  • Back up your data.

  • Reset auto-update settings if needed.

  • Verify that critical apps (security, banking, browsers) are fully current.

These simple habits prevent small issues from becoming major headaches.

Keeping Updates Safe

While updates are essential, they should always come from trusted sources.

Safety Guidelines

  1. Avoid Third-Party Download Sites: They may offer fake or tampered versions.

  2. Double-Check Permissions: Some updates request new app permissions — review them carefully.

  3. Update One Step at a Time: On older devices, avoid updating everything simultaneously; it can strain the system.

  4. Use Official App Stores: Google Play, Apple App Store, and Microsoft Store verify updates for safety.

These precautions ensure updates improve, not harm, your experience.

The Real Cost of Ignoring Updates

Delaying updates might seem harmless, but the consequences can snowball.

1. Security Risks

Unpatched apps are prime targets for malware and phishing attacks.

2. Performance Decline

Older versions consume more resources, leading to slowdowns or freezes.

3. Compatibility Failures

Apps may stop syncing with your operating system after new OS releases.

4. Lost Features

Developers often retire outdated versions, removing support altogether.

Skipping one update might seem trivial, but missing several turns into a chain reaction that impacts the entire device.

Motivation: Turning Updates Into a Habit

The easiest way to stay consistent is to shift perspective. Don’t see updates as interruptions — view them as maintenance that protects your digital life.

  • Treat Updates Like Health Checkups: Small, regular actions that prevent big problems later.

  • Think of Them as Free Upgrades: Developers continually improve performance and design.

  • Celebrate Automation: Once you enable auto-updates, you’ll barely notice the process.

Each update is a quiet improvement that keeps your technology modern and resilient.

Keep It Simple, Keep It Safe

Learning how to update apps without hassle isn’t about memorizing settings — it’s about creating habits and systems that make updates automatic, safe, and worry-free.

Remember these key takeaways:

  • Updates protect your privacy, performance, and stability.

  • Automation saves time while ensuring you stay secure.

  • Regular routines prevent frustration and future repairs.

With the right setup, updates will no longer feel like chores — just quiet, invisible acts of maintenance that keep your devices healthy and your data protected.

So, take five minutes today: open your update settings, enable automatic updates, and give your apps the refresh they’ve been waiting for. Future you will thank you for it.

What Is a VPN Simple: Your Easy Guide to Online Privacy

If you’ve ever heard someone say, “You should use a VPN,” and wondered what that actually means, you’re not alone.

Most people know that a VPN has something to do with privacy and security, but the technical explanations online can sound like a foreign language — filled with acronyms, encryption jargon, and fear-driven marketing.

This article offers a clear, plain-English explanation of what a VPN is, how it works, when to use one, and where its limits lie.

You’ll learn the VPN basics without confusing tech talk, understand what actually happens when you connect to one, and see whether it truly helps protect your privacy — especially when using public Wi-Fi or traveling.

By the end, you’ll have a grounded understanding of what a VPN does, how it affects your data, and how to use it wisely — without falling for myths or unnecessary hype.

What Is a VPN, in Simple Terms?

VPN stands for Virtual Private Network, but don’t let the name intimidate you. Imagine you’re writing a letter that you want to send across the internet. Normally, anyone watching the postal route could see where the letter came from and where it’s going. When you use a VPN, that letter gets sealed inside an envelope — one that hides your location and protects the contents inside so no one along the way can read it.

In plain terms:
A VPN creates a secure, encrypted connection between your device and the internet, acting as a private tunnel that hides your activity from others on the network.

What the VPN Actually Does

  1. Encrypts Your Data: Everything you send or receive is scrambled so that others can’t read it.

  2. Masks Your Location: Instead of websites seeing your real IP address, they see the VPN server’s address.

  3. Protects You on Public Networks: It prevents strangers using the same Wi-Fi from intercepting your traffic.

  4. Allows Secure Remote Access: In workplaces, VPNs let employees access company servers safely.

That’s the essential function — privacy through encryption and rerouting.

How Does a VPN Work Behind the Scenes?

Every time you browse, stream, or send an email, your device communicates with servers across the web. Normally, this traffic travels directly from your device to those sites. But when you turn on a VPN, all your internet requests first go through a VPN server, which sits between you and the rest of the internet.

Think of it as:
Your Device → Encrypted Tunnel → VPN Server → Website

Everything inside that tunnel is protected. Even if someone were monitoring your Wi-Fi connection — say, in a coffee shop or airport — all they’d see is meaningless, scrambled data moving to and from the VPN server.

The Two Key Processes at Work

  1. Encryption
    Encryption turns readable information (like login credentials or messages) into code that only your device and the VPN server can understand. Common encryption protocols like AES-256 are strong enough that even advanced attackers can’t easily decrypt them.

  2. IP Masking
    Your IP address is like your digital home address. The VPN replaces it with its own. So if you’re in Brazil and connect to a server in Canada, websites think you’re browsing from Canada. This feature helps maintain anonymity and can also bypass geographic restrictions.

Common Uses of a VPN

People use VPNs for different reasons, but most fall into a few categories.

1. Protecting Privacy on Public Wi-Fi

Public Wi-Fi networks are convenient but risky. Hackers can easily intercept data sent over open connections. A VPN prevents that by encrypting all your traffic.

2. Keeping Browsing Private from ISPs

Internet Service Providers can log your browsing history. Using a VPN hides this activity, preventing them from seeing what sites you visit or what you download.

3. Accessing Region-Restricted Content

Some websites, news outlets, or streaming platforms limit content by region. Connecting to a VPN server in another country may give you access to that content.

4. Avoiding Censorship or Network Blocks

In some countries or workplaces, access to certain websites is restricted. VPNs can bypass these filters by rerouting your connection.

5. Securing Remote Work Connections

Many businesses use VPNs so employees can connect securely to internal company servers when working from home or traveling.

what is a vpn simple

When You Should (and Shouldn’t) Use a VPN

While VPNs are useful, they’re not magic shields that make you invisible online. Knowing when to use them helps you avoid overreliance.

When You Should Use a VPN

  • When connecting to public Wi-Fi in places like cafes, hotels, or airports.

  • When traveling and needing access to familiar services safely.

  • When you want to prevent tracking by your internet provider.

  • When working remotely and handling sensitive files or logins.

When You Might Not Need It

  • On trusted home networks, especially when visiting secure (HTTPS) websites.

  • When using apps that require accurate location services, like online banking.

  • For gaming or video calls, where VPNs can slow connection speeds.

Use it strategically, not constantly.

Common Myths About VPNs

Many companies exaggerate what VPNs can do. Let’s clear up a few common misunderstandings.

  1. Myth: VPNs Make You Anonymous Online
    Not entirely. VPNs hide your IP address, but websites can still recognize you through cookies, logins, or browser fingerprints.

  2. Myth: VPNs Make You Invincible to Hackers
    A VPN protects data in transit but won’t stop malware or phishing attacks. You still need antivirus protection and smart browsing habits.

  3. Myth: VPNs Always Increase Internet Speed
    Because data travels through an extra server, VPNs often slow down connections slightly. The best providers minimize this effect, but it’s still noticeable.

  4. Myth: All VPNs Are Safe
    Free or unknown VPNs can log and sell your data. A trustworthy VPN has a clear no-log policy and transparent ownership.

Understanding these limits helps you use a VPN intelligently — as one layer of privacy, not a total solution.

VPN Basics: The Core Elements You Should Know

To make sense of how VPNs differ, it helps to understand the basic building blocks.

1. VPN Servers

These are physical or virtual machines run by VPN companies worldwide. You connect to them to hide your location and encrypt traffic. The more servers an organization has, the better your chances for a fast, stable connection.

2. VPN Protocols

Protocols define how data moves securely. Common types include:

  • OpenVPN: Reliable and widely used.

  • IKEv2/IPSec: Fast and stable for mobile users.

  • WireGuard: Newer, lightweight, and efficient.

Most apps choose automatically, but advanced users can switch manually for better performance.

3. Encryption Standards

Modern VPNs use AES-256-bit encryption, the same standard used by banks and government agencies. It’s practically unbreakable by brute force.

4. Kill Switch

If your VPN connection drops unexpectedly, a kill switch blocks all internet access until it reconnects. This prevents accidental exposure of your IP.

5. No-Logs Policy

A privacy-focused VPN does not keep records of your activity. Always read the fine print — some “free” VPNs collect user data as their business model.

Safety Notes: How to Use a VPN Responsibly

VPNs improve security, but careless habits can still undermine their benefits.

Essential Do’s

  • Use Strong Passwords: Even the best VPN can’t protect weak credentials.

  • Update Regularly: Keep both your VPN software and operating system up to date.

  • Enable Two-Factor Authentication: Adds another layer of protection for VPN accounts.

  • Choose Trusted Providers: Reputation matters. Use well-reviewed VPNs with proven transparency.

Important Don’ts

  • Don’t Log into Unnecessary Accounts: If privacy is the goal, stay logged out of personal services while using a VPN.

  • Don’t Rely Solely on VPNs: Combine with antivirus software and cautious online behavior.

  • Don’t Disable the Kill Switch: It’s your last defense if the connection drops.

Being mindful of these principles ensures your VPN works as intended.

The Limitations of VPNs

Understanding what a VPN cannot do is just as important as knowing what it can.

1. It Doesn’t Stop Phishing

A VPN can’t protect you from fake emails or fraudulent websites that trick you into revealing passwords.

2. It Doesn’t Prevent All Tracking

Advertising trackers and cookies can still identify you through your browser or logged-in accounts.

3. It Doesn’t Replace Antivirus Software

Malware, spyware, and ransomware operate independently of VPN protection.

4. It Can Affect Speed

Because traffic travels through an additional server, slower speeds are inevitable. Choosing closer servers helps minimize this.

The key takeaway: a VPN is one part of a larger security toolkit, not a complete solution.

Real-Life Example: Using a VPN on Public Wi-Fi

Picture this: You’re in a coffee shop using free Wi-Fi to check your email. Without a VPN, anyone on that network could potentially intercept your login details. With a VPN active, all your data travels inside an encrypted tunnel. Even if someone tries to spy on you, all they see is gibberish.

This everyday scenario shows the VPN’s true purpose — privacy through protection, not invisibility.

How to Choose the Right VPN

If you decide to use one, look for a balance between transparency, performance, and simplicity.

Factors to Consider

  1. Clear Privacy Policy: Ensure it explicitly states that no logs are kept.

  2. Strong Encryption: Prefer AES-256 with modern protocols like WireGuard.

  3. Stable Performance: Choose services with good global server coverage.

  4. Ease of Use: Look for intuitive apps that connect automatically.

  5. Customer Support: Reliable help in case setup or troubleshooting is needed.

The goal isn’t finding the most expensive service — it’s finding one you can trust and operate easily.

Setting Up a VPN (Step by Step)

If you’ve never used one, setup is surprisingly simple.

  1. Download and install your chosen VPN software.

  2. Open the app and log in.

  3. Select a server location (nearby for speed, distant for region-switching).

  4. Click “Connect.”

  5. Once connected, your traffic is now encrypted.

That’s all it takes — one click creates a secure tunnel.

How to Verify That Your VPN Works

You can confirm your VPN is active by checking your visible IP address. When connected, it should show the VPN server’s location, not your actual one.

Quick Check Steps

  • Search online for “What is my IP.”

  • Compare results with and without the VPN on.

  • If the location changes, the VPN is functioning correctly.

You can also test by disconnecting — note the difference in speeds and website access.

Maintenance and Best Practices

Even simple tools benefit from periodic care.

  • Keep Software Updated: Security patches close new vulnerabilities.

  • Change Servers Occasionally: Avoid using the same one constantly.

  • Review App Permissions: Limit unnecessary access to contacts or storage.

  • Disconnect When Idle: There’s no need to keep it running nonstop if you’re offline.

Regular habits like these make your VPN experience smoother and more secure.

The Bigger Picture: VPNs and Everyday Privacy

VPNs are part of a broader movement toward personal digital responsibility. With increasing online surveillance, targeted advertising, and insecure networks, people want control over their data.

A VPN doesn’t make you invisible — but it gives you a layer of privacy that makes casual snooping far harder. It’s like drawing your curtains at home: people know your house exists, but they can’t see what you’re doing inside.

By combining a VPN with safe browsing, password managers, and regular software updates, you create a robust shield for your digital life.

Keep It Simple, Keep It Safe

Now that you understand what a VPN is in simple terms, you can use one confidently and responsibly. You don’t need to be a technician — just an informed user who values privacy and takes basic precautions online.

Remember:

  • A VPN encrypts your data and hides your IP address.

  • It’s essential on public Wi-Fi and for sensitive browsing.

  • It’s not a miracle cure — just a smart safety tool.

Use it wisely, combine it with good security habits, and enjoy the peace of mind that comes from knowing your personal information stays yours.

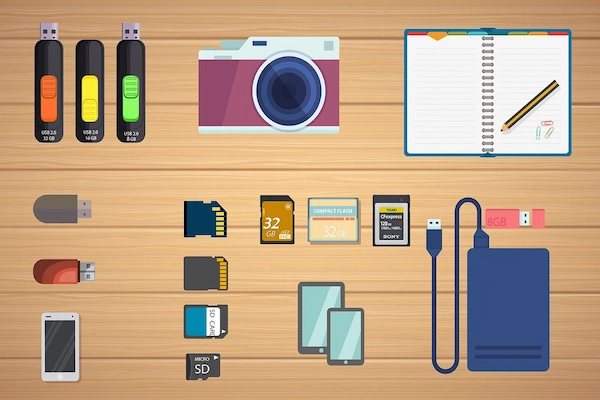
Clean Up PC Storage Safely: Free Space Without Risk

When your computer starts running slower, files take longer to open, and the hard drive warning light never seems to rest, it’s a clear sign your storage is nearly full.

For many people, the first instinct is to start deleting things randomly, but that’s where mistakes happen — photos disappear, system files break, and sometimes, Windows refuses to start properly afterward.

This guide will teach you exactly how to clean up PC storage safely without deleting anything important.

It’s written for everyday users, not technicians — step-by-step, simple, and cautious.

You’ll learn how to remove junk files, clear temporary data, manage downloads, and organize your space intelligently, so your computer feels fresh again without risk.

Let’s bring your PC back to life safely and efficiently.

Why Cleaning Your PC Storage Matters

Every file, update, or app you add to your computer consumes space over time. Unchecked, this buildup causes more than just inconvenience — it affects performance, reliability, and even your computer’s lifespan.

Here’s What Happens When Storage Gets Too Full

  1. Performance Drops – Windows relies on free space to create temporary files. With no room left, even simple tasks like opening a browser slow down.

  2. Frequent Crashes or Freezes – A cluttered drive makes it harder for your system to manage updates and processes.

  3. Failed Updates – Windows updates require space to unpack files. Low storage can prevent critical security patches.

  4. Shorter Drive Life – Solid-state drives (SSDs) degrade faster when nearly full because they have fewer free blocks to manage data efficiently.

Regular cleanups don’t just free up space; they keep your system stable and responsive.

Before You Begin: Back Up Important Files

Before deleting anything, always back up your critical data. It’s your safety net in case something goes wrong.

Backup Checklist

  • Photos and Videos: Move to an external hard drive or cloud service.

  • Documents: Save copies of invoices, resumes, and schoolwork.

  • Email Attachments: Downloaded items often linger in your “Downloads” folder unnoticed.

  • Desktop Files: Many people forget that their desktop is part of their main drive.

Once you know your essentials are backed up, you can clean with confidence.

clean up pc storage safely

Step 1: Check What’s Taking Up Space

Before you start deleting, identify where your storage is being used. Windows has a built-in tool for this.

How to Check

  1. Press Windows + I to open Settings.

  2. Go to System → Storage.

  3. Wait a few moments while Windows analyzes your disk.

  4. Review the categories such as Apps & Features, Documents, Pictures, and Temporary Files.

This overview gives you a map of what’s consuming space so you can plan your cleanup strategically.

Tip

Avoid guessing — use the data from this analysis to decide what to target.

Step 2: Use Disk Cleanup (The Built-in Tool)

Windows includes a utility called Disk Cleanup, designed to safely delete unnecessary files. It knows which system items are safe to remove and which should be left alone.

How to Run Disk Cleanup

  1. In the Windows search bar, type Disk Cleanup and open it.

  2. Choose your main drive (usually C:) and click OK.

  3. Wait for the scan to finish.

  4. You’ll see a list of categories — Temporary Files, Thumbnails, Recycle Bin, etc.

  5. Tick the boxes next to the items you want to delete.

Safe Items to Remove

  • Temporary Internet Files

  • Downloaded Program Files

  • Thumbnails

  • Old Windows Error Reports

  • Recycle Bin contents (after double-checking)

Items to Be Cautious With

  • System Files or Previous Windows Installations – Delete only if you’re sure you won’t need to roll back updates.

  • Downloads Folder – Review carefully before cleaning; it often holds personal files.

Once you’ve selected everything, click OK → Delete Files.

Step 3: Empty the Recycle Bin

It sounds simple, but the Recycle Bin often holds gigabytes of forgotten data.

Safe Steps

  1. Double-click the Recycle Bin icon on your desktop.

  2. Review its contents — make sure nothing important is inside.

  3. If everything looks fine, right-click the bin and choose Empty Recycle Bin.

This is one of the safest, most effective ways to reclaim space instantly.

Step 4: Clear Temporary Files Manually

Even after running Disk Cleanup, temporary files from browsers, updates, and installations can linger.

Manual Cleanup

  1. Press Windows + R, type %temp%, and press Enter.

  2. Select all files inside (Ctrl + A) and delete them.

  3. Repeat the process with temp (without the percentage signs) and prefetch folders.

Important Reminder

If Windows says certain files are “in use,” skip those. It’s normal — they’re being used by the system.

Step 5: Manage Your Downloads Folder

Your Downloads folder is a silent space hog. Every photo, PDF, and installer you’ve ever opened probably still sits there.

How to Organize It Safely

  1. Sort by file type — this groups all installers or media together.

  2. Move important documents to dedicated folders.

  3. Delete old installers (.exe or .zip files) that you’ve already used.

  4. Keep only the files you genuinely need.

You’ll be surprised how much space this step alone can recover.

Step 6: Uninstall Programs You Don’t Use

Old or rarely used software often occupies gigabytes of valuable space.

Safe Removal Process

  1. Open Settings → Apps → Installed Apps (or “Apps & Features”).

  2. Review the list and note the storage size beside each program.

  3. Click Uninstall on apps you don’t need.

What’s Safe to Remove

  • Trial versions of software you never activated.

  • Games or large apps you haven’t used in months.

  • Printer or webcam utilities installed automatically.

What to Keep

  • Drivers and essential utilities.

  • Security software.

  • Office suites or applications used frequently.

If unsure, search the app name online before uninstalling.

Step 7: Remove Large Files

You can use Windows tools to find large files quickly.

How to Locate Them

  1. Open File Explorer.

  2. In the search box, type size:>500MB and press Enter.

  3. Sort results by size.

Once you see what’s largest, evaluate:

  • Can you move it to an external drive?

  • Is it a backup or media file you no longer need?

  • Is it a duplicate?

Always double-check before deleting.

Step 8: Clear Browser Cache and Old Data

Browsers store cached pages, cookies, and history that can add up over time.

General Browser Steps

  1. Open your browser’s settings.

  2. Find Privacy or Clear Browsing Data options.

  3. Delete Cached Images and Files while keeping passwords and site settings intact.

Doing this regularly keeps your browser fast and frees hundreds of megabytes of space.

Step 9: Clean Hidden System Files and Restore Points

System Restore creates checkpoints that can occupy several gigabytes. It’s safe to delete older ones if your PC is stable.

How to Do It

  1. Type System Protection into the search bar and open it.

  2. Under your system drive, click Configure.

  3. Select Delete under “Delete all restore points.”

  4. Then, turn System Protection back on and create a new restore point.

This resets the system safely with a clean baseline.

Step 10: Use Storage Sense (Windows 10 and 11)

Storage Sense is a built-in feature that automatically clears unnecessary files on a schedule.

How to Enable

  1. Open Settings → System → Storage.

  2. Turn on Storage Sense.

  3. Click Configure Storage Sense or run it now to customize.

You can set it to run automatically every day, week, or month — deleting temporary files and emptying the Recycle Bin.

Step 11: Move Files to External Storage

When your main drive stays full even after cleanup, offloading nonessential files is your best option.

What to Move

  • Old photos or videos.

  • Backups.

  • Large project folders.

  • Software installers.

Use an external hard drive or USB stick. It’s safer than cloud-only storage because you maintain control and access even without internet.

Step 12: Defragment or Optimize the Drive

If your computer still feels sluggish, optimization can help.

For HDDs (Hard Disk Drives)

  1. Type Defragment and Optimize Drives into the search bar.

  2. Choose your main drive.

  3. Click Optimize.

This rearranges data for faster access.

For SSDs (Solid-State Drives)

Never defragment manually — instead, use Optimize (the same option). It triggers TRIM, which safely clears unused space without damaging the drive.

Step 13: Check Cloud Storage Integration

If you use OneDrive, Google Drive, or Dropbox, old offline copies may still be stored locally.

How to Manage

  1. Right-click the folder and choose Online-only (if available).

  2. This frees local space but keeps files accessible via cloud.

Make sure important files you need offline remain marked as Available on this device.

Step 14: Double-Check Before Final Deletion

Before you call your cleanup done, review one last time.

Final Safety Checks

  • Open File Explorer → sort by Date Modified → look for recent deletions.

  • Ensure your backups are working and accessible.

  • Empty the Recycle Bin one final time.

This careful final pass ensures you didn’t remove something critical by accident.

Step 15: Maintenance Routine for the Future

The best way to keep your PC fast is through light, regular maintenance instead of occasional big cleanups.

Weekly Routine

  • Clear temporary files and browser cache.

  • Move downloads to proper folders.

  • Empty Recycle Bin.

Monthly Routine

  • Run Disk Cleanup or Storage Sense.

  • Review large files and uninstall unused apps.

Every Six Months

  • Back up everything to an external drive.

  • Create a new restore point.

  • Verify your cloud storage settings.

By following this rhythm, you’ll never run into the “disk full” warning again.

Common Mistakes to Avoid

  1. Deleting System Files: Never delete items you don’t recognize in Windows or Program Files directories.

  2. Skipping Backups: Always create one before any major cleanup.

  3. Using Random Cleanup Apps: Many third-party tools overpromise and underdeliver. Stick with built-in options.

  4. Ignoring Updates: Outdated systems accumulate unnecessary files. Keep Windows updated for automatic optimization.

  5. Neglecting the Recycle Bin: Many forget that deleted files remain until emptied.

Caution is your best friend when cleaning up PC storage.

A Quick Recap

  • Check what’s using your space first.

  • Use Disk Cleanup and Storage Sense for safe automated clearing.

  • Delete temporary files and duplicates manually.

  • Move large media or backups to external drives.

  • Never delete unknown system files.

  • Keep your cleanup consistent with a monthly routine.

If you follow these steps carefully, your computer will stay fast, organized, and reliable without risk.

Keyboard Shortcuts for Mac: Work Smarter and Faster

Mac computers are built for speed, simplicity, and elegance—but many users never discover their true potential.

Every time you reach for your mouse or trackpad, you lose a few seconds and a bit of mental flow. The real secret to working efficiently on a Mac lies in mastering its shortcuts.

Learning keyboard shortcuts for Mac transforms how you work. It’s not about memorizing hundreds of key combinations—it’s about training your fingers to handle everyday actions instantly.

From switching apps and managing files to controlling system settings and formatting text, these shortcuts save time, improve focus, and give you a smoother workflow.

This complete guide walks you through essential Mac shortcuts, including universal commands, Finder navigation, text editing, and productivity keys.

You’ll also learn how to create custom shortcuts that fit your habits, along with practical exercises to help you remember them naturally.

Why Keyboard Shortcuts on Mac Matter

Shortcuts aren’t just fancy tricks—they’re tools that help you reclaim attention and momentum. Once you internalize them, they become invisible extensions of your thought process.

The Real Benefits

  1. Speed and Flow – You perform commands instantly without pausing to point and click.

  2. Better Focus – Staying on the keyboard keeps you in a deep work state.

  3. Physical Ease – Less wrist and arm strain over long sessions.

  4. Professional Precision – When colleagues watch you fly through tasks, it leaves an impression of mastery.

Every second saved adds up. A few milliseconds here and there can translate to hours over weeks of consistent use.

How to Learn Mac Shortcuts the Right Way

The mistake most people make is trying to memorize too many shortcuts at once. That approach never sticks.

Step-by-Step Learning Method

  1. Start Small: Pick five shortcuts that directly impact your daily routine.

  2. Reinforce With Use: Repeat them consciously until they become reflexes.

  3. Add Gradually: Introduce a few more each week.

  4. Keep a Cheat Sheet Nearby: Print or jot down your most-used ones for quick reference.

  5. Practice in Real Contexts: The more you use shortcuts naturally, the faster you retain them.

Within a couple of weeks, your fingers will start moving automatically—no thinking required.

The Core Mac Keyboard Symbols Explained

Before diving in, it helps to recognize Apple’s keyboard symbols used in menus and documentation.

  • Command (⌘) – The most common modifier key on Mac.

  • Option (⌥) – Used for alternative commands and symbols.

  • Control (⌃) – Often used for contextual actions or menus.

  • Shift (⇧) – Works as a modifier for capitalization or extended selections.

  • Function (fn) – Activates special features or toggles keys like F1–F12.

Once you recognize these, reading shortcut guides becomes much simpler.

keyboard shortcuts for mac

Everyday Keyboard Shortcuts Every Mac User Should Know

These are your foundation—the shortcuts you’ll use dozens of times a day.

  • Command + C: Copy selected item.

  • Command + X: Cut.

  • Command + V: Paste.

  • Command + Z: Undo previous action.

  • Shift + Command + Z: Redo.

  • Command + A: Select all.

  • Command + S: Save.

  • Command + Q: Quit the active app.

  • Command + H: Hide current window.

  • Command + Tab: Switch between open applications.

Practice Drill

  1. Open any document.

  2. Copy, cut, and paste lines using only the keyboard.

  3. Switch between two open apps with Command + Tab and return.

  4. Undo and redo actions repeatedly to build rhythm.

After five minutes, you’ll already feel the speed difference.

Finder Shortcuts for File Navigation

The Finder is where every Mac user spends significant time—organizing, searching, and accessing files. Knowing these shortcuts makes that process much faster.

Essential Finder Commands

  • Command + N: Open a new Finder window.

  • Command + T: Open a new tab in Finder.

  • Command + W: Close the current window.

  • Command + Delete: Move selected item to Trash.

  • Shift + Command + Delete: Empty the Trash instantly.

  • Command + Up Arrow: Go up one folder level.

  • Command + Down Arrow: Open a selected folder or file.

  • Command + F: Start a search within Finder.

  • Command + D: Duplicate selected files.

  • Command + Option + Y: Play a Quick Look slideshow of selected files.

Example Use

When organizing a project folder:

  1. Select files.

  2. Press Command + D to duplicate backups.

  3. Open each with Command + Down Arrow to review.

  4. Trash unneeded ones with Command + Delete.

Within seconds, you’ll clean your workspace with precision.

Window and App Management Shortcuts

When you work with multiple apps or windows, managing them smoothly is essential.

Key Shortcuts

  • Command + Tab: Cycle through open applications.

  • Command + ` (backtick): Switch between windows of the same app.

  • Control + Up Arrow: Activate Mission Control (shows all open windows).

  • Control + Down Arrow: See windows only from the current app.

  • Command + M: Minimize the active window.

  • Option + Command + M: Minimize all windows of the active app.

  • Command + H: Hide the active app.

  • Option + Command + H: Hide all other apps.

  • Command + Space: Open Spotlight search.

Power Tip

Use Command + Space followed by typing the app name to launch any program instantly—faster than finding it in the Dock.

Text Editing Shortcuts

Writers, editors, and anyone handling long documents can speed up editing dramatically.

Core Editing Keys

  • Command + Left Arrow / Right Arrow: Jump to the start or end of a line.

  • Option + Left Arrow / Right Arrow: Jump one word at a time.

  • Command + Up Arrow / Down Arrow: Move to the start or end of the document.

  • Option + Shift + Arrow Keys: Select one word at a time.

  • Command + Shift + Arrow Keys: Select entire lines or paragraphs.

  • Control + A: Move to the start of the paragraph.

  • Control + E: Move to the end of the paragraph.

  • Control + K: Delete from the cursor to the end of the line.

Example Routine

Try writing a paragraph and navigating entirely by keyboard—moving between words with Option + Arrow Keys and selecting text with Shift. Within minutes, it becomes second nature.

System and Utility Shortcuts

Mac shortcuts aren’t just for typing—they control system functions too.

  • Control + Command + Q: Lock your screen immediately.

  • Command + Space: Open Spotlight to search apps or files.

  • Option + Command + Esc: Force-quit frozen apps.

  • Command + Comma (,): Open preferences for the current app.

  • Shift + Command + 3: Capture the entire screen.

  • Shift + Command + 4: Capture a selected area.

  • Shift + Command + 5: Open the screenshot toolbar.

  • Control + Command + Power: Force restart.

  • Option + Shift + Volume or Brightness Keys: Adjust settings in small increments.

These shortcuts help manage your system faster than any menu can.

Safari and Browser Shortcuts

Since many people live inside their browser, mastering Safari shortcuts is one of the fastest ways to improve workflow.

Navigation Shortcuts

  • Command + T: Open a new tab.

  • Command + W: Close the current tab.

  • Shift + Command + T: Reopen the last closed tab.

  • Command + L: Highlight the address bar.

  • Command + R: Refresh the page.

  • Command + Y: Open browsing history.

  • Command + Click: Open a link in a new tab.

  • Control + Tab: Move to the next tab.

  • Control + Shift + Tab: Move to the previous tab.

Use these daily and your browsing rhythm will become noticeably smoother.

Screenshot and Recording Shortcuts

Mac’s built-in screenshot tools are powerful once you know the key combinations.

  • Shift + Command + 3: Capture entire screen.

  • Shift + Command + 4: Select and capture part of the screen.

  • Shift + Command + 4, then Spacebar: Capture a specific window.

  • Shift + Command + 5: Record video or take timed screenshots.

  • Control + Shift + Command + 3 or 4: Copy screenshot directly to clipboard.

Practice capturing various areas to learn which method suits each task.

Shortcuts for Productivity Apps

Different macOS apps support unique key combinations. Here are a few universal examples that apply across most productivity tools.

In Mail

  • Command + N: New email.

  • Command + R: Reply.

  • Shift + Command + R: Reply all.

  • Command + Shift + F: Forward.

  • Command + Option + F: Search inbox.

In Calendar

  • Command + N: Create new event.

  • Command + D: Duplicate event.

  • Command + Delete: Delete selected item.

In Notes

  • Command + N: New note.

  • Command + P: Pin or unpin note.

  • Command + F: Search within notes.

These small keystrokes eliminate dozens of daily clicks.

Advanced Workflow and Multi-Tasking Shortcuts

Power users who juggle projects benefit most from multi-app control.

  • Control + Left/Right Arrow: Switch between full-screen apps or desktops.

  • Control + Mission Control Key (F3): View all desktops.

  • Command + Tab + Q: Quit selected app from the app switcher.

  • Command + Option + Esc: Force-quit misbehaving apps instantly.

Workflow Example

If you’re writing in Pages while referencing Safari and Notes:

  1. Switch instantly with Command + Tab.

  2. Use Control + Right Arrow to jump to a full-screen workspace.

  3. Paste references with Command + V and save progress with Command + S.

This routine keeps you flowing without breaking concentration.

Accessibility Shortcuts

Accessibility isn’t just for users with special needs—it’s for anyone wanting greater control.

  • Command + Option + F5: Open accessibility options.

  • Command + Option + 8: Toggle screen zoom.

  • Control + Option + Command + 8: Invert screen colors.

  • Option + Command + Plus (+)/Minus (-): Zoom in and out.

  • Control + Option + Command + Period (.): Reduce transparency effects.

These shortcuts improve visibility and comfort during long sessions.

Customizing Shortcuts to Fit Your Workflow

macOS allows you to create or change shortcuts easily for any app.

How to Customize

  1. Open System Settings → Keyboard → Shortcuts.

  2. Choose an app or category (e.g., App Shortcuts).

  3. Click the plus sign (+) to add a new one.

  4. Enter the exact menu command name and your preferred key combination.

  5. Test it immediately in the app.

This is perfect for users who frequently repeat niche actions not covered by defaults.

Example Custom Shortcuts

  • Assign Option + N to open Notes instantly.

  • Set Command + Shift + K to export in Keynote.

  • Create Option + Command + E for quick email drafts.

Over time, these become as natural as breathing.

How to Build a Shortcut Practice Routine

Shortcuts become habits through repetition.

Daily Routine

  1. Pick three shortcuts to practice.

  2. Use them intentionally throughout the day.

  3. Note when you forget and remind yourself gently.

Weekly Routine

  • Add two or three new shortcuts.

  • Remove rarely used ones from your focus list.

  • End the week by testing recall—cover your cheat sheet and try performing actions blind.

This simple schedule turns learning into muscle memory.

Common Mistakes to Avoid

  1. Learning too many at once. Stick to small, meaningful batches.

  2. Ignoring consistency. Use the same shortcuts across apps when possible.

  3. Skipping practice. Knowledge fades without use.

  4. Using conflicting combinations. Always check that new custom shortcuts don’t override existing ones.

  5. Forgetting about accessibility. Make shortcuts ergonomic—avoid hand strain by spacing keys comfortably.

Success comes from smart pacing, not speed.

Pro Tips for Power Users

  1. Combine Spotlight (Command + Space) with Finder shortcuts for lightning-fast searches.

  2. Use Automator or Shortcuts app to create multi-step macros triggered by one key combo.

  3. If you work with repetitive tasks, use Text Replacements to expand short codes into full phrases automatically.

  4. Memorize screenshot shortcuts—they’re invaluable for remote work and visual communication.

  5. Sync your custom shortcuts via iCloud so they stay consistent across Macs.

Each tweak compounds your efficiency until every action feels effortless.

Turning Shortcuts into a Natural Language

Once you’ve learned the essential keyboard shortcuts for Mac, your device starts to feel like an extension of your mind. No more hunting through menus or juggling trackpads—just pure flow between thought and action.

Start with the basics, practice a few daily, and add new ones over time. Within a month, you’ll move through macOS with confidence, saving minutes every hour and reducing physical strain.

Efficiency isn’t about working harder—it’s about working smoother. Every shortcut mastered is one step closer to effortless productivity, where your tools disappear and your ideas take center stage.

Keyboard Shortcuts for Windows: Work Faster Every Day

Every second you reach for your mouse, you lose momentum.

Whether you’re writing reports, managing spreadsheets, or replying to endless emails, constant clicking slows you down.

Keyboard shortcuts, though often overlooked, are the simplest and most effective way to move faster on your computer without installing a single new tool.

Learning keyboard shortcuts for Windows can transform your workday.

With a few key combinations, you can open apps, switch windows, control files, and navigate faster than ever. It’s not about memorizing hundreds of commands—it’s about mastering the ones that make your daily routine smoother.

This in-depth guide teaches you the essential Windows shortcuts that boost focus, save time, and eliminate repetitive actions.

It includes a categorized cheat sheet, practical drills for habit-building, and step-by-step examples so you can apply each shortcut naturally, not just read about it.

Why Keyboard Shortcuts Matter

Most people know a few basics like Ctrl + C for copy or Ctrl + V for paste, but that barely scratches the surface. Imagine controlling your desktop, documents, browser, and even system settings—all without touching the mouse.

Benefits of Using Keyboard Shortcuts

  1. Speed and Efficiency
    You perform tasks instantly, avoiding time lost navigating menus.

  2. Better Focus
    Switching between keyboard and mouse constantly breaks concentration. Shortcuts keep your flow unbroken.

  3. Reduced Physical Fatigue
    Less hand movement equals less strain during long work sessions.

  4. Professionalism
    People notice when you operate confidently and smoothly—it looks like mastery.

Shortcuts aren’t just tricks; they’re productivity habits. The more you practice, the more naturally they become part of your workflow.

How to Learn Shortcuts Effectively

You don’t need to memorize all shortcuts at once. Instead, start small and practice a few each day.

Step-by-Step Learning Plan

  1. Pick 5 Shortcuts for Daily Use
    Focus on repetitive actions—copying, switching apps, saving files.

  2. Use Sticky Notes or Print a Cheat Sheet
    Keep visible reminders near your screen for quick reference.

  3. Repeat During Routine Tasks
    The key to retention is repetition in real work situations.

  4. Add New Shortcuts Weekly
    Gradually build your list over time—consistency matters more than volume.

Within two weeks, your fingers will remember most combinations automatically.

keyboard shortcuts for windows

Basic Navigation Shortcuts Everyone Should Know

These are the foundation of efficient Windows navigation. Once you know them, you can move through your system at double speed.

Essential Navigation Keys

  • Alt + Tab: Switch between open apps.

  • Ctrl + Tab: Move between tabs in browsers or documents.

  • Windows + D: Show or hide the desktop instantly.

  • Windows + E: Open File Explorer.

  • Windows + L: Lock your computer when stepping away.

  • Alt + F4: Close the current app.

  • Ctrl + Shift + Esc: Open Task Manager directly.

How to Practice

  1. Open three or four apps (browser, Word, Excel, Outlook).

  2. Practice switching between them with Alt + Tab without using your mouse.

  3. Repeat until it feels seamless.

This drill alone can save several minutes every hour.

File and Folder Management Shortcuts

Organizing and accessing files faster is essential for any office worker.

File Explorer Shortcuts

  • Windows + E: Open File Explorer.

  • Alt + Up Arrow: Move up one folder level.

  • Ctrl + N: Open a new window.

  • F2: Rename selected file or folder.

  • Shift + Delete: Permanently delete without sending to Recycle Bin.

  • Ctrl + Shift + N: Create a new folder instantly.

  • Alt + Enter: Open properties for a file or folder.

Example in Use

When renaming a group of files, you can:

  1. Select them all with Ctrl + A.

  2. Press F2, type a new name, and press Enter.

  3. Windows automatically adds numbers to each file.

This is much faster than right-clicking each file individually.

Text Editing and Formatting Shortcuts

Writers, data analysts, and administrators use text daily. These shortcuts keep typing efficient.

Universal Text Commands

  • Ctrl + C / Ctrl + X / Ctrl + V: Copy, cut, and paste.

  • Ctrl + Z / Ctrl + Y: Undo and redo.

  • Ctrl + A: Select all text.

  • Ctrl + B / Ctrl + I / Ctrl + U: Bold, italic, underline.

  • Ctrl + F: Find a word or phrase in a document.

  • Ctrl + H: Find and replace text.

  • Ctrl + Backspace: Delete an entire word.

  • Shift + Arrow Keys: Highlight text precisely.

Advanced Tips

  • Combine Shift + Ctrl + Arrow Keys to select entire words at once.

  • Use Ctrl + Home and Ctrl + End to jump to the start or end of documents instantly.

The more you write, the more these shortcuts feel indispensable.

Window and Desktop Management Shortcuts

When multitasking with several windows, mastering layout shortcuts saves huge amounts of time.

Managing Multiple Windows

  • Windows + Left Arrow / Right Arrow: Snap windows side by side.

  • Windows + Up Arrow: Maximize window.

  • Windows + Down Arrow: Minimize or restore.

  • Windows + Tab: Open Task View (see all open apps).

  • Windows + Ctrl + D: Create a new virtual desktop.

  • Windows + Ctrl + Left/Right Arrow: Switch between desktops.

  • Windows + Ctrl + F4: Close the current virtual desktop.

Example Drill

  1. Open three applications—Word, browser, and File Explorer.

  2. Use Windows + Arrow Keys to arrange them in a grid.

  3. Switch desktops with Windows + Ctrl + Right Arrow to create a separate workspace.

Once you get used to virtual desktops, you’ll never go back to cluttered screens.

Browser Shortcuts for Everyday Work

Since most work happens inside web browsers, mastering these saves immense time.

Essential Browser Shortcuts

  • Ctrl + T: Open a new tab.

  • Ctrl + W: Close current tab.

  • Ctrl + Shift + T: Reopen last closed tab.

  • Ctrl + Tab / Ctrl + Shift + Tab: Switch between tabs.

  • Ctrl + L: Highlight the address bar.

  • Ctrl + D: Bookmark current page.

  • F5 or Ctrl + R: Refresh page.

  • Ctrl + + / Ctrl + -: Zoom in or out.

  • F11: Enter full-screen mode.

Practice Exercise

  1. Open multiple tabs in your browser.

  2. Move through them using Ctrl + Tab instead of the mouse.

  3. Close one with Ctrl + W and reopen it instantly with Ctrl + Shift + T.

These muscle-memory skills improve your browsing rhythm dramatically.

Productivity and Workflow Shortcuts

Beyond typing and browsing, Windows includes shortcuts that automate system-level actions and app switching.

High-Impact Productivity Shortcuts

  • Windows + S: Open Windows Search.

  • Windows + I: Open Settings quickly.

  • Windows + P: Change display modes (useful for presentations).

  • Windows + R: Open the Run command.

  • Windows + Number (1–9): Launch or switch to apps pinned on the taskbar.

  • Alt + Space: Open the window control menu.

  • Windows + Shift + S: Take a screenshot of a specific area.

Real-World Use Case

Imagine you’re preparing a presentation:

  1. Press Windows + P to project to an external display.

  2. Use Alt + Tab to switch between PowerPoint and Excel.

  3. Capture an image for your slides using Windows + Shift + S.

Each action takes seconds—smooth, controlled, and efficient.

Shortcuts for File Operations and Quick Actions

Knowing file-handling shortcuts prevents repetitive clicking during your busiest days.

  • Ctrl + S: Save current document.

  • Ctrl + Shift + S: Save As (rename or change location).

  • Ctrl + O: Open file.

  • Ctrl + P: Print document.

  • Alt + F: Open file menu.

  • Ctrl + N: Create new document.

Tip: Combine shortcuts with quick searches using Windows + S to locate files instantly.

System Control and Accessibility Shortcuts

These shortcuts help control system behavior and accessibility features efficiently.

  • Windows + U: Open Accessibility settings.

  • Windows + + (plus): Zoom in using Magnifier.

  • Windows + Esc: Exit Magnifier.

  • Windows + X: Open the Power User menu (quick access to Device Manager, Settings, and more).

  • Windows + Pause/Break: Open System properties.

  • Alt + Shift + Print Screen: Toggle high-contrast mode.

Accessibility shortcuts aren’t just for specialized use—they improve visibility, speed, and focus for everyone.

Screenshot and Snipping Shortcuts

Capturing images of your screen is vital for tutorials, reports, or troubleshooting.

  • PrtScn (Print Screen): Capture entire screen.

  • Alt + PrtScn: Capture active window.

  • Windows + Shift + S: Capture selected area with Snipping Tool.

  • Windows + PrtScn: Capture full screen and save automatically to Pictures → Screenshots.

Pro Tip: After capturing with Windows + Shift + S, paste directly into Word, Paint, or chat windows using Ctrl + V.

Shortcut Drills to Build Muscle Memory

Learning shortcuts is easier through action than reading.

Daily Five-Minute Drills

  1. Switch Drill:
    Open multiple apps and cycle through them using Alt + Tab for one minute straight.

  2. Typing Flow Drill:
    Copy and paste text using Ctrl + C, Ctrl + V, then undo and redo repeatedly to build rhythm.

  3. Navigation Drill:
    Practice snapping windows and switching virtual desktops.

  4. File Drill:
    Create folders, rename them, and move them around entirely with shortcuts.

  5. Browser Drill:
    Manage tabs—open, close, and reopen without touching your mouse.

By repeating these mini-routines daily, you’ll internalize the shortcuts effortlessly.

Creating a Custom Shortcut Routine

Once you master the basics, create your personalized workflow.

Steps to Customize

  1. Identify repetitive actions (opening Excel, screenshots, document saving).

  2. Find or assign shortcuts for them in Windows Settings → Keyboard Shortcuts.

  3. Pin frequently used apps to the taskbar for Windows + Number access.

  4. Use third-party tools like AutoHotkey (if permitted at work) to build sequences.

A tailored routine gives you an efficiency edge unique to your workflow.

Troubleshooting and Memory Tips

Common Issues

  • Some shortcuts may conflict with custom software—check app settings.

  • Laptop keyboards may require using Fn (Function) keys.

  • International keyboards may vary slightly in key placement.

How to Remember Shortcuts

  1. Group by Purpose: Learn sets (e.g., “window shortcuts” one week, “text shortcuts” the next).

  2. Use Visual Memory: Associate actions with finger movements, not letters.

  3. Create Mnemonics: For example, “C for copy,” “V for paste,” “Z for undo.”

  4. Practice in Real Contexts: Apply them naturally while working, not during idle practice.

Shortcut Power User Challenge

If you already know the basics, push yourself with this mini-challenge:

  1. Go a full day without using the mouse for basic navigation.

  2. Use Alt + Tab, Windows + Arrow Keys, and Ctrl + S for every task.

  3. End your day noting which actions felt awkward—practice those again.

In less than a week, your workflow will feel smoother and your hand will automatically reach for the keyboard.

When to Print or Share Your Shortcut Cheat Sheet

A printed list nearby reinforces habits through visual reminders.

What to Include:

  • Most-used shortcuts (10–15 core ones).

  • Shortcuts grouped by category (text, windows, browser).

  • Empty space to add your own.

Laminate or tape it near your monitor. Every glance is a quick memory boost.

Make Keyboard Shortcuts a Daily Habit

Keyboard shortcuts are the smallest change with the biggest impact on your workday. They’re free, built into Windows, and immediately improve how you interact with your computer.

Learning a few at a time builds confidence and control. Before long, your hands will move instinctively, and tasks that once took minutes will happen in seconds.

Efficiency isn’t about rushing—it’s about removing friction. By mastering these keyboard shortcuts for Windows, you’ll spend less time managing your computer and more time doing meaningful work.

So choose five shortcuts today, practice them consistently, and feel your productivity rise—one keypress at a time.

Best Free Note Apps for Everyday Ideas

Every idea begins as a small spark — a quick line during a meeting, a grocery reminder, a sketch on your phone screen.

The only problem is that ideas don’t wait for perfect timing, and if you don’t capture them, they fade fast.

That’s why choosing a simple, reliable note-taking app matters more than it might seem at first glance.

This guide compares the best free note apps for everyday ideas, helping you find one that fits your habits without unnecessary features or costs.

Whether you’re a student taking class notes, a freelancer tracking project details, or someone who just wants to stop losing random thoughts, this article will walk you through the best options, what they do well, and which one is right for you.

Why a Good Note App Matters

Taking notes used to mean paper notebooks and sticky reminders scattered across desks. Today, a single app can do all of that — and sync it instantly between your phone, laptop, and tablet. But not all note apps are created equal.

A well-designed note app:

  • Opens quickly so you never lose an idea.

  • Syncs seamlessly between all your devices.

  • Offers just enough structure to stay organized without slowing you down.

  • Keeps your data safe through encryption and backups.

A poor one can frustrate you with sync errors, cluttered menus, or paywalls that appear just when you start relying on it.

The goal is to find the middle ground — a tool that’s lightweight, stable, and ready the moment inspiration strikes.

What We Considered in This Comparison

To keep this guide balanced, every app was evaluated under the same set of real-world conditions. We looked at how each performed for quick notes, long entries, organization, syncing, and offline use.

Main Evaluation Criteria:

  1. Ease of use — how fast it is to start writing.

  2. Organization options — folders, tags, or notebooks.

  3. Cross-device syncing — consistency between mobile and desktop.

  4. Search speed and reliability.

  5. Privacy and data protection.

  6. Free plan restrictions or limits.

We tested these apps on Windows, macOS, Android, and iPhone to see which ones performed best for different users.

free note apps compared

Google Keep – Fast, Colorful, and Straightforward

If you want something quick and visual, Google Keep is one of the most effortless note apps ever made. It feels like a wall of digital sticky notes — easy to rearrange, color-code, and tag.

What Makes It Great:

  • Instant capture — open and start typing without extra clicks.

  • Notes appear as cards, which makes browsing simple.

  • Voice dictation and image-to-text recognition for fast entry.

  • Location-based reminders, useful for errands or grocery lists.

Potential Drawbacks:

  • No folder system for deeper organization.

  • Limited formatting — only plain text with checkboxes.

  • Works best inside the Google ecosystem.

Who It’s For:
People who live in Gmail, Drive, or Android already, and just need a lightweight digital notepad that syncs everywhere instantly.

Microsoft OneNote – Feature-Rich for Serious Note-Takers

For those who prefer structure and flexibility, OneNote is the digital equivalent of a thick binder full of sections and pages. It handles everything from quick bullet lists to full research collections.

Key Strengths:

  • Uses a familiar notebook layout with sections and pages.

  • Supports handwriting, drawings, and embedded files.

  • Syncs across all major platforms using OneDrive.

  • Excellent for lectures, study notes, or meeting summaries.

What Could Be Better:

  • Interface can feel heavy compared to simpler apps.

  • More features than casual users might need.

Who It’s For:
Students, teachers, and professionals who want a structured, all-in-one note system that handles multimedia and long entries easily.

Apple Notes – Seamless and Secure for Apple Users

Apple Notes started as a basic memo app but has evolved into a polished, full-featured tool tightly integrated with the Apple ecosystem.

Why It Stands Out:

  • Flawless sync via iCloud across iPhone, iPad, and Mac.

  • Allows text, sketches, scanned documents, and photos in one place.

  • Locked notes add extra privacy using Face ID or Touch ID.

  • Simple but powerful tagging and folder organization.

Limitations:

  • No Android or Windows versions.

  • Lacks some of the advanced formatting and layout flexibility of other apps.

Who It’s For:
Apple users who want a private, reliable, and elegant note system built into every device they own.

Evernote (Free Plan) – The Research Collector

Evernote was once the standard for digital note-taking, and although newer options have appeared, it still remains strong for organizing information-heavy collections.

What It Does Well:

  • Web Clipper saves full web pages, PDFs, or screenshots.

  • Excellent search — even scans text from images.

  • Folder-and-tag hybrid organization for easy sorting.

Where It Falls Short:

  • Free version limited to two devices.

  • Offline access restricted for mobile users.

  • Slightly slower sync than competitors.

Best Use Case:
Writers, researchers, and students who collect a lot of reference material from the web and want a system that archives it neatly.

Simplenote – Minimalism That Just Works

If you want the opposite of Evernote’s complexity, Simplenote is the definition of focus. It’s a pure writing app that loads instantly and syncs beautifully across all devices.

Highlights:

  • Lightweight, distraction-free interface.

  • Markdown support for simple formatting.

  • Reliable sync without extra steps.

  • Tag-based organization instead of folders.

Weaknesses:

  • No attachments or embedded files.

  • Limited styling — only plain or Markdown text.

Who It’s For:
Writers, developers, or minimalists who prefer speed, simplicity, and clarity over fancy features.

Notion – Creative Structure for Organized Thinkers

Notion isn’t just for notes; it’s a complete workspace. However, even in its free version, it works brilliantly for people who like structure and visual organization.

What Makes It Unique:

  • Combines text, lists, databases, and task boards.

  • Allows nested pages — a powerful way to connect ideas.

  • Real-time collaboration features.

  • Flexible enough to become a planner, journal, or idea tracker.

Possible Downsides:

  • Has a learning curve for beginners.

  • Slightly slower on low-end devices.

Who Will Love It:
Students, freelancers, or professionals who want their notes to connect with projects, goals, and workflows in one tool.

Zoho Notebook – Beautiful and Visual

Zoho Notebook focuses on beauty and user experience. Each note is represented as a “card” with its own color and texture, making browsing and organization intuitive.

Why People Like It:

  • Visually appealing layout for text, photos, and audio notes.

  • Built-in checklists and sketches.

  • Offline access and sync once connected.

  • No ads or data tracking.

Limitations:

  • Smaller ecosystem than the giants (Google, Microsoft, Apple).

  • Less integration with third-party tools.

Perfect For:
Creative users, visual thinkers, or anyone who enjoys organizing information in an attractive way.

How to Decide Which App Fits You

With so many options, the easiest way to choose is by matching your workflow and personality.

If You Want Speed and Simplicity

Go for Google Keep or Simplenote. They’re both instant, lightweight, and great for spontaneous thoughts.

If You Need Structure and Depth

Choose Microsoft OneNote or Notion. Both handle complex projects, subtopics, and multimedia efficiently.

If You Use Apple Devices Exclusively

Stick with Apple Notes — it’s private, built-in, and polished.

If You Save Web Articles or Research

Try Evernote — the web clipper alone saves hours.

If You Think Visually

Zoho Notebook is a joy to use with its colorful, card-like design.

In short:

  • Fast thinkers: Google Keep

  • Organizers: OneNote or Notion

  • Collectors: Evernote

  • Minimalists: Simplenote

  • Visual users: Zoho Notebook

  • Apple loyalists: Apple Notes

Privacy and Data Security

Free doesn’t mean careless. When it comes to storing your ideas, privacy is critical.

Here’s what to look for:

  • End-to-end encryption where possible.

  • Two-factor authentication for login.

  • Clear data policies about who can access your notes.

  • The ability to export notes in common formats (TXT, HTML, PDF).

Strongest Security Practices:

  • Apple Notes: Encrypted locally and in iCloud.

  • OneNote and Google Keep: Encrypted in transit and at rest.

  • Notion and Zoho: Offer strong account protection.

  • Simplenote: Open about data handling, though not end-to-end encrypted.

Avoid storing sensitive financial or password data in any note app, even those with strong encryption.

Migrating Notes Between Apps

If you’ve already been using another tool and want to switch, migrating doesn’t have to be messy.

Follow these steps:

  1. Export all notes as text or HTML from your old app.

  2. Import them gradually into your new one.

  3. Rebuild tags and folders manually for a fresh start.

  4. Test sync on all your devices before deleting the old app.

  5. Keep both systems running for a week to ensure nothing is lost.

A slow, deliberate migration prevents sync errors and gives you a chance to reorganize your ideas.

Keeping Your Notes Organized

No app can fix messy habits. The key is building a small, repeatable routine.

Daily Habits:

  • Write ideas immediately when they appear.

  • Add short tags or keywords for future search.

  • Review quickly before logging off.

Weekly Habits:

  • Merge duplicates.

  • Delete temporary or outdated notes.

  • Create a “Highlights” page for your best ideas.

Monthly Habits:

  • Export a backup copy to your computer or cloud drive.

  • Review your tags and folders for relevance.

Consistency keeps your notes from turning into digital clutter.

When to Upgrade

Free plans are perfect for most users. However, consider upgrading if you need:

  • Offline mobile access in Evernote.

  • More storage or larger attachments.

  • Collaboration with teams (Notion, Zoho).

  • Advanced encryption or version history.

Try using the free plan for a few months first — if you naturally hit its limits, you’ll know it’s worth paying for.

Common Mistakes to Avoid

Even with the right app, small errors can undermine your system.

  1. Using multiple apps at once. Pick one and stick with it.

  2. Over-organizing. Don’t spend more time sorting than writing.

  3. Ignoring backups. Always export copies monthly.

  4. Storing sensitive data. Notes are for ideas, not private credentials.

  5. Skipping cleanup. Old notes pile up fast if you never review.

A focused, minimal workflow always beats a complicated setup.

Performance Observations

After weeks of testing, here’s what stood out in practice:

  • Simplenote and Google Keep are the fastest to open.

  • OneNote and Notion handle large documents best but use more memory.

  • Evernote remains excellent for web clipping, though slower on sync.

  • Zoho Notebook strikes a nice balance between function and aesthetics.

For low-end devices or slow internet, Simplenote is nearly flawless.

Find the App That Matches Your Mind

After comparing these free note apps, one principle remains clear: the best app isn’t about features — it’s about how naturally it fits your thought process.

If you think fast and move often, choose something quick like Google Keep.
If you plan, research, or build projects, go for OneNote or Notion.
If you simply want peace of mind and security, Apple Notes will never let you down.

Whichever you choose, use it consistently. The more you trust it, the better it serves you. Notes aren’t just records of tasks — they’re blueprints of your ideas, and keeping them safe, searchable, and accessible turns creativity into lasting results.

So take a few minutes today, test one app, and start writing. Your future self — and your next great idea — will thank you.

Best Browser Extensions to Stay Focused

It happens to everyone — you sit down to study, work, or write an important email, and within minutes you’ve opened a dozen tabs.

One for research, one for music, one for “just checking” social media, and somehow an hour disappears before you even begin.

The internet is both a powerful tool and a constant temptation machine, designed to keep your attention scattered.

If you’ve ever wondered how to regain control of your focus without disconnecting entirely, the answer might be simpler than you think.

Carefully chosen browser extensions to stay focused can filter distractions, set time limits, and create mental space for deep concentration without overwhelming your system or compromising your privacy.

This complete guide presents a neutral, test-based overview of the best lightweight, safe extensions for Chrome, Firefox, and Edge.

You’ll learn what to look for, how to set them up effectively, and even what to do if you prefer not to use any extensions at all.

Why Browser Extensions Matter for Focus

Browser extensions are small add-ons that change or enhance how your browser behaves. Some block websites that distract you. Others manage tabs, track your time, or remind you to take breaks. The right mix can turn your browser from an attention trap into a productivity ally.

The Problem They Solve

  • Distraction overload: Too many open tabs and notifications fragment attention.

  • Unconscious habits: Many people visit certain websites automatically without thinking.

  • Lack of structure: Without limits, short breaks stretch into hours.

  • Mental fatigue: Constant switching between work and entertainment reduces energy.

By adding specific rules or blockers, extensions act like digital boundaries — gentle, not restrictive — that guide your focus instead of forcing it.

How to Choose Browser Extensions to Stay Focused

Before installing anything, it’s crucial to know what makes an extension safe, effective, and worth keeping.

Key Selection Criteria

  1. Privacy: The extension should collect minimal data and clearly state what it accesses.

  2. Performance: Lightweight and efficient, without slowing down browsing speed.

  3. Simplicity: Easy to configure, with no steep learning curve.

  4. Customization: Lets you adjust lists, timers, and schedules to fit your habits.

  5. Cross-browser availability: Works on both Chrome and Firefox (and ideally Edge).

  6. Offline compatibility: Some tools continue functioning even when internet access is limited.

Signs of a Reliable Developer

  • Clear privacy policy.

  • Recent updates (within the past year).

  • Positive reviews with specific examples.

  • Transparent support contact or website.

Installing the wrong extension can cause more harm than good, so vetting carefully ensures both safety and performance.

browser extensions to stay focused

Categories of Focus Extensions

Different extensions target different focus problems. To choose effectively, it helps to group them by function.

  1. Website Blockers: Stop or limit access to distracting sites like social media or entertainment platforms.

  2. Time Trackers: Measure how you spend time across sites and suggest patterns to adjust.

  3. Tab Managers: Help you handle large numbers of open tabs without chaos.

  4. Pomodoro Timers: Integrate timed focus sessions directly into your browser.

  5. New Tab Replacements: Replace blank new tab pages with motivational quotes, to-do lists, or calming visuals.

  6. Break Reminders: Notify you to rest your eyes or stretch during long work periods.

Each type supports concentration differently — and using too many at once can backfire. Start with one or two and observe your results.

Tested List of Browser Extensions to Stay Focused

This curated list focuses on reliability, privacy, and low memory use. Each entry was selected based on independent testing and consistent performance across browsers.

1. StayFocusd (Chrome)

Category: Website Blocker
Best for: Limiting time on distracting websites.

StayFocusd lets you set daily time limits for sites that waste your attention. Once the time is up, the site becomes inaccessible for the rest of the day.

Strengths:

  • Highly customizable site lists.

  • Clear timers and progress bars.

  • Minimal CPU use.

Limitations:

  • Chrome-only.

  • No break schedule reminders.

Ideal User: Students or professionals who open social media “just for a minute.”

2. LeechBlock NG (Firefox & Chrome)

Category: Website Blocker
Best for: Precise scheduling and site control.

LeechBlock NG offers powerful flexibility — you can block, allow, or time-limit sites down to the minute.

Strengths:

  • Works across multiple browsers.

  • Highly granular rule creation (days, times, exceptions).

  • Option to redirect blocked sites to motivational pages.

Limitations:

  • Complex for beginners.

  • Interface feels technical.

Ideal User: Users who want total control over browsing habits.

3. Forest (Chrome, Firefox)

Category: Pomodoro Timer
Best for: Encouraging undistracted work sessions.

Forest uses a gamified approach — you “grow” a digital tree during focus sessions, and if you visit blocked sites, your tree withers.

Strengths:

  • Encouraging, visual motivation.

  • Syncs with a mobile app for cross-device consistency.

  • Gentle rather than punitive.

Limitations:

  • Some features require sign-in for syncing.

  • Limited customization for advanced users.

Ideal User: Students or visual learners who enjoy rewards and streaks.

4. Toggl Track (Chrome, Firefox)

Category: Time Tracker
Best for: Understanding where your time goes.

Toggl integrates directly into your browser, letting you track tasks manually or automatically detect idle time.

Strengths:

  • Detailed reports for personal or professional use.

  • Integrates with productivity platforms like Trello and Notion.

  • Reliable sync between browser and mobile app.

Limitations:

  • Requires manual labeling for accuracy.

  • Advanced features hidden behind setup menus.

Ideal User: Freelancers and remote workers managing multiple projects.

5. Momentum (Chrome, Edge, Firefox)

Category: New Tab Replacement
Best for: Creating calm and intention each time you open a tab.

Momentum replaces your default new tab with a serene background, motivational quote, and single daily focus prompt.

Strengths:

  • Minimal distractions.

  • Custom to-do list integration.

  • Encourages mindfulness before switching tasks.

Limitations:

  • Requires internet connection for new backgrounds.

  • May load slower on older devices.

Ideal User: Anyone seeking visual calm and light daily structure.

6. OneTab (Chrome, Firefox)

Category: Tab Manager
Best for: Reducing clutter from too many open tabs.

OneTab consolidates all open tabs into a single list, freeing up memory and making your workspace simpler.

Strengths:

  • Instantly improves browser speed.

  • Easy restore option.

  • Offline compatible.

Limitations:

  • Doesn’t sync automatically across devices.

  • Not suitable for real-time tab switching.

Ideal User: Researchers or multitaskers with dozens of open tabs.

7. Workona (Chrome, Edge, Firefox)

Category: Workspace Organizer
Best for: Separating projects or workflows.

Workona groups tabs into “workspaces,” helping you switch between contexts without losing track.

Strengths:

  • Saves tab sets automatically.

  • Perfect for managing different jobs or clients.

  • Built-in notes and task list.

Limitations:

  • Heavier than simpler tools like OneTab.

  • Requires account setup for full functionality.

Ideal User: Remote workers juggling multiple projects.

8. Mindful Break (Chrome)

Category: Break Reminder
Best for: Building mindful pause habits.

Mindful Break gently reminds you to breathe, stretch, or rest your eyes after long sessions.

Strengths:

  • Subtle notifications.

  • Adjustable intervals.

  • Developed by Google, lightweight and private.

Limitations:

  • Chrome-only.

  • Minimal customization.

Ideal User: Desk workers spending hours online without natural breaks.

9. Cold Turkey Blocker (Windows, Chrome Extension)

Category: Hybrid Blocker
Best for: Serious focus periods with strict enforcement.

Cold Turkey combines browser blocking with full system integration. Once activated, it’s nearly impossible to override until time expires.

Strengths:

  • Extremely effective during deadlines.

  • Works even if browser restarts.

  • Great for exam prep or deep writing sessions.

Limitations:

  • Overly restrictive for casual use.

  • Requires paid desktop app for full features.

Ideal User: Students or professionals who want guaranteed focus.

Privacy Considerations When Using Focus Extensions

Even though extensions are small, they can access your browsing history or site data. Always review permissions before installation.

Best Practices for Privacy

  1. Read Permissions Carefully: Avoid extensions requesting access to “all site data” unless essential.

  2. Prefer Open Source or Verified Developers: Transparency reduces risk.

  3. Update Regularly: Old versions may contain unpatched vulnerabilities.

  4. Avoid Installing Too Many: Each extension adds potential exposure points.

  5. Review Data Policies: Ensure your information isn’t shared or sold.

A good rule of thumb: if an extension needs more data than its purpose requires, skip it.

How to Combine Extensions Without Overload

The goal is focus, not complexity. Too many tools cause distraction themselves.

Suggested Lightweight Combinations

  • For Students: StayFocusd + Forest → Limits distractions and adds motivation.

  • For Remote Workers: Workona + Toggl → Organizes projects and tracks time.

  • For Writers: LeechBlock + Momentum → Clean workspace with gentle reminders.

Avoid installing multiple blockers simultaneously — they can conflict and block legitimate sites.

Setting Up Focus Extensions Effectively

Even the best tool won’t help if it’s configured poorly. Follow these guidelines to make your extensions work harmoniously.

  1. Start Small: Choose two extensions maximum and test for a week.

  2. Define Core Focus Hours: Use timers or schedules instead of all-day blocking.

  3. Whitelist Essential Sites: Keep work-related pages accessible.

  4. Create “Break Windows”: Allow small relaxation intervals every few hours.

  5. Regularly Review Usage Reports: Identify patterns to improve your setup.

Tuning your configuration gradually creates sustainable focus rather than burnout.

Productivity Without Extensions: Low-Tech Alternatives

If you prefer a clean browser without add-ons, you can still apply discipline manually.

Simple No-Extension Focus Tactics

  1. Use Built-In Browser Tools:

    • Chrome’s “Focus Mode” or Firefox’s “Reader View” removes clutter.

  2. Create Work Profiles:

    • Separate work and personal accounts to isolate distractions.

  3. Schedule Offline Time:

    • Turn off Wi-Fi during deep work sessions.

  4. Use Browser Bookmarks Wisely:

    • Keep a “Work Only” folder visible. Hide entertainment bookmarks.

  5. Rely on Self-Control Techniques:

    • Set clear goals before each session.

    • Use the Pomodoro method with a simple timer.

Sometimes, intentional minimalism outperforms any tool.

Troubleshooting Common Issues

Even trustworthy extensions can occasionally cause hiccups.

Problem 1: Browser Slowdown

Fix: Disable extensions one by one to find the heavy one; keep only essentials.

Problem 2: Conflicting Permissions

Fix: Two blockers may override each other — disable duplicates.

Problem 3: Extension Not Syncing Across Devices

Fix: Sign in with the same browser account and enable sync in settings.

Problem 4: False Positives (Blocking Work Sites)

Fix: Whitelist the domain or adjust rule scope.

Regular maintenance keeps your focus setup efficient and reliable.

Recommended Routine for Digital Focus Hygiene

Like cleaning your workspace, your browser also benefits from regular maintenance.

Weekly Focus Tune-Up Checklist

  1. Review and update your block lists.

  2. Delete unused extensions.

  3. Clear cache and cookies for speed.

  4. Check focus timer logs for improvement areas.

  5. Restart browser to reset performance.

These quick actions take minutes but keep your focus tools working seamlessly.

The Balance Between Control and Flexibility

True focus isn’t about eliminating all distractions — it’s about managing them consciously. Extensions should feel like gentle guidance, not rigid enforcement.

Signs You’ve Found the Right Balance

  • You can stay on task without feeling restricted.

  • You use your browser intentionally, not habitually.

  • You finish work feeling calmer and clearer, not pressured.

When technology supports focus instead of controlling it, productivity becomes natural and sustainable.

Building a Focus-Friendly Digital Environment

Your browser is the window to both your work and your distractions. Choosing the right browser extensions to stay focused transforms that window into a workspace tailored to your attention, not against it.

Whether you rely on website blockers like LeechBlock, time trackers like Toggl, or calming interfaces like Momentum, the key is balance — enough structure to stay intentional, but enough freedom to stay creative.

If you combine smart tools with mindful habits, your browser stops being an endless playground of temptation and becomes a quiet studio for your best ideas.

Focus, after all, isn’t about saying no to everything — it’s about saying yes to what truly matters.

Organize Photos in Cloud: Simple Steps to Tidy Your Memories

If you’ve ever opened your cloud photo library only to feel instantly overwhelmed by thousands of images — duplicates, screenshots, blurry shots, and random documents — you’re not alone.

Most of us take more pictures than ever before, but few take the time to truly organize them. The result? A digital mess that feels impossible to sort through.

Learning how to organize photos in cloud isn’t about perfection or deleting every extra snapshot.

It’s about bringing clarity, accessibility, and peace of mind to your growing collection of memories.

This guide will show you, step by step, how to build a system that works — whether you use Google Photos, iCloud, or another platform.

We’ll cover folder and album structure, tagging techniques, deduplication strategies, and a simple maintenance routine you can repeat each month to keep your photo library neat without stress.

Why You Should Organize Photos in Cloud

Your cloud storage isn’t just a backup; it’s a digital memory archive. Every photo tells a story — your child’s first steps, your favorite vacation, a meal with friends — but when these moments are lost among clutter, they lose emotional value.

The Hidden Cost of Chaos

  • Time Lost: Searching for one specific photo becomes frustrating.

  • Storage Waste: Duplicates and blurry shots eat up valuable space.

  • Missed Memories: Great photos remain buried and forgotten.

  • Stress: Clutter creates mental overload every time you open your gallery.

Organizing brings order and joy back to your digital life. Once done, you’ll be able to find photos instantly, create albums that make sense, and actually enjoy looking through your collection again.

Organize Photos in Cloud

Step 1: Understand Where Your Photos Are Stored

Before organizing, you need a clear picture of where everything lives. Many people use multiple devices and platforms — phones, tablets, laptops, cameras, and cloud apps — without realizing their photos are scattered everywhere.

Make an Inventory

  1. List all devices where you take or save photos (phones, cameras, tablets).

  2. Note which cloud services you use (Google Photos, iCloud, OneDrive, Amazon Photos, etc.).

  3. Identify any overlapping accounts or duplicate uploads.

Having a master list ensures you won’t miss anything when cleaning up later.

Consolidate Your Sources

If possible, choose one main cloud platform for long-term storage and organization.
Keep other services for temporary sharing, not for permanent archiving.

Step 2: Create a Master Photo Folder Structure

A simple, consistent folder structure forms the foundation of an organized library. It prevents confusion and keeps everything in predictable places.

Recommended Folder Hierarchy

  1. By Year: Start with the year as your top-level folder. Example:

    • 2023

    • 2024

    • 2025

  2. By Month or Event: Inside each year, create subfolders. Example:

    • 2024 → January – Family Trip to Rome

    • 2024 → February – Birthday Party

    • 2024 → March – Everyday Moments

  3. By Category (Optional): Some users prefer themes like:

    • Family

    • Travel

    • Work

    • Nature

    • Pets

Pick one method and stick with it. The key is consistency.

Tips for Naming Folders

  • Use clear, chronological names: 2024-03 – Paris Trip instead of “Spring Vacation.”

  • Avoid special characters that confuse systems (/, ?, *, etc.).

  • Keep names short but descriptive.

Step 3: Gather and Upload Everything to the Cloud

Before organizing, collect all your photos into your chosen cloud.

Why Centralization Matters

If your pictures are split across multiple apps or devices, organizing becomes impossible. A single location allows you to spot duplicates, sort albums, and search efficiently.

Steps to Consolidate

  1. Upload all photos from your phone and camera to your main cloud.

  2. Import old folders from computers, USB drives, or external hard drives.

  3. Make sure the upload settings include full resolution (not compressed).

  4. Wait for syncing to complete before organizing further.

Once everything is in one place, you can start decluttering confidently.

Step 4: Deduplicate and Clean Up

Duplicate photos are the biggest obstacle to photo organization. They sneak in during transfers, backups, or app syncing.

How to Spot Duplicates

  • Identical file names like IMG_1234.JPG appearing multiple times.

  • Same image with different file sizes or timestamps.

  • Burst or live photo sequences with minor differences.

Deduplication Strategies

  1. Manual Review:

    • Sort photos by name or date.

    • Compare similar-looking ones visually.

    • Delete extras carefully.

  2. Automatic Tools:

    • Most cloud platforms now detect and group similar images.

    • You can use “delete duplicates” or “free up space” features for quicker cleanup.

  3. Batch Deletion:

    • Remove screenshots and random downloads separately before focusing on real photos.

Tip: Always double-check before deleting — cloud trash bins usually store deleted items for 30 days as a safety net.

Step 5: Group Photos into Albums

Once your collection is clean, it’s time to give it structure and meaning.

Albums make browsing enjoyable again by turning chaos into stories.

Album Ideas for Families and Travelers

  • Yearly Highlights (2023, 2024, etc.)

  • Vacations and Trips

  • Birthdays and Celebrations

  • Kids’ Milestones

  • Pets Over the Years

  • Favorite Places

  • Work and Projects

Tips for Effective Albums

  • Limit each album to 100–300 photos to stay manageable.

  • Include only your best shots — not every angle.

  • Use descriptive titles (e.g., “Summer 2023 – Italy and France”).

  • Add captions or notes for future context.

Albums act like digital photo books — concise and meaningful.

Step 6: Tagging for Better Search and Discovery

Tags (also called labels or keywords) make finding specific photos effortless, especially as your collection grows.

What to Tag

  1. People: Family members, friends, coworkers.

  2. Places: Cities, landmarks, or recurring locations.

  3. Events: Weddings, holidays, birthdays.

  4. Themes: Food, sunsets, beaches, pets.

How to Tag Efficiently

  • Start with your most recent photos first.

  • Use auto-tagging features where available — most clouds use AI recognition for faces and objects.

  • Add custom tags for unique themes (e.g., “Grandma’s Recipes” or “Road Trip 2022”).

The Benefit of Tags

Once tagged, searching becomes effortless. Type “beach 2019” or “birthday John,” and your cloud brings up exactly what you want instantly.

Step 7: Curate Highlights and Delete the Rest

Not every photo deserves permanent storage.

Deleting doesn’t mean losing memories; it means preserving quality.

Simple Decision Rules

  • Keep: Clear, meaningful, emotional, or unique shots.

  • Delete: Blurry images, duplicates, screenshots, or receipts.

  • Maybe: Keep temporarily in a “Review Later” folder.

The 5-Minute Habit

Each week, spend five minutes reviewing your recent uploads. Delete the unnecessary ones immediately. Small, frequent cleanups prevent future overwhelm.

Step 8: Verify Backups and Sync Settings

Even if your photos live in the cloud, double-check that backups are working correctly.

Checklist

  1. Confirm your phone automatically uploads new photos.

  2. Ensure Wi-Fi backup is active (not paused to save data).

  3. Test by deleting a photo from your device — confirm it remains in the cloud.

  4. Make a second backup on another service or external drive once a month.

Clouds can fail or accounts can get locked — redundancy keeps your memories safe.

Step 9: Maintain a Monthly Photo Routine

A little routine keeps your photo library organized forever.

Monthly Photo Maintenance Checklist

  1. Delete duplicates and screenshots.

  2. Add tags to new albums.

  3. Rename folders consistently.

  4. Update shared albums with new memories.

  5. Verify your backup status.

Schedule it alongside another monthly habit — like paying bills — to make it automatic.

Step 10: Plan Long-Term Photo Organization

Digital photo storage isn’t just about now; it’s about creating a lasting, usable archive for years to come.

Future-Proof Tips

  • Use standard file formats (JPEG, PNG, MP4) for universal compatibility.

  • Export key albums to an external hard drive annually.

  • Create a shared “Family Archive” folder so others can contribute.

  • Add text captions describing the people and events — useful for future generations.

When organized thoughtfully, your photo library becomes a family heirloom, not just a data collection.

Optional: Create Shared and Thematic Albums

Cloud platforms make sharing easy. Use it intentionally to spread joy — not confusion.

Examples of Shared Album Ideas

  • Grandparents’ Album: Update it monthly with the latest family photos.

  • Trip Highlights: Share with travel companions.

  • Private Milestones: Limited access albums for special occasions.

Remember to adjust permissions — “View Only” prevents others from accidentally deleting your photos.

Managing Storage Space in the Cloud

Even with perfect organization, cloud space fills up quickly.

How to Save Space Without Losing Photos

  1. Delete Large Video Files: Move them to external drives.

  2. Optimize Upload Quality: Some clouds offer “High Quality” compression with minimal visual loss.

  3. Archive Old Albums: Move inactive ones to secondary storage.

  4. Empty Trash: Deleted photos still occupy space until purged.

  5. Review Shared Media: Remove duplicates across shared albums.

A lighter library makes syncing faster and browsing smoother.

Quick Fix: Handling Blurry, Dark, or Overexposed Photos

Editing every photo individually can take forever. Instead, apply these fast cleanup strategies:

  1. Sort by date to process batches from the same event.

  2. Delete obviously bad photos (out-of-focus, dark).

  3. Keep one version of each pose or scene.

  4. Apply bulk enhancements using cloud editing tools to brighten or straighten.

This keeps your albums sharp without wasting hours in editing mode.

Using Metadata to Your Advantage

Every photo carries hidden information called metadata — details like date, location, and camera type.

How Metadata Helps Organization

  • Automatically sorts by date and location.

  • Allows you to filter by device (e.g., “Drone Photos” or “iPhone Shots”).

  • Helps identify duplicates even if file names differ.

You can edit metadata manually to fix mislabeled dates from older uploads or scanned photos.

Advanced Tagging Techniques for Enthusiasts

If you love details, go deeper with a structured tagging system.

Sample Tag Categories

  • People: John, Emma, Grandpa.

  • Location: Paris, New York, Beach House.

  • Event: Wedding, Graduation, Christmas 2022.

  • Emotion or Theme: Joy, Adventure, Nature, Art.

Tagging Rules for Consistency

  • Keep tags lowercase or Title Case — pick one.

  • Avoid spaces in tags (use underscores if necessary).

  • Limit each photo to 3–5 tags for clarity.

Consistent tagging turns your photo library into a searchable story database.

Why Deleting Photos Can Feel Emotional

Many people struggle to delete photos because of emotional attachment. It’s natural — photos are memories. But remember: removing a duplicate or blurry shot doesn’t erase the moment itself.

Gentle Approach to Letting Go

  1. Focus on quality over quantity.

  2. Keep the best representation of each event.

  3. Save sentimental extras in a separate “Archive” folder if you can’t decide.

  4. Revisit older albums occasionally; perspective makes pruning easier later.

Your goal is to keep what sparks joy, not everything that ever happened.

Common Mistakes to Avoid When Organizing Cloud Photos

  1. Mixing multiple platforms: Keep one main library for simplicity.

  2. Skipping deduplication: It causes confusion and waste.

  3. Renaming inconsistently: Use uniform patterns.

  4. Forgetting backups: Even clouds can fail.

  5. Overcomplicating structure: Keep folders simple and logical.

Avoiding these traps saves countless hours later.

Quick Reference: Photo Organization Summary

  • Step 1: Gather all photos in one place.

  • Step 2: Create a simple folder structure.

  • Step 3: Deduplicate and delete junk.

  • Step 4: Group into albums and tag.

  • Step 5: Automate backup and maintenance.

With this foundation, your library stays clear and enjoyable for life.

The Peace of an Organized Cloud

When your cloud library finally feels organized, you’ll notice an unexpected calm. No more endless scrolling or panic when someone asks for an old picture. You’ll know exactly where it is.

The process of organizing isn’t just digital housekeeping — it’s rediscovering your story, one photo at a time.

So set aside a few evenings, make a cup of tea, and start small. Clean one month of photos, one trip, or one year. Step by step, you’ll transform chaos into clarity — and your photo collection will once again become a source of joy, not stress.